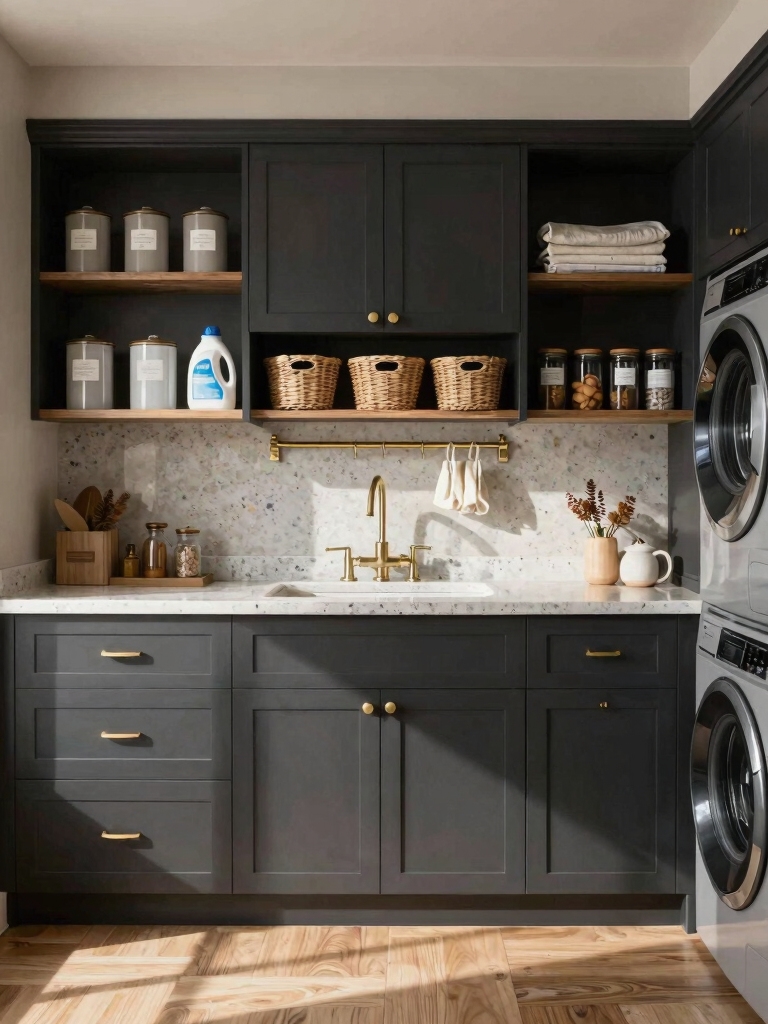
I’ve got you covered with 20 outdoor laundry room ideas for small spaces. Think compact drying setups, wall-mounted pegboards, fold-away lines, and weatherproof storage that stay tidy with minimal effort. I’d pick durable, low-maintenance materials and a smart layout that zones sorting, washing, and folding. Add simple upgrades like outdoor lighting and affordable wall racks for instant impact. If you keep going, you’ll uncover more practical tips to transform your tiny space.
Why Outdoor Laundry Works in Tiny Spaces
Outdoor laundry rooms shine in small spaces because they free up indoor square footage without sacrificing function.
I’ll show you how they work: weatherproof setups curb noise, let you classically separate chores, and keep utilities outside the main living area.
You gain better airflow, simpler maintenance, and quick breaks between loads. It’s practical, upbeat, and totally doable.
Plus, incorporating smart and stylish solutions can elevate both the efficiency and aesthetic of your outdoor laundry space.
Ready to jump in?
Start With a Small Space Plan: Key Criteria
When you’re planning a compact outdoor laundry spot, start with a clear, practical layout that fits your space and habits.
I assess traffic flow, water access, and power needs first, then choose a durable surface and weatherproof storage.
Prioritize zones for sorting, washing, and folding, plus a compact drying option.
Keep maintenance minimal with simple, labeled, easy-to-clean elements.
Consider integrating stackable washer dryer units to maximize your small laundry area efficiently.
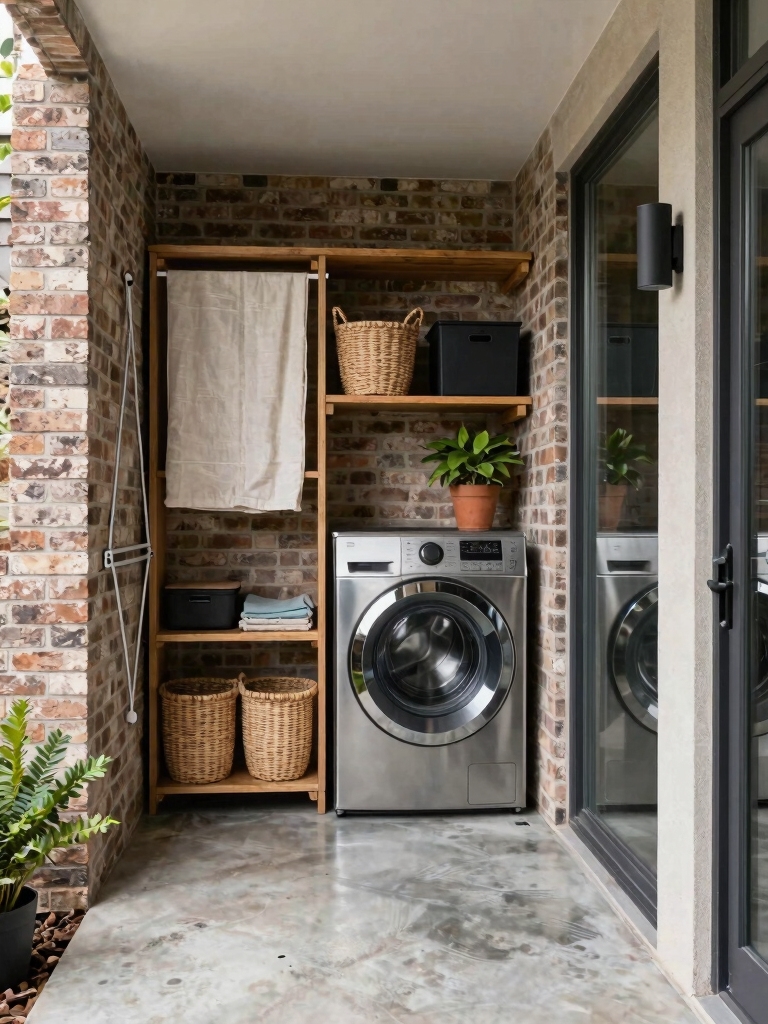
Best Compact Drying Setups for Patios
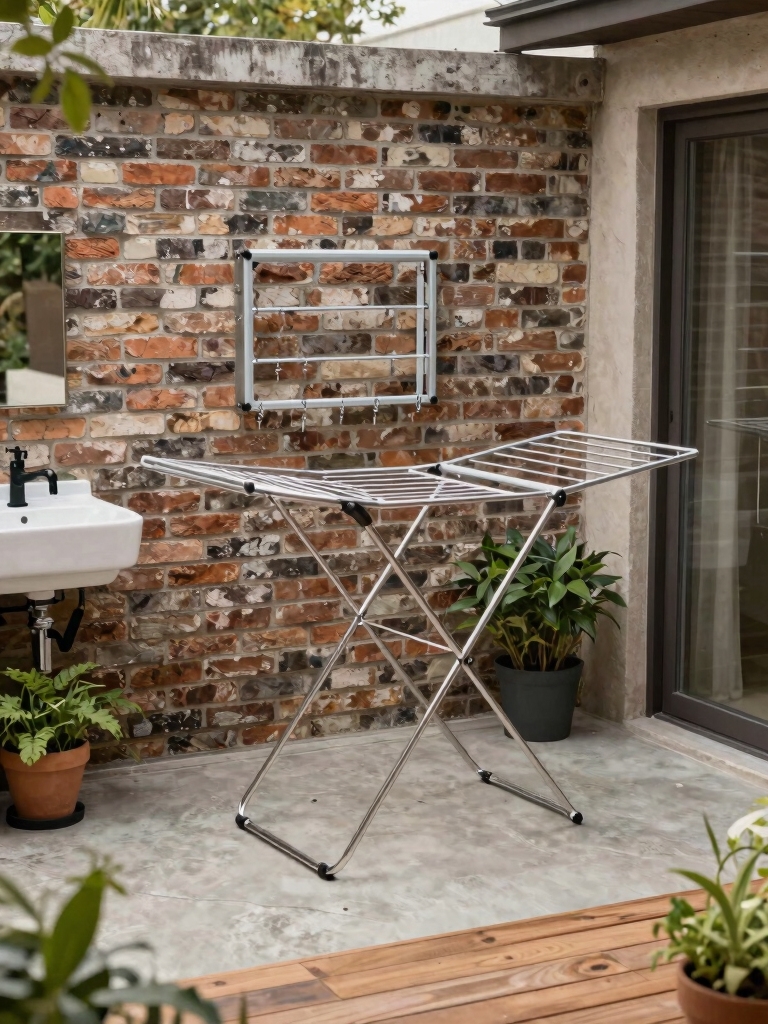
If you’re short on space but still want a reliable drying setup, start with a compact, purpose-built system that fits your patio’s footprint and your laundry flow.
Choose a foldable rack, retractable line, or compact clothesline with adjustable height.
Pair with weatherproof pegs, a small drying mat, and a drainer tray.
Easy to store, quick to use, total efficiency.
Wall-Mounted Pegboards for Tools and Racks
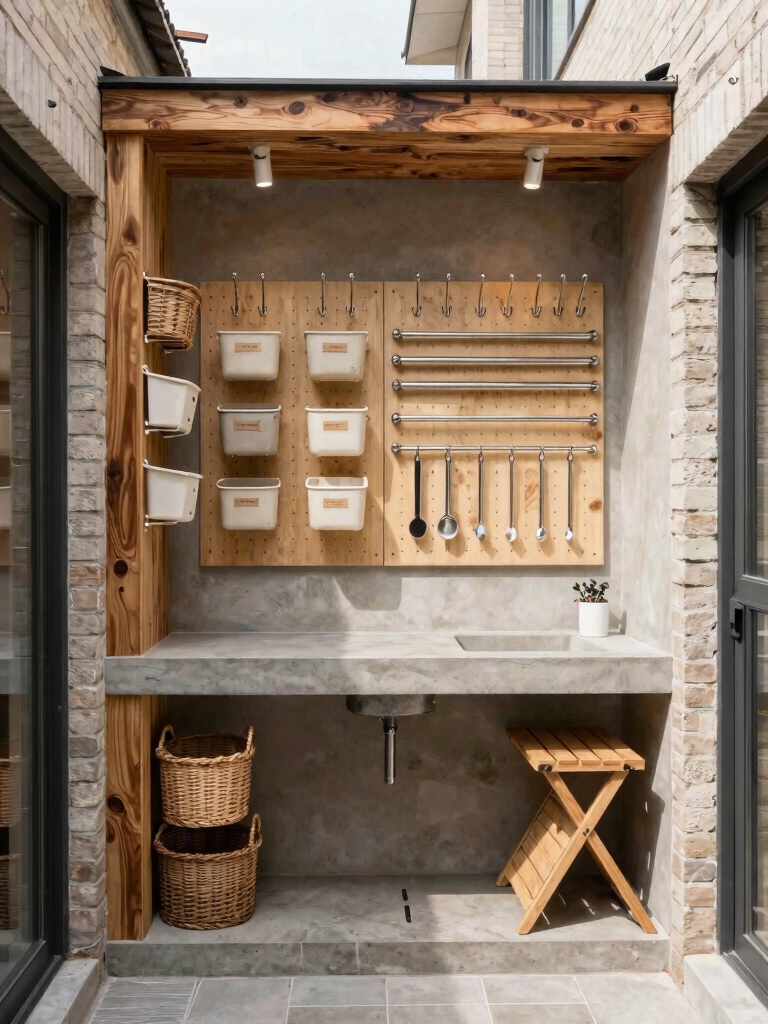
I love a good wall-mounted pegboard setup because it makes Tool Storage Solutions quick and painless.
I’ll show you clean Pegboard Layout Ideas that keep essentials at hand and labeled for easy finding.
With these Outdoor Rack Organization tips, your yard tools stay tidy and ready, no clutter slowing you down.
Tool Storage Solutions
Pegboards and wall-mounted racks turn clutter into quick-access gear, making tools easy to find and use.
I love how a simple setup keeps brushes, wrenches, and sponges within arm’s reach, so chores flow smoothly.
You’ll customize zones, label sections, and swap gear as seasons change.
Practical, compact, and ready for small spaces—tool storage finally feels organized and stress-free.
Pegboard Layout Ideas
Pegboard layouts are a game changer for quick-access tools and supplies in an outdoor laundry setup. I love how wall-mounted boards keep essentials visible and grab-and-go.
I arrange hooks by task—cleaning, gardening, repairs—so I grab the right tool fast. Use moisture-resistant boards, labeled bins, and a small mat for dropped items.
It stays tidy, efficient, and adaptable.
Outdoor Rack Organization
A solid outdoor rack setup starts with a wall-mounted pegboard that keeps tools visible and within arm’s reach, so you can grab what you need without hunting through bins.
I show you how to maximize space with hooks, bins, and labeled zones for quick access.
- Install sturdy pegs and a lip shelf
- Group by task and frequency
- Label everything for easy return
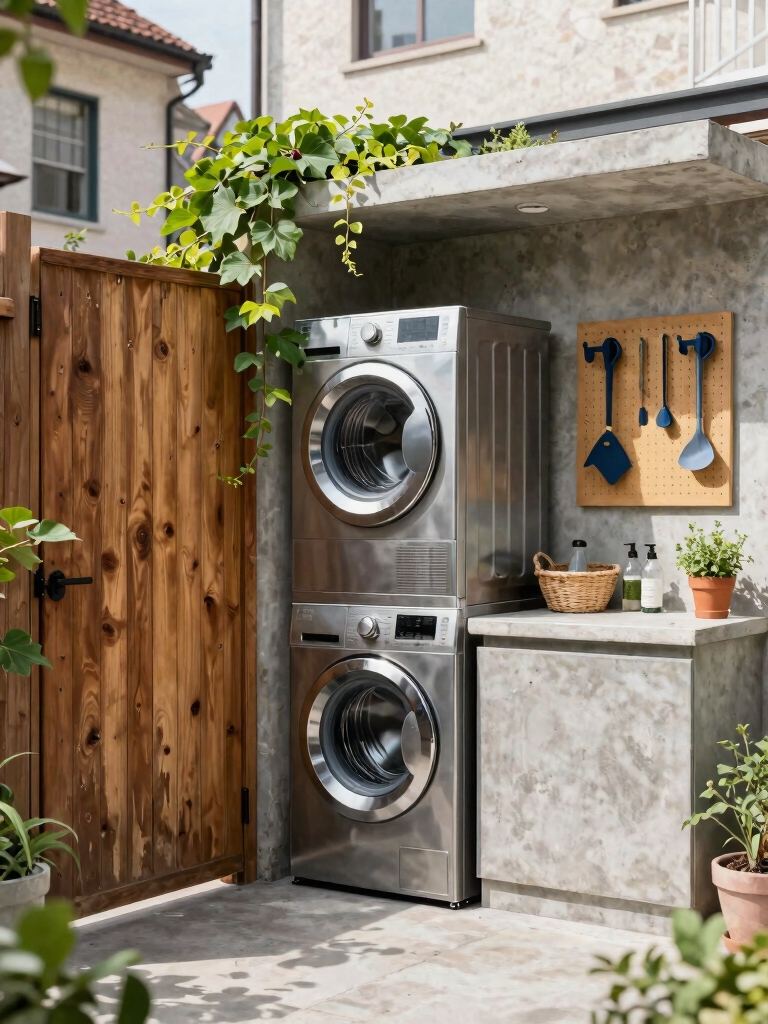
Fold-Away Drying Solutions for Tiny Patios
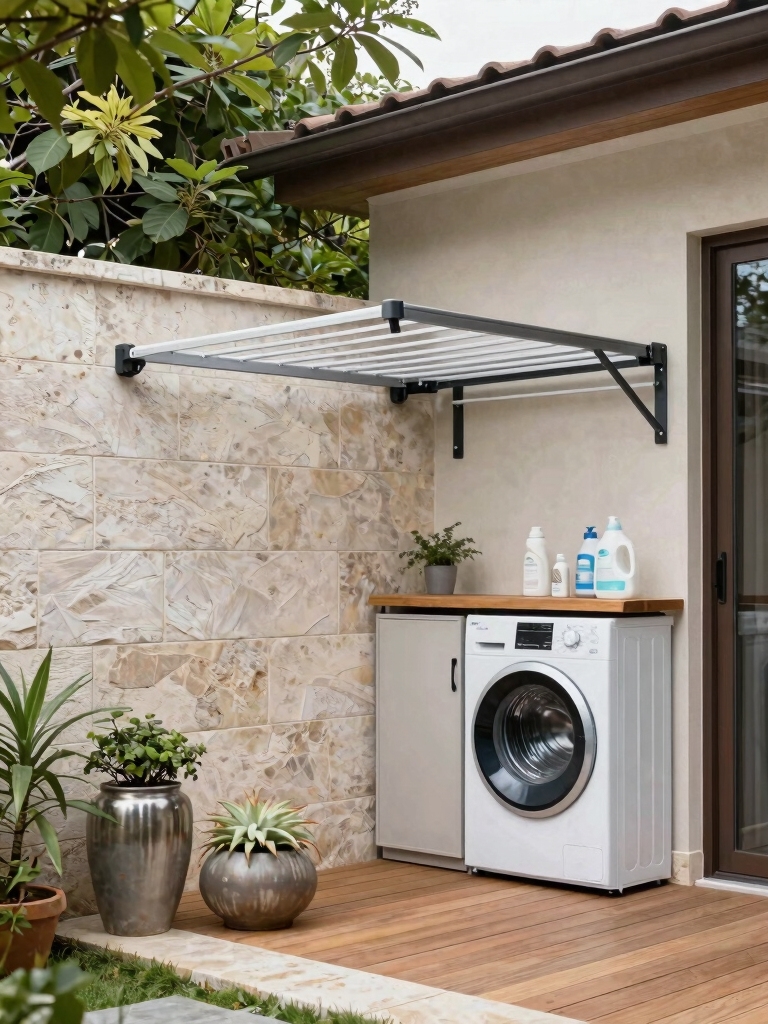
On tiny patios, fold-away drying solutions save space without sacrificing efficiency.
I use compact, wall-mounted or ceiling-hung racks that deploy with a nudge and tuck away neatly. No clutter, just sturdy posts and slim lines.
I hang shirts, towels, delicates, and sheets in stages. Quick-dry cycles, smart airflow, and easy folding keep laundry calm and patio usable.
Maximizing every inch with clever storage options is key to a functional small laundry space, making the most of limited outdoor areas with space-saving solutions.
Weather-Resistant Storage for Sun and Rain
I’m thinking about Weatherproof Cabinet Solutions that stand up to sun and rain, keeping tools and detergents safe and organized.
We’ll also look at Sunproof Storage Considerations so you know which materials and placements resist fading and heat.
Let’s explore practical, durable options that make outdoor laundry a breeze.
Weatherproof Cabinet Solutions
I choose durable hinges, weather seals, and UV-resistant finishes to simplify maintenance and protect essentials.
Here are practical options:
1) Stainless steel hardware for longevity
2) Sealed plywood or fiberboard with moisture barriers
3) Raised panels to prevent puddles and splashback damage
Sunproof Storage Considerations
Rising sun shifts the game for outdoor storage, so I tailor solutions that stand up to both UV and sudden showers.
I prioritize weatherproof materials, like powder-coated aluminum, resin, and cedar, plus gaskets and sloped tops to shed moisture.
I keep cords tidy, shelves breathable, and locks kid-friendly.
Practical, compact solutions let laundry stay organized year-round.
Efficient Outdoor Hampers and Sorting Stations
- Clear labeling
- Near-washer grouping
- Odor control and airflow
Storage Benches: Laundry and Seating Combos
Outdoor laundry setups can benefit from a smart combo that blends storage with seating, letting you perch while you sort or fold without crowding the space.
I love using storage benches that hold detergents, clothespins, and towels inside, with a sturdy top for folding. They’re weather-resistant, easy to clean, and invite quick breaks during busy outdoor laundry sessions. Incorporating laundry room ideas for small spaces can help make your outdoor area feel bigger and more functional.
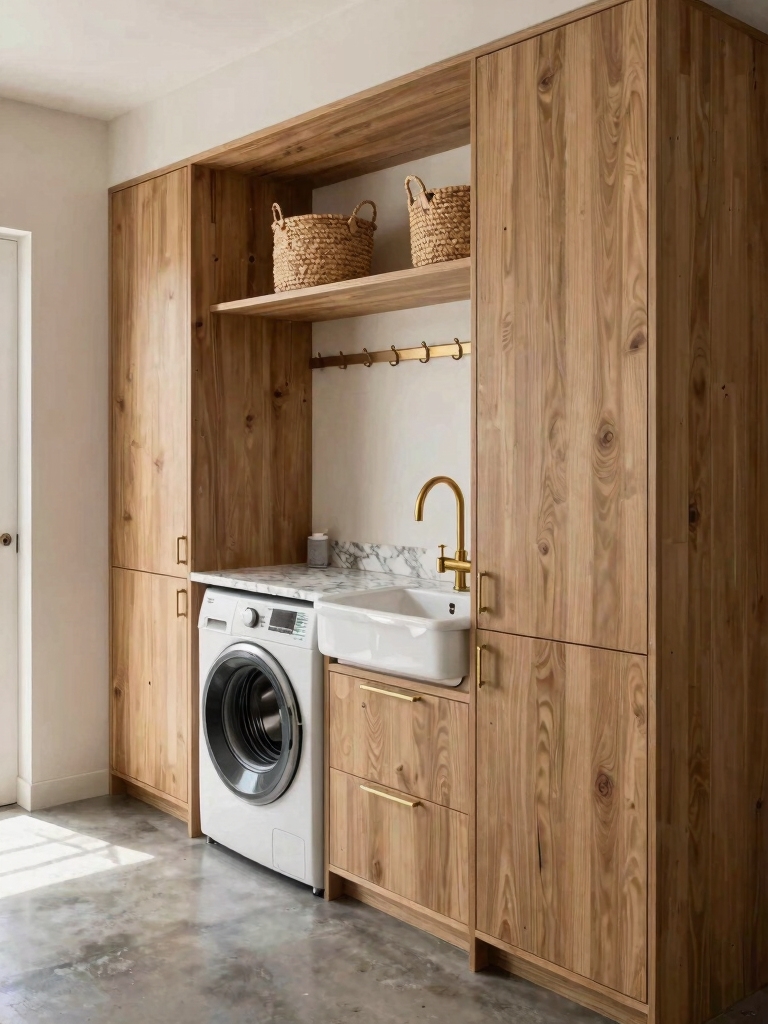
Stackable and Modular Units for Flexible Layouts
Stackable and modular units make it easy to tailor an outdoor laundry area to fit your space and changing needs.
I’ll show you how they adapt as you grow, without clutter or wasted gaps.
- Use vertical stacks to double capacity without expanding footprint.
- Mix modules for sink, counter, and storage in one cohesive line.
- Leave room for future add-ons as your routines evolve.
Outdoor Laundry Station Must-Have Features
I’m thinking about three essentials for an outdoor laundry station: weatherproof materials that handle sun and rain, reliable waterproof drainage, and easy access to power for washers, dryers, and unplugged tools.
I’ll walk you through practical picks that stay sturdy year round and keep spills quiet and clean.
Let’s chat about how these features fit your space and routine.
Weatherproof Materials Choice
When choosing weatherproof materials for an outdoor laundry station, I look for durability first, followed by low maintenance and easy-to-clean surfaces.
- Corrosion-resistant metals that withstand humidity
- Treated surfaces or composites that resist stains
- Non-porous, wipeable worktops for quick cleanups
Waterproof Drainage Solutions
Waterproof drainage keeps an outdoor laundry area functional without puddles or mess.
I design with simple, reliable routes: sloped concrete or pavers guiding water away, a trench drain for heavy spills, and a nearby cleanout.
I seal joints, test with a quick hose, and label access points.
Practical, durable setups save time and protect surroundings.
Efficient Power Access
- Install GFCI outlets near the station for safety.
- Use weatherproof covers and a covered trough for cords.
- Add a dedicated circuit or outdoor-rated extension with proper strain relief.
Safe Composting and Greywater Basics for Small Yards
Safe composting and greywater basics are doable in small yards with simple rules and practical setups.
I’ll use a compact bin system for kitchen scraps, add browns, and turn weekly to speed compost.
For greywater, I redirect non-toxic rinse water to a mulch bed or drip line, never directly on edible roots.
Clean, compliant, sustainable—and surprisingly straightforward.
Rainwater Harvesting Corner for Outdoor Laundry
I’m setting up a Rainwater Harvesting Corner for the outdoor laundry, so we’ll talk through an efficient layout that fits my space and helps the wash go farther.
I’ll cover a simple maintenance plan for outdoor drainage to keep everything flowing smoothly.
Let’s explore practical tips that keep this corner tidy, reliable, and easy to use.
Rainwater Harvesting Layout
Rainwater harvesting in an outdoor laundry area isn’t fancy, but it’s smart and simple to set up.
I’ll share a practical layout you can replicate, focusing on flow, placement, and access. Think simple sequence, not ceremony, so you actually use it.
- Plan intake and downspouts near your washing zone.
- Position barrels at easy-to-reach heights with gravity feed.
- Leave space for filtration and occasional checks.
Maintenance For Outdoor Drainage
I’ll walk you through quick checks: hoses clear, screens cleaned, and filters swapped.
Inspect gutters after storms, test overflow, and keep a spare seal handy.
With simple routines, your setup stays reliable, economical, and ready for chores.
Weather-Proof Seating and Laundry Scoot-Away Zones
When you’re coordinating laundry chores outdoors, a weather-proof seating area and a dedicated scoot-away zone make the process smoother and more enjoyable.
I keep rhythm by pairing comfort with function, so folding and sorting feel effortless and calm.
- Choose durable, weather-resistant seating for quick breaks
- Designate a nearby scoot-away zone with clear boundaries
- Use compact, all-weather storage to reduce clutter
Adding creative solutions tailored to small laundry rooms can maximize both style and functionality in limited outdoor spaces.
Lighting to Extend Outdoor Laundry Hours
Outdoor laundry work doesn’t have to stop when the sun goes down, and lighting is what makes that possible.
I aim for practical, energy-smart options: string lights for ambient glow, task lighting over sinks, motion sensors to save power, and warm LEDs for a comfortable vibe.
Keep cords tidy and moisture-rated fixtures for a safe, extended laundering routine.
Sloped Surfaces and Drainage Away From Indoors
I’ll start with simple sloped drainage rules to keep water moving away from indoor spaces.
We’ll look at indoor-water drainaway risk and how to spot it, then switch to practical outdoor surface pitching tips that prevent puddling.
If we get these basics right, your outdoor laundry area stays dry and easy to use.
Sloped Drainage Principles
If water can’t pool near your doors, your outdoor laundry space stays safer and drier.
So start by shaping slopes away from the indoors. I optimize drainage for reliability and ease, keeping materials simple and clean.
- Maintain a gentle 1–2% slope away from thresholds
- Use permeable surfaces to handle runoff naturally
- Include a discreet grate or swale to direct water away
Indoor-Water Drainaway Risk
Water can puddle near doors if slopes point inward, so I’m focusing on indoor-water drainaway risk with sloped surfaces.
I inspect floor gradients to keep water moving away from entry points. Use a gentle incline toward exterior drains or a dedicated sump, install grates, and seal joints.
Regular checks prevent leaks, mold, and damp spots in compact outdoor-to-indoor setups.
Outdoor Surface Pitching Tips
When designing outdoor laundry areas, I start with a gentle slope that guides water away from doors and indoor spaces, not toward them.
1) Trade flat patches for a slight pitch to shed moisture quickly.
2) Angle surfaces away from doors and grading to prevent pooling near thresholds.
3) Use permeable pavers and proper edge drains to keep feet dry and foundations dry.
Privacy and Wind Shields for Tiny Balconies
Tiny balconies may be small, but they don’t have to feel exposed. I choose privacy and wind shields that work with your space, not against it.
A slim trellis, tall planter screens, or outdoor curtains create gentle boundaries while letting breeze flow.
I also tuck laundry area lamps and hooks behind them for practical, clutter-free shelter and calmer, cozier mornings.
Maximizing every inch with creative storage solutions helps keep the area organized and inviting.
Materials That Weather Well With Minimal Maintenance
- Aluminum shelving that resists rust and stays lightweight.
- Treated wood or composite decking for durability with a clean look.
- Cable stainless hooks and hardware for easy, lasting organization.
Budget-Smart Upgrades for Immediate Impact
If you’re aiming for a noticeable upgrade without breaking the bank, start with two or three high-impact tweaks that you can tackle this weekend.
I suggest swapping to a durable, weatherproof rug, adding simple exterior lighting, and organizing with affordable wall-mounted racks.
These changes feel immediate, practical, and budget-smart, boosting usability without complicating maintenance or future redesigns.
Incorporating stylish storage solutions can elevate the space while keeping it functional and organized.
Step-by-Step: A 1-Day Outdoor Laundry Makeover
Today, I’ll take you through a practical, 1-day makeover for your outdoor laundry area, from quick prep to the final touches, so you can enjoy a refreshed space by sundown.
- Prep fast: clear clutter, measure space, and map zones for washing, drying, and storage.
- Install lean, weatherproof hooks and shelves for essentials.
- Finish with color, new mat, and effortless maintenance cues.
Maintenance Hacks to Keep Outdoor Laundry Fresh
Now that your outdoor space is refreshed, keeping laundry area freshness is a breeze with simple maintenance hacks.
I keep a small, labeled spray bottle for mildew and pollen, wipe surfaces weekly, and schedule monthly hose-downs to clear debris.
Quick weatherproofing, breathable baskets, and sunlight help prevent odors.
Consistency beats clutter, so I stay proactive and tidy.
Incorporating smart solutions can maximize your space and enhance functionality.
Fresh laundry, always.
Conclusion
You’ve got this—outdoor laundry can be neat, efficient, and almost invisible with a smart setup. Start small, pick weather-friendly gear, and add one upgrade at a time. Before you know it, your tiny patio will feel like a calm, functional laundry nook, rain or shine. I planted my mini clothesline under a skylight once and swore I’d never stuff a dryer vent through a window again. You’ll love the breeze-powered ease, trust me.