I’ve mapped out 17 genius craft room ideas that really tame chaos and boost flow. Start with a clear diagnose of clutter and a Core Zone Map to guide every project step. Use budget-friendly wall shelves, color-coded bins, and lazy Susans for fast access. Add multi-purpose furniture and smart wire management to keep counters clean. Establish simple maintenance rituals and personalize the space for joy. Stick with me, and you’ll uncover even more practical tips.
Diagnose Your Craft Room Chaos
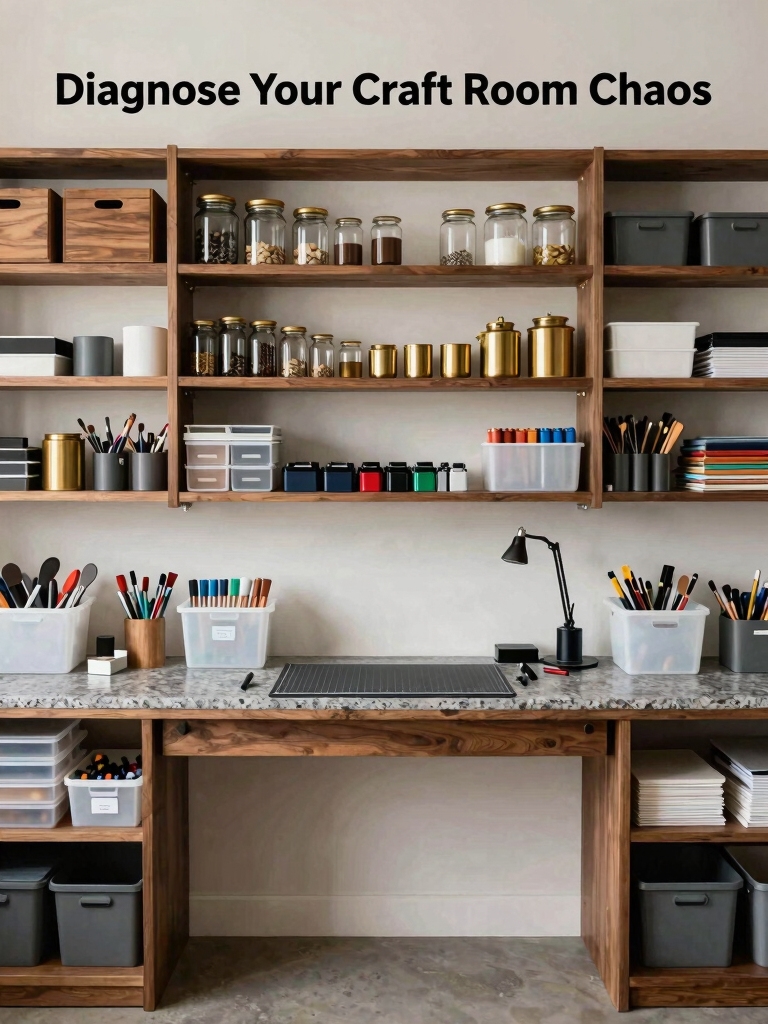
Diagnosing craft room chaos starts with a simple, honest look around. I’m talking about facts, not feelings: shelves misaligned, bins overflowing, tools scattered.
First, I notice flow—where do projects stall? Then I identify priorities: what’s essential, what’s unused.
I map a quick traffic pattern, label clearly, and separate junk from gear. Clarity follows organization; momentum returns, one practical step at a time.
Create a Core Zone Map to Guide Your Workflow
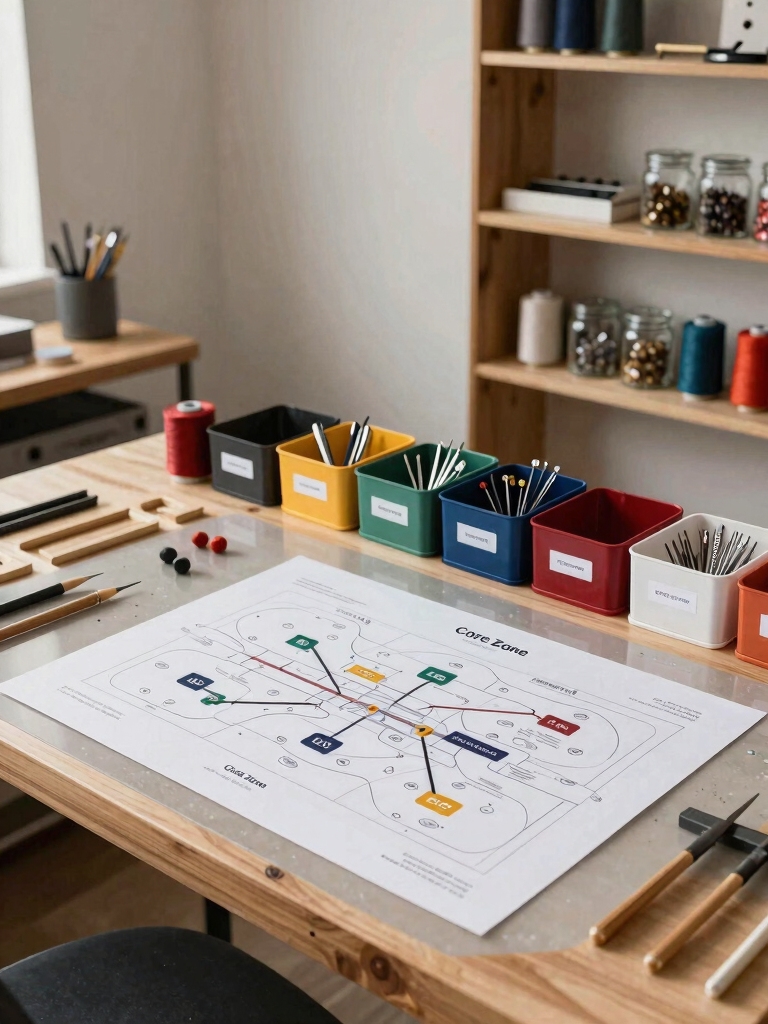
I start by mapping my workflow to keep tools and supplies in logical spots, so I waste less time hunting for stuff.
I’ll set clear zone allocation rules—like cutting, sewing, and gluing areas—so each task has a home.
Finally, I design a simple visual path that guides movement from one zone to the next, reducing back-and-forth and keeping momentum.
Map Your Workflow
A core zone map helps you see where you actually work best, so you can streamline your craft sessions.
I map each step of my workflow, labeling where prep, cutting, assembly, and finishing happen. I keep tools nearby, minimize distance, and tag tasks by urgency.
If a zone slows me down, I rearrange; progress follows clarity, not chaos.
Zone Allocation Rules
We’ve mapped where I work best, now it’s time to set the rules that keep those zones efficient.
I allocate tasks by proximity: cutting, glue, and finishing stay near each other; prep tools sit within reach of the main station; storage is labeled and grouped by project type; clear borders prevent crossing paths.
Simple, repeatable steps keep momentum and clarity intact.
Visual Path Principles
I’ll show how a Core Zone Map guides flow, reduces backtracking, and keeps tools in reach.
Let’s map steps, stations, and routes that feel natural to you.
- Define key zones and入口 points
- Align workstations to tasks
- Plan pull-push paths
- Mark shortcut corridors
- Review and revise regularly
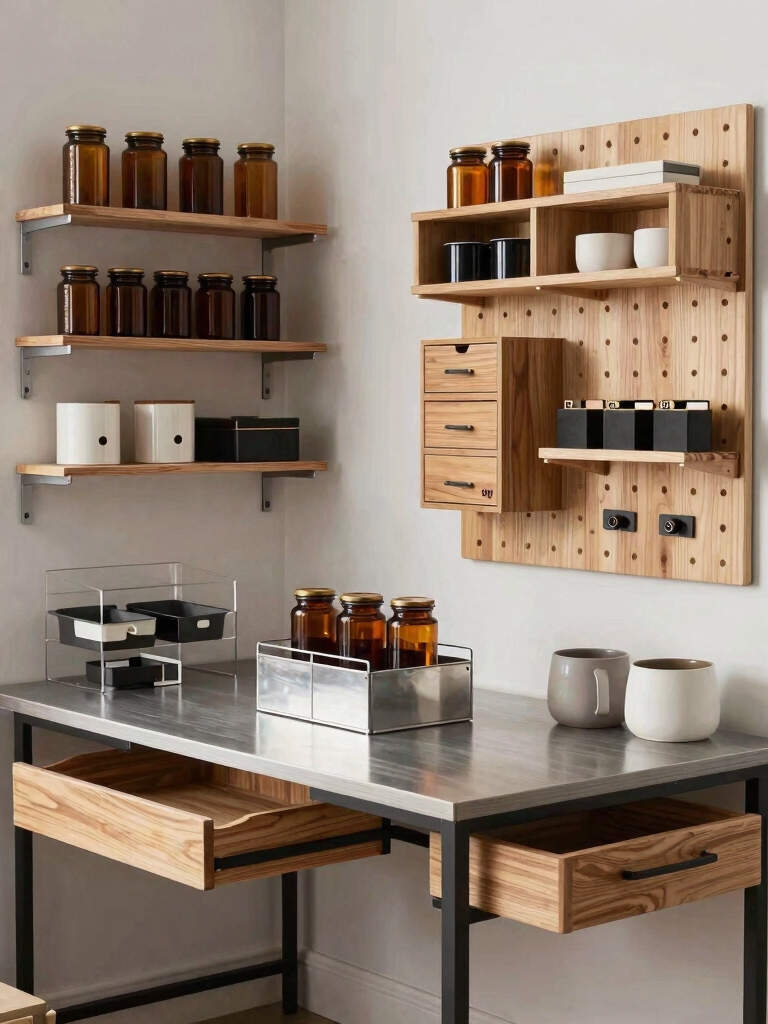
Budget-Friendly Wall-Mount Shelves That Do More
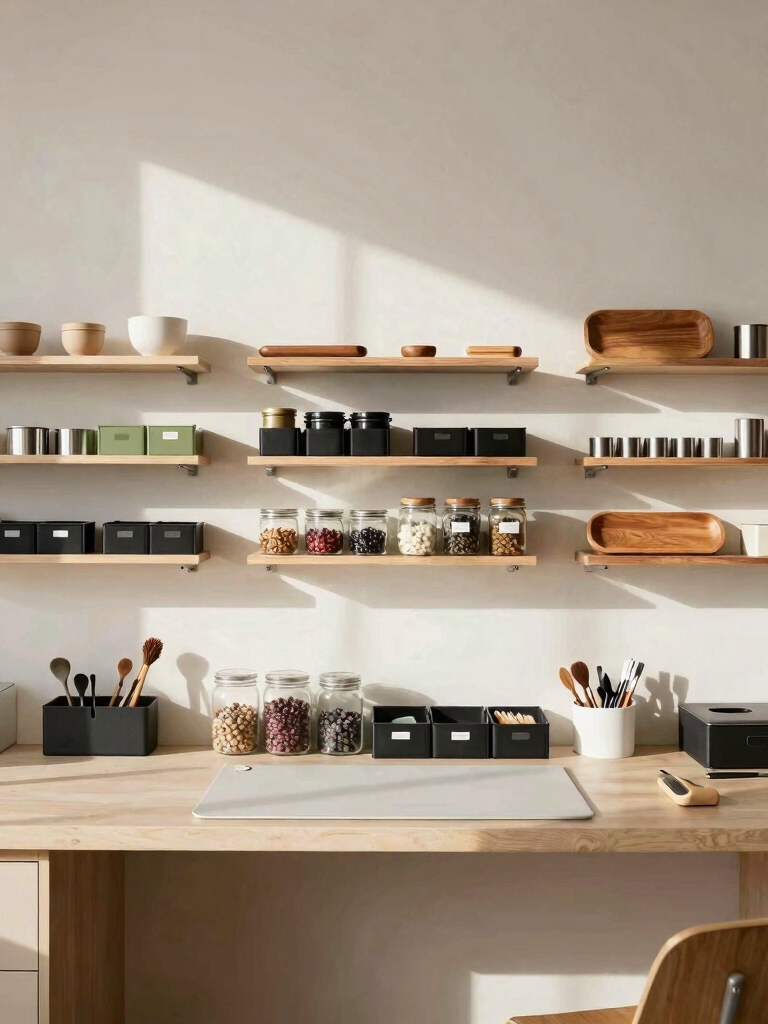
If you’re trying to stretch decorating dollars, budget-friendly wall-mount shelves are a smart move that adds function without clutter.
I pick compact, sturdy options and position them at eye level for quick access. Use labeled bins underneath, or small jars for supplies, so surfaces stay clear.
Install with anchors, measure spacing, and reuse empty frames for a cohesive, practical display. These creative room ideas can transform any space while keeping costs low.
Clear-Label Storage Bins by Color and Function
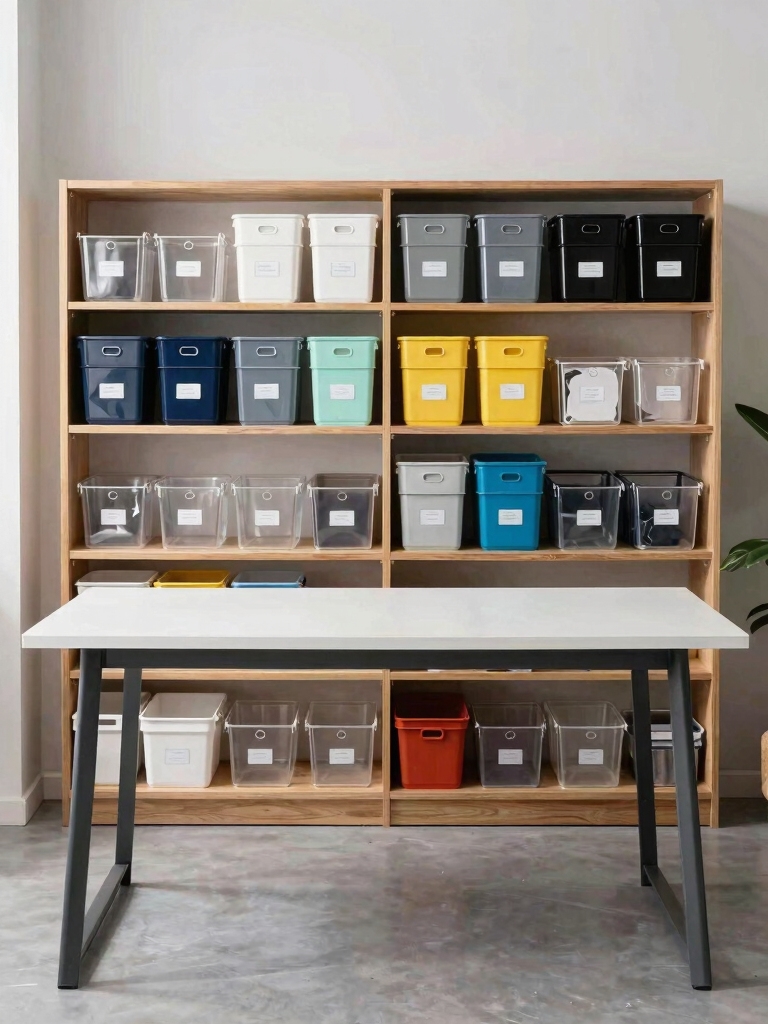
Color-coded bins keep my craft stash easy to find, so I’ll show you how I pair color with function for quick grabs.
When I label by use—glue, paints, beads—I waste less time sorting later and you can see at a glance what’s what.
Let’s talk about setting up a simple system that’s both clear and consistent, so every bin earns its place in your workflow.
Inspired by clever utility room solutions, this method helps maintain a tidy and efficient craft space.
Color-Coded Organization
To keep my craft space calm and efficient, I label clear storage bins by color and function, so everything has a quick home.
I keep it practical and tidy, using color cues to locate supplies fast.
- Red bins: paints and brushes
- Blue bins: papers and stickers
- Green bins: ribbons and threads
- Yellow bins: tools and blades
- Purple bins: finished projects and samples
Function-Label Clarity
I’ve seen how color helps me spot supplies quickly, and now I’m leaning into a clear, label-first approach that says exactly what’s inside.
Function-label clarity means bins are both color-coded and described, so I grab the right tool fast. I keep wording simple, use consistent terms, and place labels front and center.
This keeps my workspace organized and efficient.
Spin It: Lazy Susans and Turntables for Quick Access
If you want to find supplies faster in a busy craft room, a lazy Susan or turntable is your best friend.
I keep essentials orbiting each station, so chaos stays outside.
- rotate for quick access
- label visible edges
- group similar items
- stack sparingly
- clean regularly
Hidden Cabinets: Clever Secret Compartments
Hidden cabinets aren’t just for hidden goodies; they’re practical space savers you can actually use.
I hide frequently used tools behind cabinet fronts and under shallow drawers, keeping folds and scraps accessible yet out of sight. My trick: slim, labeled compartments for pens, glue, and rulers.
I measure, install, and place items logically so setup stays tidy and fast. Incorporating creative storage solutions can transform even the smallest craft room into an efficient, cozy workspace.
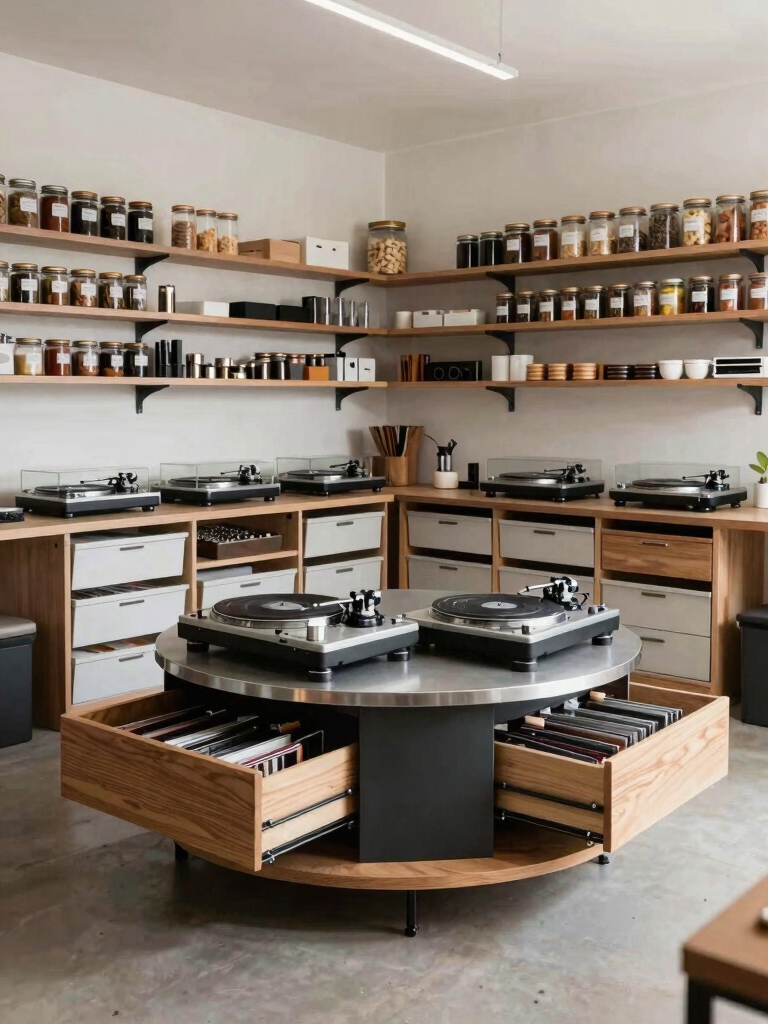
Modular Storage That Grows With Your Projects
– Incorporate design elements that double your space instantly to maximize efficiency.
Pegboard Systems That Work Without Clutter
Pegboard systems can keep a craft space clean and efficient, as long as you approach them with a plan.
I map zones for tools, reels, and supplies, then hang items based on frequency of use. Use labeled hooks and uniform spacing to reduce search time.
Regular quick audits prevent overstuffing, keeping your workspace calm, focused, and genuinely functional.
Vertical Storage Hacks for Small Spaces
I’m here to share simple vertical space tricks that maximize what you already have, starting with Vertical Space Maximizers and Slim Wall Storage.
Let’s explore practical setups that keep craft surfaces clear while adding sturdy, easy-to-reach spots for tools and materials.
If you’re tight on floor space, these ideas help you organize efficiently without crowding your workspace.
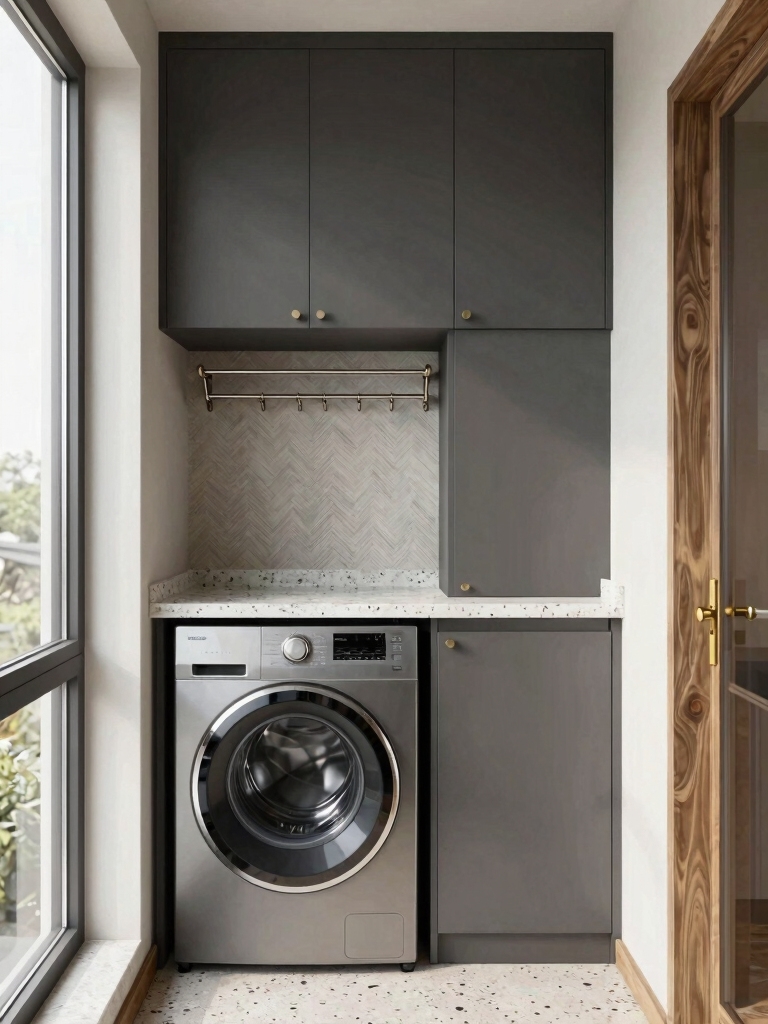
Many creative laundry room ideas for tight spaces can be adapted to craft rooms, providing clever solutions for small areas with space-saving storage.
Vertical Space Maximizers
Vertical space is often wasted in small studios, so I’ll show you quick hacks to turn walls into extra storage you’ll actually use.
I’ll keep it practical and tidy.
- Install staggered pegboards for tools and trims
- Use magnetic strips for metal palettes and brushes
- Add over-door organizers for scraps
- Mount slim shelves above work zones
- Hang transparent bins for tiny supplies
Slim Wall Storage
I organize vertical hooks, magnetic strips, and slim bins to keep supplies accessible yet tucked away. You’ll notice clear labels, consistent heights, and easy reach.
This approach cuts clutter, boosts visibility, and invites quick projects, turning your walls into efficient, inspiring work zones.
Drawer Dividers for Tiny Tools
- clear, shallow trays
- adjustable widths
- labeled compartments
- non-slip bottoms
- dedicated spot for extras
The Power of Consistent Labeling
Consistency is the backbone of an organized craft space: when labels stay the same, you spend less time hunting and more time creating.
I keep labeling simple and uniform, matching fonts, colors, and terminology across containers. You’ll build quick recognition, reduce mistakes, and streamline workflows.
If a tag fades or dies, replace it promptly to preserve clarity and save brainpower.
Workspace Zoning: Sewing, Painting, and Assembly Areas
To keep your craft space efficient, I like to create distinct zones for sewing, painting, and assembly, so each task has its own flow and tools within reach.
- Sew station near natural light
- Paint area with trays and cleanable surface
- Assembly bench with organized hardware
- Shared storage for threads, brushes, glue
- Clear workflow from prep to finish
Lighting for Color Accuracy in Crafting
When I set up lighting for crafting, I prioritize color accuracy to make true-tinted decisions on fabric, paint, and paper.
I’ll explain how lighting standards and color temperature affect how colors appear, and how to choose bulbs that minimize shifts in hue.
Let’s keep this practical: start with a single, reliable light source that renders colors well, then add task lighting to reduce shadows and keep color perception consistent.
Lighting Standards for Crafting
Good lighting is essential for true color when you’re crafting, so I’ll start by tuning the setup you already have.
Here’s a practical checklist to meet standard brightness and color needs:
- Use daylight-balanced bulbs (5000–6500K)
- Aim for 2–3 adjustable luminaires
- Avoid glare with diffusers
- Maintain even wall/desk illumination
- Regularly recalibrate with a color card
Color Temperature Considerations
I explain how cool bulbs highlight blues and whites, while warm bulbs soften reds and skin tones.
Choose a balanced daylight or 4000–5000K range, guarantee consistent lighting, and avoid mixed sources.
Your projects look accurate, consistent, and clean.
Multi-Purpose Furniture That Saves Space
If you’re short on space but still want a functional craft area, multi-purpose furniture is a game changer.
I prioritize pieces that fold, stack, or tuck away, so tools stay organized without crowding the room. Texture, color, and efficiency matter, too.
- Fold-out cutting table with storage
- Upright tool cabinet that doubles as desk
- Benches with hidden drawers
- Modular shelving that converts to tackle station
- Rolling cart for portable supplies
Incorporating stylish storage solutions can help you maximize both space and aesthetics in your craft room, just like in a well-designed laundry area with storage and style.
Wire Management for Clean Counters
Wire clutter can derail even the best craft setup, so I keep cords and clips tucked out of sight and off the work surface. I label power strips, route cables behind organizers, and use short connectors to prevent tangles.
A small pegboard holds chargers, while a tray catches crumbs and dust. Clean counters boost focus, efficiency, and safety during projects.
Maintenance Rituals That Stick
Maintaining a craft setup is easier when rituals become habit, not chores. I share practical routines that stay when simple and specific rules guide me.
You’ll notice consistency compounds, not clutter.
- Wash brushes and tools after use
- Return items to dedicated spots
- Do a 5-minute tidy at day’s end
- Audit supplies weekly
- Label containers for quick access
Incorporating creative DIY ideas can transform your space and make organization enjoyable.
Personalize Your Studio for Joyful Creation
Turning your space into a reflection of you can boost joy and spark creativity.
I’ll show you practical, simple steps to personalize your studio without clutter. Pick a few meaningful items, like a favorite color palette or a cherished photo, and use them consistently.
Label storage, rotate projects seasonally, and keep a quick mood board nearby for fresh inspiration.
Your space, your momentum.
Many aesthetic lovers are copying room ideas right now to create inspiring environments that fuel creativity.
Conclusion
Imagine your craft room as a well-tended garden. Each shelf is a sturdy trellis, every bin a labeled bloom, and the core zone your sunlit patch where ideas sprout. As you prune clutter and weed out waste, tools become seeds that confidently root—quick, easy, joyful. When you move, you’ll harvest flow instead of chaos, turning messy days into productive seasons. Stay patient, water your routines, and watch organized growth bloom into creative abundance.