I’d first tackle the chaos with a good declutter, then install warm, white floor-to-ceiling cabinets for hidden storage. To maximize my tiny space, I love adding a wall-mounted drying rack and a handy pegboard for customizable supplies. Clear, labeled jars keep pods visible, and a dedicated stain hamper saves my clothes. Keeping a neutral color scheme with woven baskets adds that modern-farmhouse charm I crave. Let me show you how these small changes make a huge difference.
Declutter and Assess Your Laundry Room First
Before we roll up our sleeves and get creative, we’ve got to start with a clean slate.
I start by emptying my laundry room completely. It’s the only way I can honestly assess what I own and what the space truly needs.
I sort everything into keep, donate, or trash piles. This simple, budget-friendly purge reveals the existing storage and gives me a clear vision for my DIY project.
Incorporating smart and stylish laundry solutions can make the most of your available space and keep everything organized efficiently.
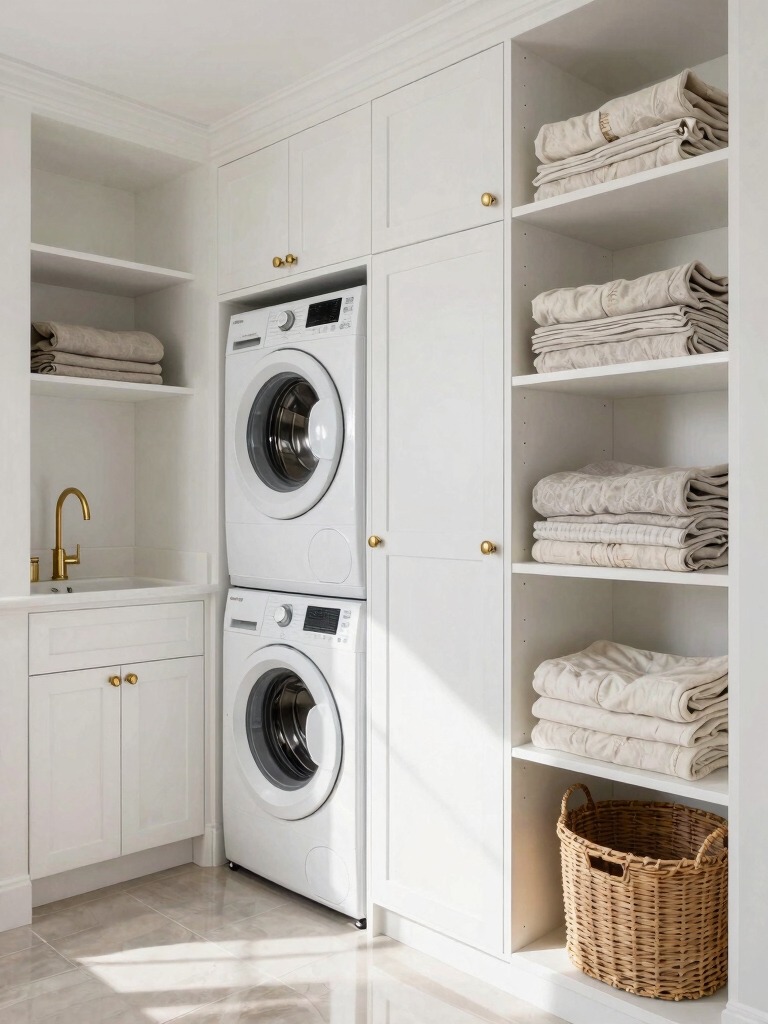
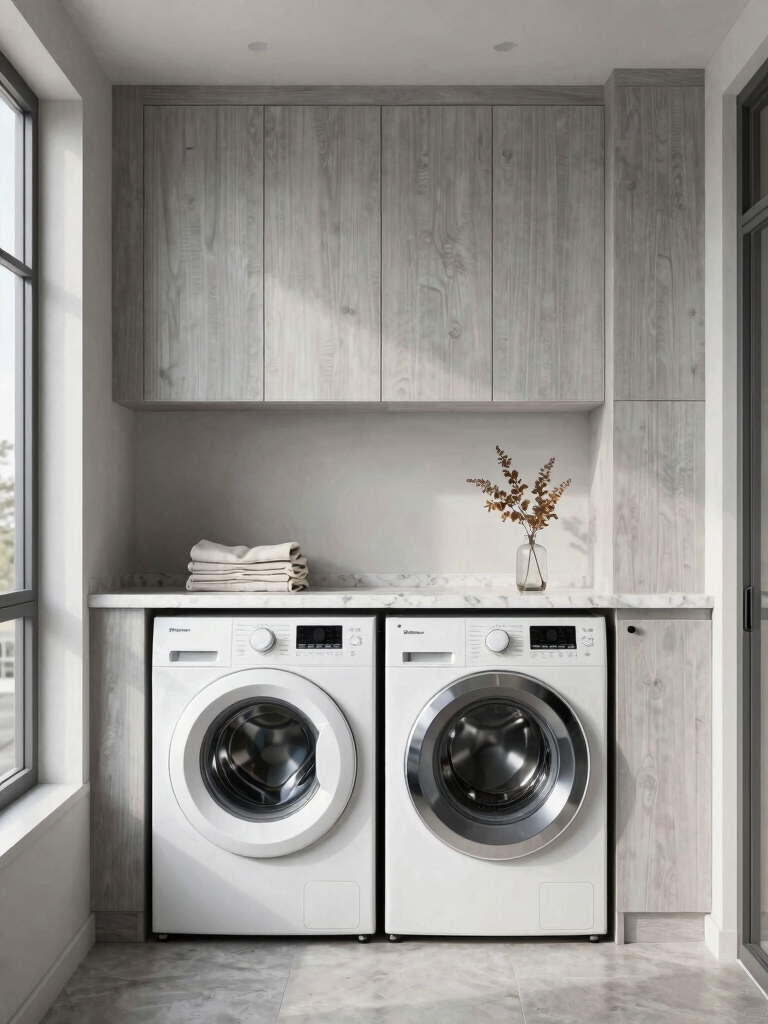
Install Floor-to-Ceiling Laundry Cabinets
One of the smartest investments I’ve made is installing floor-to-ceiling laundry cabinets for ultimate storage.
I built mine from budget-friendly stock cabinets, painting them a warm white for a modern-farmhouse feel. They completely conceal supplies, tools, and linens.
This DIY project uses every inch of wall space, turning clutter into a clean, functional backdrop. It’s a permanent solution that makes the whole room feel larger and calmer.
These clever cabinet solutions are perfect for keeping your laundry room tidy by hiding everything out of sight, creating a streamlined and organized space with clever cabinet solutions.
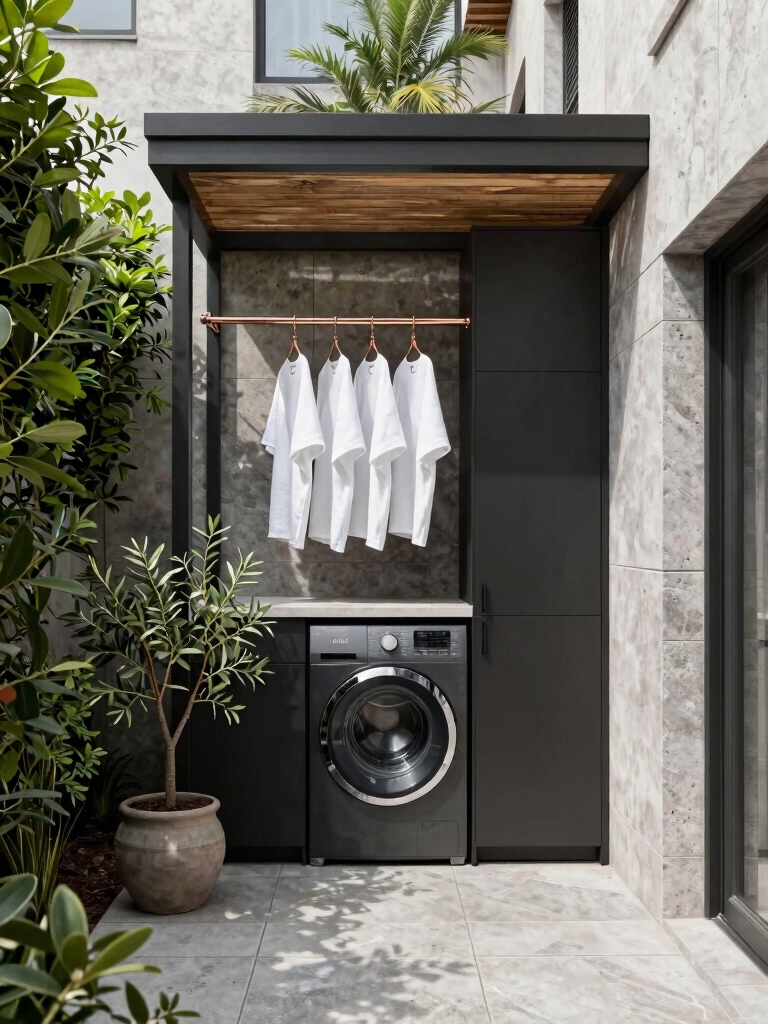
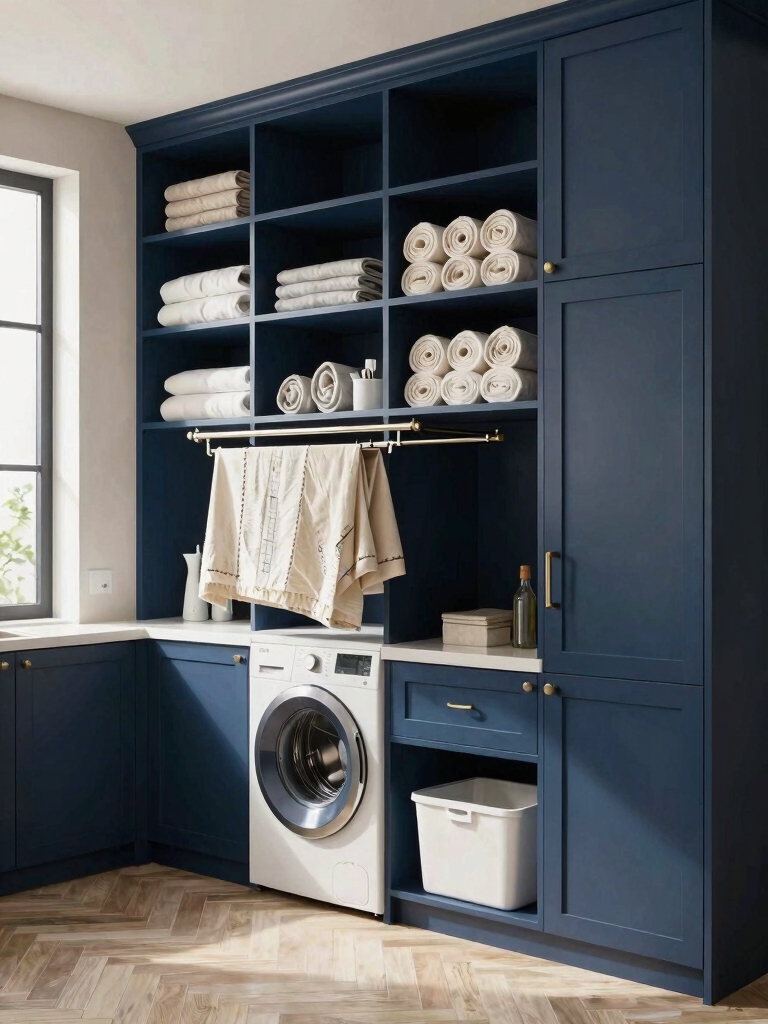
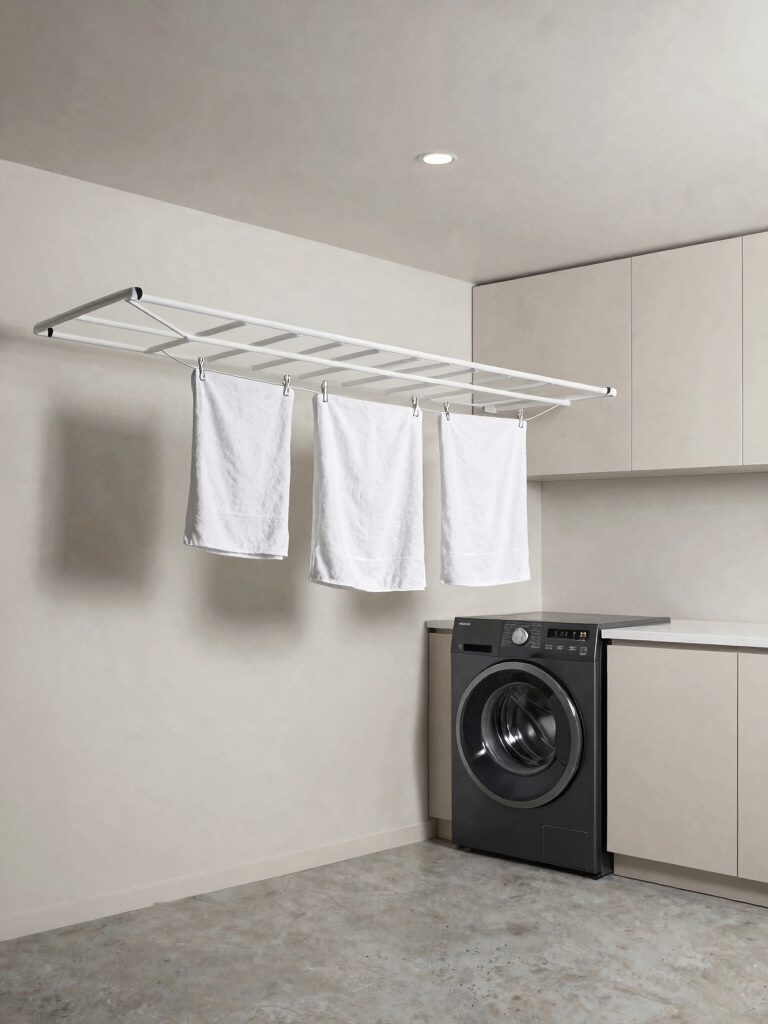
Maximize Vertical Space With a Wall-Mounted Drying Rack
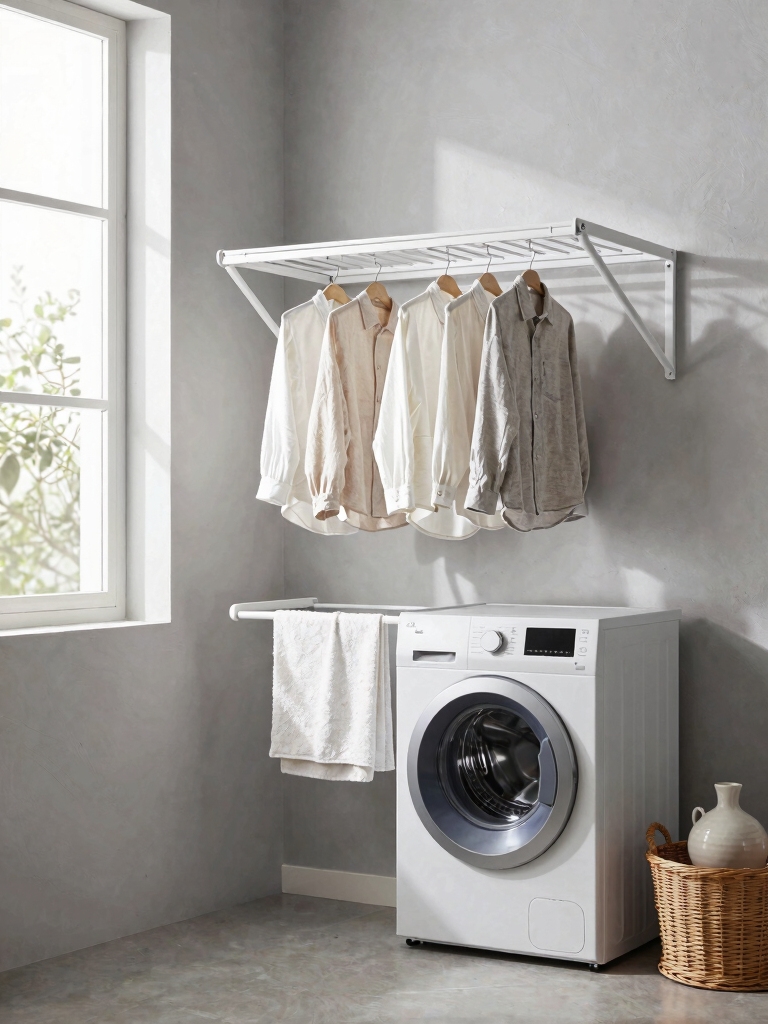
I’ve found a simple wall-mounted drying rack truly maximizes my laundry room’s vertical space.
It clears up floor space while utilizing that unused wall area above my washing machine.
Installing it’s a quick DIY fix that looks great in my modern-farmhouse space.
This clever solution is one of many smart storage ideas that can transform even the smallest laundry rooms.
Free Up Floor Space
Since floor space in my laundry area feels tight, I’m installing a wall-mounted drying rack to utilize the wall.
I’m choosing a simple, rustic wooden one stained white to match my modern-farmhouse vibe. It’s a cheap DIY that clears my floor.
I’ll mount it over the washer, so I can air-dry delicates or sweaters without sacrificing precious room for baskets or a freestanding rack.
Utilize Unused Wall Areas
When you’re tight on space but still need to hang-dry clothes, a wall-mounted rack can be the perfect vertical solution.
I love using simple, rustic wood I’ve stained myself to build mine—it adds farmhouse charm without a big price tag.
Installing it above a door or over a sink taps into that unused wall real estate.
You’ll instantly dry more items while keeping your floor clutter-free.
Install Above Appliance Solutions
To really maximize every inch, you can mount a sturdy drying rack right above your washer or dryer—it’s a budget-friendly DIY that reclaims vertical space beautifully.
I love how its clean, black metal lines add that modern-farmhouse touch. You’ll air-dry delicates easily, freeing up floor space.
Just anchor it securely into studs. It’s the single smartest project I’ve tackled to conquer laundry day clutter without a big renovation.
Add a Retractable Clothesline for Hidden Drying
You can give your laundry room a clever farmhouse update by installing a retractable clothesline that tucks away when not in use.
I found a sturdy, affordable model online. Mounting it myself was simple. It gives me a perfect spot to air-dry sweaters or linens, saving energy.
When I’m done, it retracts neatly, keeping my modern farmhouse space looking clean and organized. Small laundry room ideas like this save space while adding functionality and charm.
Use Tension Rods to Air-Dry Delicates
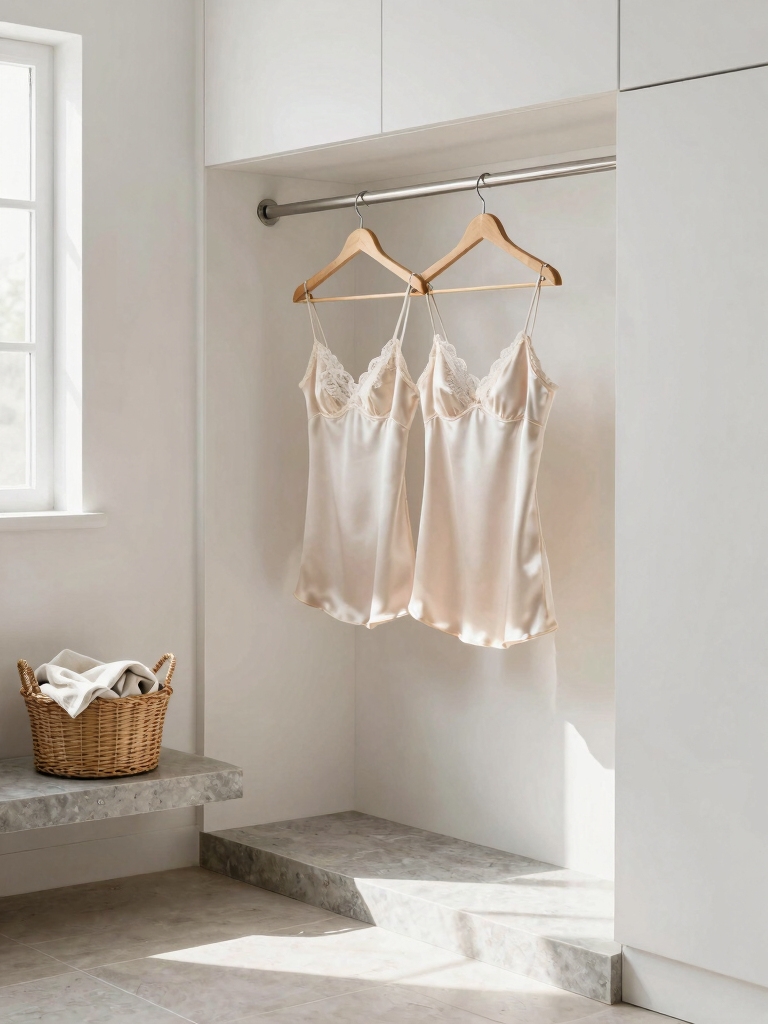
I’ve found installing a few tension rods under my cabinets creates perfect, hidden drying lines.
You’ll want to measure your space carefully to pick the right rod length and strength.
Let’s talk about placement options and how to choose the best rod for your laundry room.
Maximizing your small laundry room’s efficiency with smart design tips can help you fit more into less space.
Installation And Placement
Another clever trick for air-drying delicates is using tension rods. I simply install them inside my upper cabinet doorframes or across a narrow wall section.
It’s a fantastic DIY project that creates instant, budget-friendly drying space. I position them high enough so my sweaters and lingerie drip safely into the sink or onto the floor below, keeping my modern-farmhouse room tidy and functional without any complex mounting.
Choosing The Right Rod
Picking the perfect tension rod for this drying hack isn’t hard, but there are a few key details I always check.
- Finish: I grab a classic matte white or black rod that fits my farmhouse aesthetic.
- Adjustability: It must offer a wide length range to fit snugly in my chosen space.
- Strength: A sturdy, spring-loaded mechanism holds everything securely.
- End Caps: Rubber ends protect my walls from any scuffs.
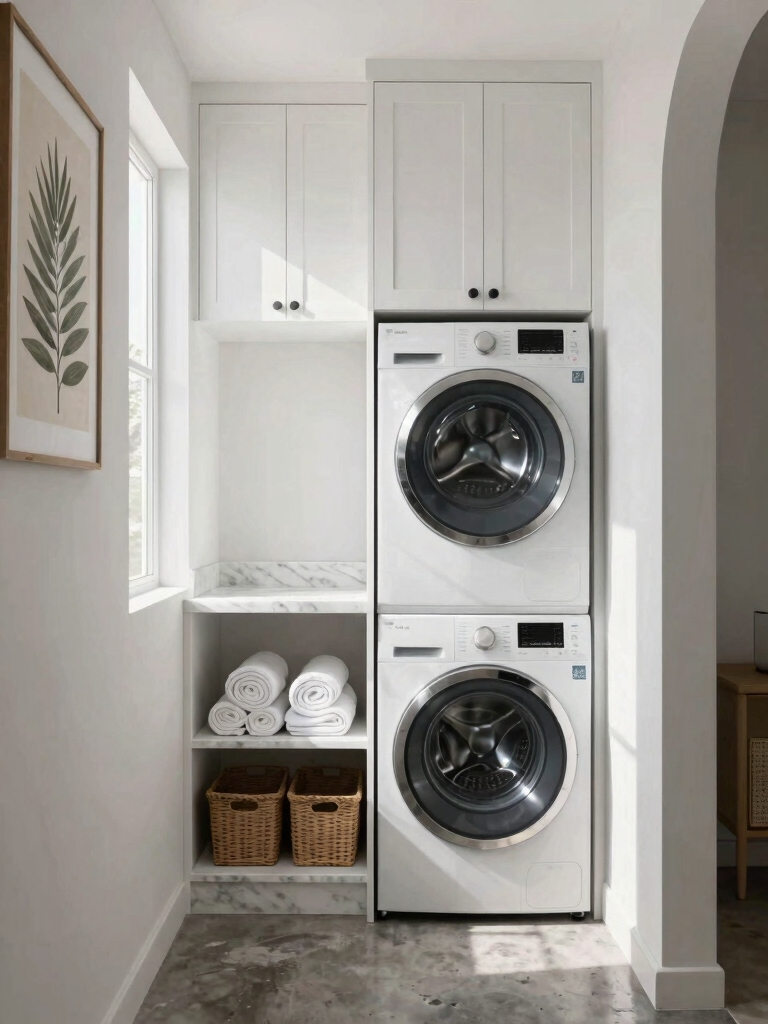
Stack Your Washer and Dryer to Gain Floor Space
One straightforward way you can immediately free up square footage is by stacking your washer and dryer.
I use a simple, secure stacking kit to vertically align my machines. It creates a lovely, clean line and opens up valuable floor space below.
Now I tuck a vintage laundry basket or a rustic shelf there for supplies. It’s a budget-friendly DIY project that maximizes function with that modern-farmhouse feel.
Stackable laundry units are a smart solution to maximize space without sacrificing style.
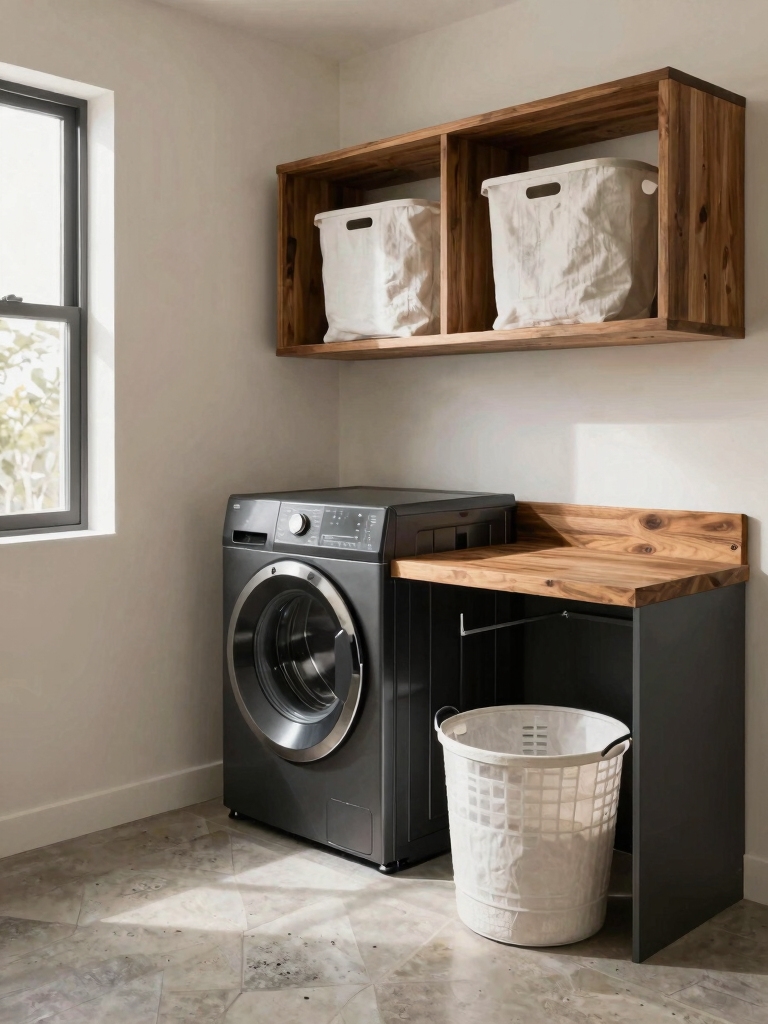
Mount a Pull-Down Folding Shelf Over Machines
I’m always looking for ways to use vertical space above my machines.
Mounting a DIY pull-down shelf gives me a dedicated folding station I can tuck away.
It’s a modern-farmhouse solution that doesn’t take up my floor space.
This clever storage idea helps maximize space and eliminates clutter, making the laundry room more functional and organized with clever storage solutions.
Leverage Unused Vertical Space
Since you’re dealing with tight space, mount a pull-down folding shelf over your washer and dryer—it’s a simple DIY solution that adds a folding station without costing a fortune.
I use reclaimed wood for a modern-farmhouse feel and store it vertically.
My key considerations are:
- Using sturdy, hidden hinges for a clean look
- Securing it firmly into wall studs
- Staining the wood to match my decor
- Letting it fold flat when not needed
Create A Dedicated Folding Station
Mounting a pull-down folding shelf directly above your washer and dryer establishes a dedicated spot for sorting and folding laundry.
I love this DIY project! I’ll build a rustic, wooden shelf with simple hardware. It folds flat against the wall when I’m not using it, saving precious floor space.
This budget-conscious solution keeps my clean clothes organized and makes laundry day feel so much simpler.
Create a Dedicated Ironing Board Nook
A simple yet effective laundry room upgrade is dedicating a narrow nook for your ironing board. I built a simple wooden frame that lets mine slide in and out effortlessly, freeing up floor space for good.
You can achieve a similar clean look with just a few basic tools and reclaimed wood. My nook keeps everything tidy and functional.
- Mount two parallel, horizontal boards to your wall studs.
- Make certain the gap is just wider than your board’s thickness.
- Add a small shelf above for spray starch and a lint roller.
- Finish with a coat of crisp, white paint for that farmhouse charm.
Incorporating stylish storage solutions like this nook not only maximizes space but also enhances the overall aesthetic of your laundry room.
Sort Easily With Wall-Mounted Laundry Hampers
I love how wall-mounted laundry hampers save me tons of floor space.
I built a simple wooden frame to hang them in, sorting loads by color or for each family member.
It’s a practical DIY project that’s totally changed my laundry routine on a small budget.
These clever solutions are perfect for maximizing every inch in compact laundry room spaces.
Space-Saving Hampers
Your first step in conquering laundry day starts long before the wash cycle: it’s about smart, easy sorting.
I adore wall-mounted hampers that free up floor space. They’re a perfect modern-farmhouse, DIY project.
- Mount simple canvas bags on a rustic wood frame.
- Repurpose vintage metal baskets for industrial charm.
- Use leftover beadboard to craft a built-in hamper nook.
- Label sections for lights, darks, and delicates right away.
Sort By Person Or Load
Because we’ve already freed up floor space with our wall-mounted system, let’s make sorting just as streamlined.
I use three open-front canvas hampers labeled by load type: lights, darks, and delicates. For a family, label them by person instead.
Grab one and wash its entire contents—it’s that easy. This DIY approach saves so much time sorting on laundry day and fits my modern-farmhouse vibe.
Corral Supplies on a Rolling Laundry Cart
For an adaptable solution that moves with me through the laundry workflow, I love using a rolling cart to corral all my supplies.
I found a great metal cart and gave it a budget-friendly, modern-farmhouse makeover with a coat of matte black paint. Now my essentials are always within reach.
- Stain treater & detergent on the top tier
- Drying racks & hangers on the middle
- Basket for delicates below
- DIY wooden crate for ironing supplies on the handle
Adding a rolling cart is one of the best creative laundry room solutions for tight spaces, helping maximize functionality without crowding the area.
Tame an Awkward Gap With a Slim Pull-Out Cart
Narrow, unused spaces between appliances are prime real estate waiting to be claimed, and I tamed ours with a slim pull-out cart.
I found a basic metal frame online and built a simple wooden shelf to fit. Now it glides out, holding my iron and spray bottles.
It’s a perfect, budget-friendly DIY that adds that modern farmhouse charm while turning dead space into functional storage.
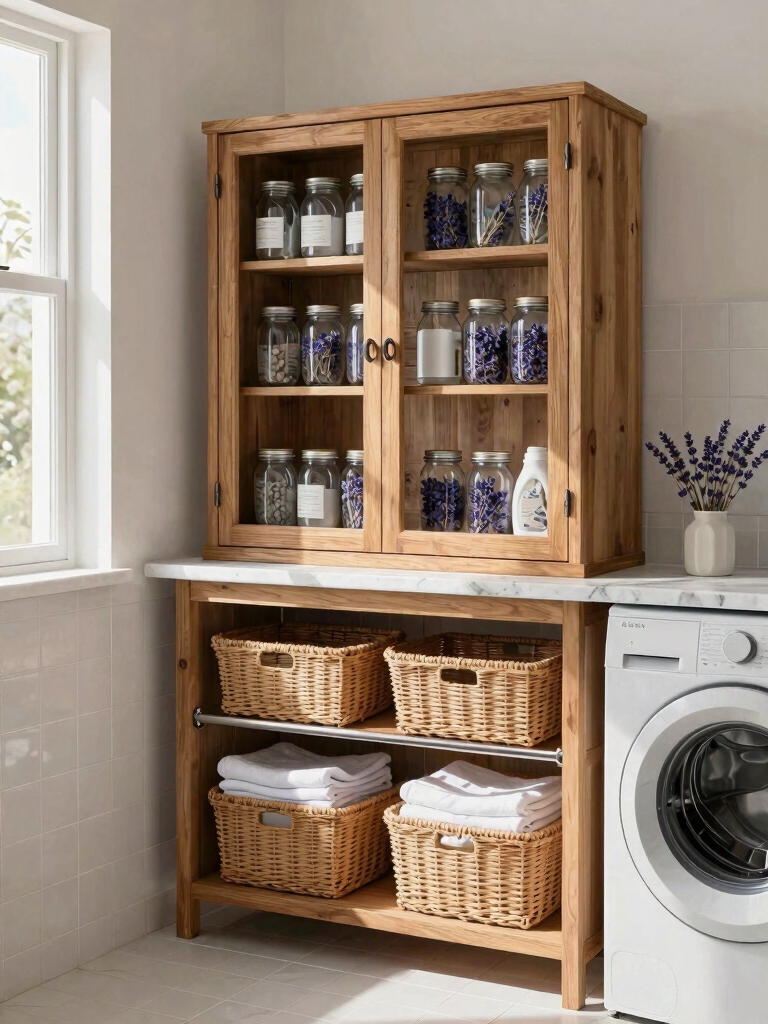
Store Pods and Stain Sticks in Clear, Labeled Jars
Another simple way I’ve organized my laundry supplies is by storing pods and stain sticks in clear, labeled jars.
It’s a modern-farmhouse look that’s budget-friendly and keeps everything visible. I just used jars I already had.
My simple system works because it:
- Prevents spills from torn pod packages.
- Corrals clutter on a shelf or in a basket.
- Saves time with instant identification.
- Looks tidy and intentional.
Use the Inside of Cabinet Doors for Tiny Items
Since cabinet doors offer unused vertical space, I’ve started attaching small bins to the inside of mine to hold tiny laundry items.
I use simple metal or wooden bins from a thrift store and secure them with screws. They perfectly corral my loose buttons, stray socks, or sewing kit.
This DIY trick is totally budget-friendly and adds that functional, modern-farmhouse charm without using any precious shelf space.
Hang an Over-the-Door Organizer for Cleaning Tools
I’m hanging an over-the-door organizer to hold all my cleaning tools. It’s a genius, budget-friendly trick for hidden storage!
I love this DIY solution for its quick, farmhouse-clean feel. I’m stocking mine with:
- Dusting cloths and microfiber wipes
- A natural-bristle scrub brush
- My favorite spray bottles
- A small dustpan and brush
Every item now has a spot, saving my precious shelf space for other things.
Install a Shelf Above the Door for Bulk Supplies
Step up your laundry room’s storage game by installing a shelf above the door for bulk supplies.
I love this high-up spot for storing extra detergent, bleach, or that giant box of dryer balls.
It’s a simple DIY project—just find a reclaimed wood plank or a basic bracket shelf.
You’ll reclaim precious floor space and keep those essentials handy yet out of the main clutter zone.
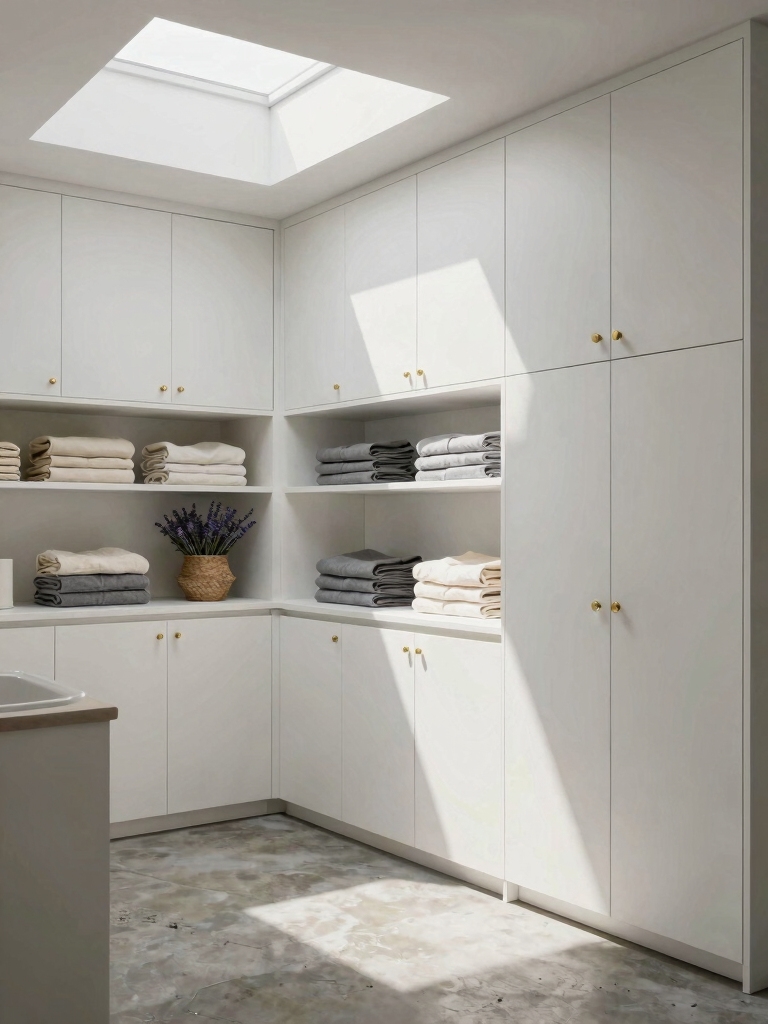
Unify Open Shelving With Matching Baskets and Bins
I’m grouping my supplies in matching wicker baskets to create a streamlined look on my open shelves.
A bit of chalk paint on simple tags gives me labeling for swift access.
It’s a budget-friendly DIY project that delivers both aesthetic harmony and serious function.
Labeling For Swift Access
While open shelving keeps essentials within reach, a jumble of mismatched containers can slow you down.
I make my cohesive bins truly functional with clear labels. I stick to my modern-farmhouse aesthetic with a few simple, budget-conscious DIY tricks.
- Use a Cricut to cut vinyl labels from a rustic font.
- Stencil directly onto linen-look baskets with paint.
- Apply chalkboard labels for easy updates.
- Burn words into wood tags for a handmade touch.
Streamlined Storage Solutions
My next move for a truly streamlined laundry space is unifying those open shelves with a set of matching baskets and bins.
I grab affordable woven or metal bins from a discount store. Grouping similar items—like stain treatments or dryer balls—into dedicated containers instantly cuts visual clutter.
It’s a quick, impactful DIY project that makes everything feel intentional and effortlessly tidy on a tight budget.
Aesthetic Harmony And Function
Building on those streamlined storage solutions, unifying open shelves with matching baskets and bins is where form meets function.
I create a calm, cohesive look that hides clutter instantly. My modern-farmhouse approach is budget-friendly and DIY-focused.
- Source neutral baskets from discount stores for a unified base.
- Label with rustic tags for quick identification.
- Use uniform colors like cream, gray, or natural fiber.
- Mix in a few woven textures for visual warmth.
Add a Pegboard for Fully Customizable Storage
Because organization needs can change, a pegboard gives you fully customizable storage.
I love that you can mount it to an empty wall and use inexpensive hooks, bins, and shelves from any hardware store.
Paint it a warm white or sage to get that modern-farmhouse feel.
You can rearrange everything in minutes when you need a new spot for stain sticks or dryer balls, making this my favorite budget DIY.
Repurpose a Desktop Organizer for Socks and Sundries
For another clever storage hack, I repurpose a desktop organizer in my laundry room to sort socks and small sundries. I found a wooden one at a thrift store and gave it a fresh coat of white chalk paint for that modern-farmhouse feel.
- Dedicate each cubby to a family member’s socks.
- Corral stray buttons and sewing kits.
- Store lint roller refills neatly.
- Tuck in single-use detergent pods for quick access.
Keep a Small Stain-Treatment Hamper Handy
Since sorting laundry, I keep a small, dedicated hamper for stained items right in my laundry room so I can treat them immediately.
I found an old wire basket that works perfectly. Now, I just grab my stain stick and tackle spots before they set.
It’s a simple, budget-friendly DIY system that keeps my modern-farmhouse space functional and prevents laundry-day panic over last-minute discoveries.
Label Every Bin and System to Stay Organized
How I keep my family on track with my laundry system is to label everything clearly. A simple label makes a bin self-explanatory.
My favorite budget-friendly, DIY tags include:
- Chalkboard stickers on woven baskets
- Paint-pen writing directly on jars
- Laminated cardstock tied with jute twine
- Wooden clothespins with hand-lettered categories
It’s an instant guide that maintains order effortlessly.
Conclusion
I finally built those rustic wall shelves from old crates. A study showed organized spaces can save us 40 minutes a week. My laundry room, once a frantic drawer-dig, is now a calm, productive nook. It proves that a little DIY, like a single stitch, can hold the whole fabric of my routine together, saving precious time and my sanity on the daily.