I find paper’s forgiving nature makes crafting stress-free. Start with the essentials like cardstock and a glue stick. You can create a colorful paper flower garland, simple glowing lanterns, or a delicate origami mobile. Transform an old book into a sculpture or frame your windows with paper cutouts. It’s amazing how easily these ideas personalize your space, and I’ve got more clever tricks just ahead for you.
Why Paper Crafts Are Perfect for Beginners
Since you might be new to crafting, you’ll find paper is an ideal starting point because it’s affordable and forgiving. You can experiment without fear; I often just cut and fold to see what happens.
Mistakes become part of the process, not failures. The simplicity lets you build skills confidently before tackling more complex materials.
It’s truly a gateway to accessing your creativity without pressure. Plus, incorporating creative room ideas can transform any space on a budget, making your projects both beautiful and practical.
Gather Your Essential Paper Crafting Supplies

First, I’ll cover basic paper types you’ll need for most projects.
Then, let’s look at essential cutting tools to shape your materials.
Finally, I’ll recommend the best adhesives and fasteners to hold everything together.
Basic Paper Types
Before I show you how to fold a single crane, let’s explore the foundation: your choice of paper can make or break your project.
I always start with standard printer paper for practice. Then I move to origami paper, which is perfectly square and folds crisply.
For sturdier creations like gift boxes, I use cardstock. Just avoid anything too thick or flimsy for clean, sharp results.
Essential Cutting Tools
While paper sets the stage, your tools are what bring each cut and shape to life.
I always start with sharp scissors for general cutting and small, pointed detail scissors for tight curves. A metal ruler and a hobby knife are perfect for perfectly straight edges and intricate patterns.
Keep a self-healing cutting mat underneath to protect your table. Sharp tools make your work cleaner and much easier.
Adhesives And Fasteners
Having moved beyond cutting, your next essential step is choosing the right adhesives and fasteners to assemble your project.
I’d start with a simple glue stick for basic paper layers and double-sided tape for a clean, instant bond.
For heavier decorative pieces, I use a stronger craft glue.
Sometimes, a decorative brad or a bit of ribbon can act as a charming fastener, adding both function and style.
Craft a Blooming Paper Flower Garland
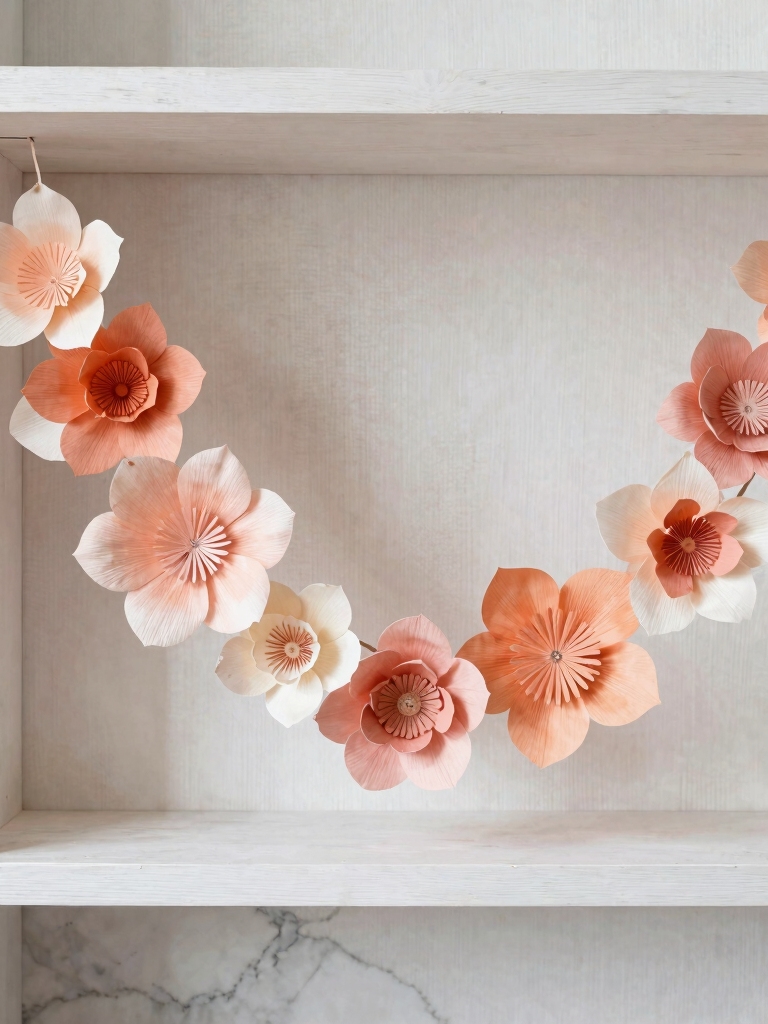
Let me show you how to craft a blooming paper flower garland that will add a burst of spring to any room.
I start by cutting colorful paper into simple petal shapes. I layer and glue a few together, adding a button center for detail.
After making a bunch, I just punch a hole in each and thread them onto a long string.
You’ll have a beautiful, customizable decoration in no time.
Refreshing your home this weekend with new decor ideas is a great way to revitalize your space and boost your mood with fresh room decor.
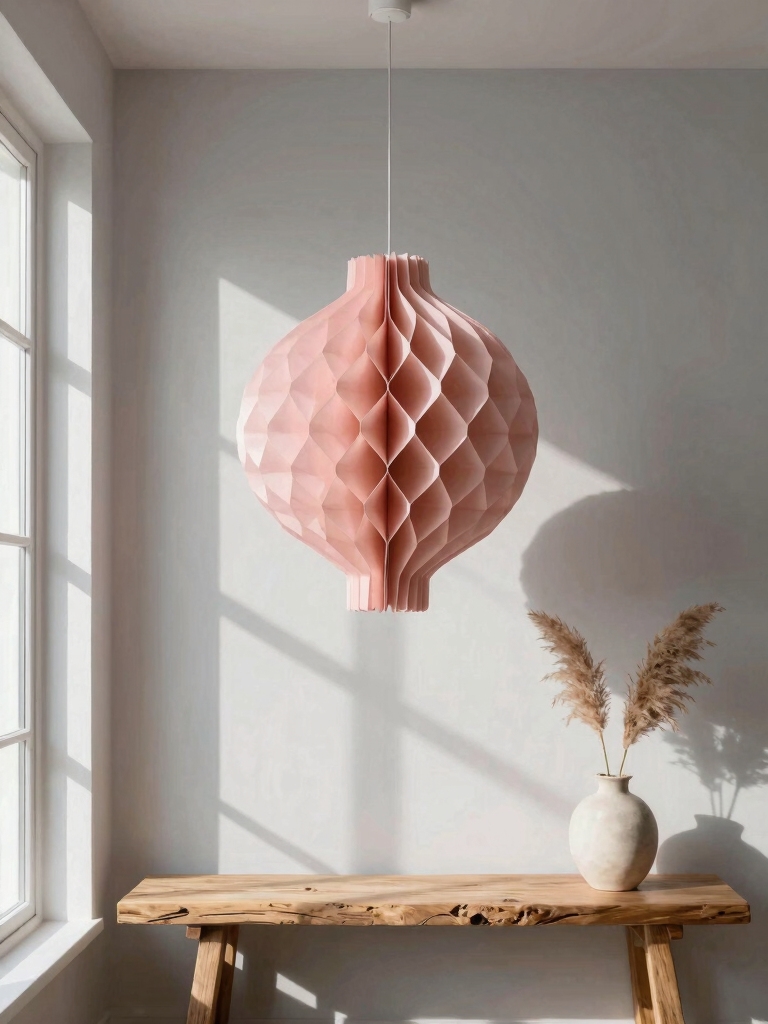
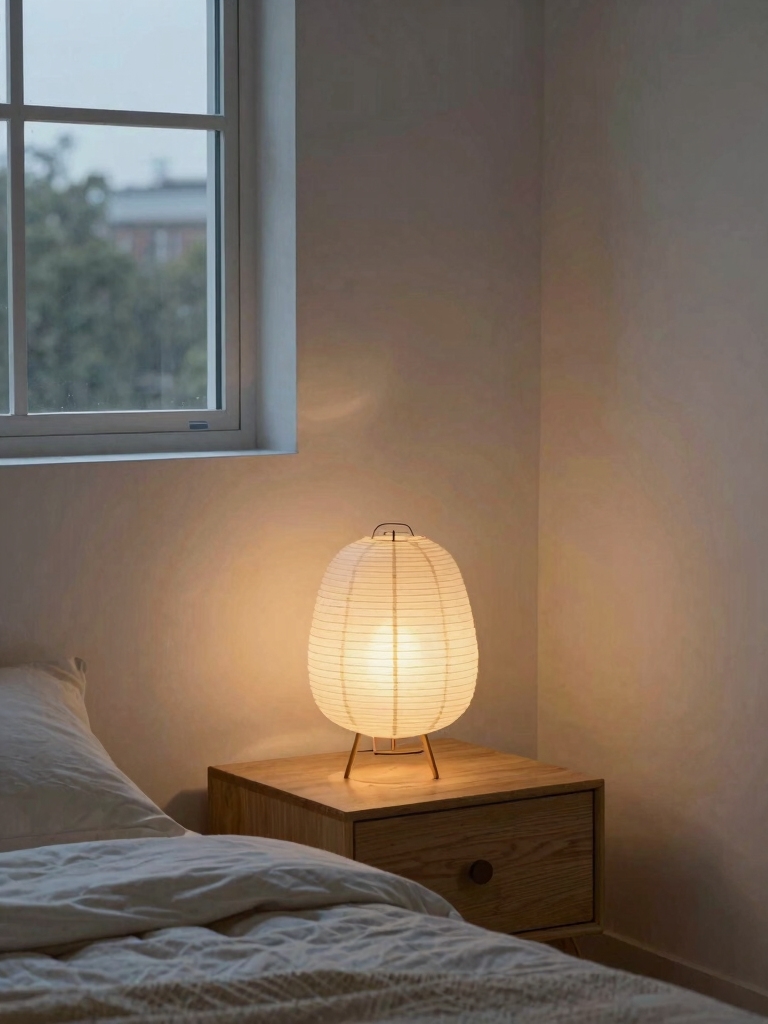
Add Glow With Simple Paper Lanterns
I’ll start by showing you how to choose your paper style.
Then I’ll walk you through crafting the lantern shape.
Finally, we can explore lighting and hanging techniques.
To maximize the effect, consider design tips that help small rooms feel spacious when placing your lanterns.
Choosing Your Paper Style
Since you’re adding a warm glow with simple paper lanterns, the first step is picking the right paper.
I always consider translucency and weight. Thinner papers like vellum or tissue let more light shine through beautifully. For durability, I might choose a medium-weight cardstock.
Don’t forget color! Solid hues create a modern look, while patterned paper adds playful charm before I even start crafting the shape.
Crafting The Lantern Shape
Now, the real fun begins as we transform that paper into a lantern’s form.
I fold it lengthwise to create a long rectangle. Next, I make evenly spaced, vertical cuts from the folded edge, stopping about an inch from the opposite side.
I unfold it, bring the short ends together, and staple or tape them to form a cylinder. Those cuts will now bow outward, creating that classic lantern shape.
Lighting And Hanging Techniques
Once the lantern’s shape is ready, you can add light and a way to hang it.
I gently place a battery-operated tea light inside for a safe, soft glow.
Then, I attach a loop of string or ribbon to the top for hanging. You can use clear tape or punch small holes.
It’s that simple! Now you’ve got a beautiful, glowing decoration for any room.
Fold Your Way to a Stunning Origami Mobile
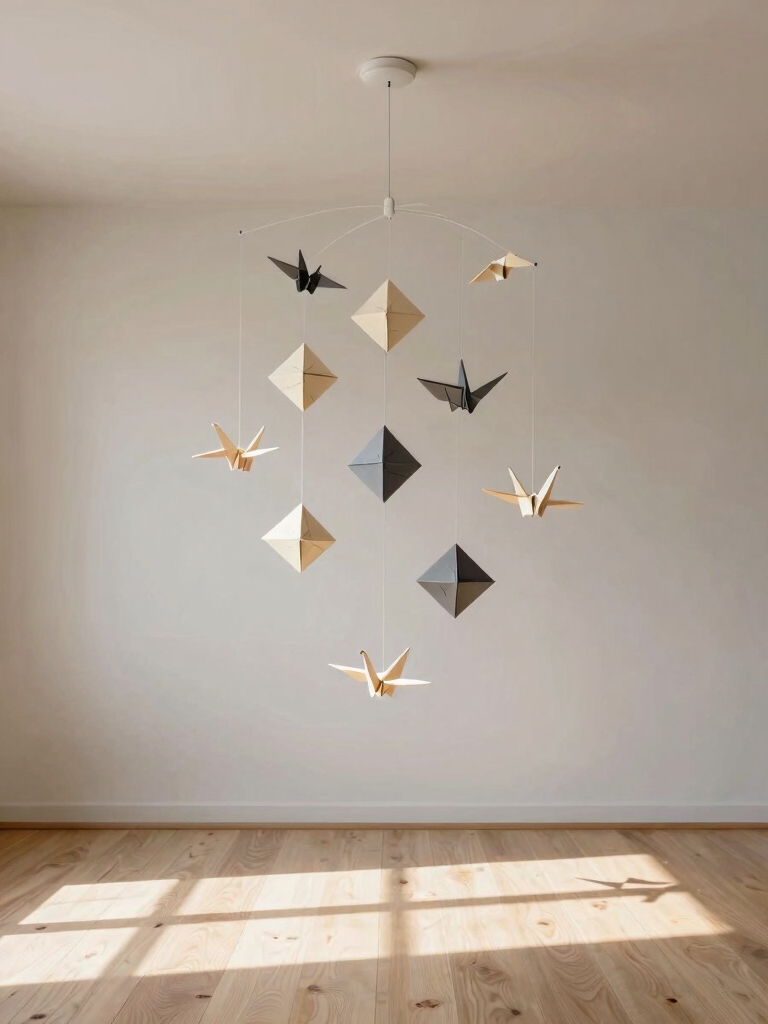
Imagine your living space transformed by delicate origami pieces dancing gracefully in the air.
I start with crisp paper, folding basic shapes like cranes or flowers. Then, I attach each piece to a lightweight frame using thin thread. I balance the lengths carefully so the mobile hangs level.
Finally, I suspend it where light and breeze can bring it to life. You’ll find the process surprisingly simple and deeply rewarding. Incorporating such creative DIY projects is a fantastic way to add stylish room decor that reflects your personality.
String Up a Whimsical Paper Pom-Pom Garland
I’ll start by showing you how to pick a vibrant mix of paper colors for your pom-poms.
Then I’ll guide you through the simple assembly, where we’ll string them all together.
You’ll find hanging this cheerful garland is the easiest part of the whole project.
This project is a fantastic way to elevate your space with stunning DIY decor ideas.
Colorful Pom-Pom Selection
You’ll need about twenty colorful paper pom-poms for this whimsical garland, so let’s start by gathering your materials.
I choose a vibrant mix of tissue paper sheets. I’m aiming for variety, so I pick solids, metallics, and a few with patterns.
I cut them into rough squares, about eight inches each. This selection gives me a great palette to create pom-poms that’ll look lively when grouped together.
Easy Hanging Assembly
With a stack of colorful pom-poms ready, the garland assembly becomes a simple, satisfying process. I thread my needle with a sturdy string and knot the end.
My four-step method guarantees a perfect garland every time.
- Poke the needle through the center of your first pom-pom.
- Slide it down the string to the knot.
- Space them out evenly as you add more.
- Secure the final knot between pom-poms to keep them spaced.
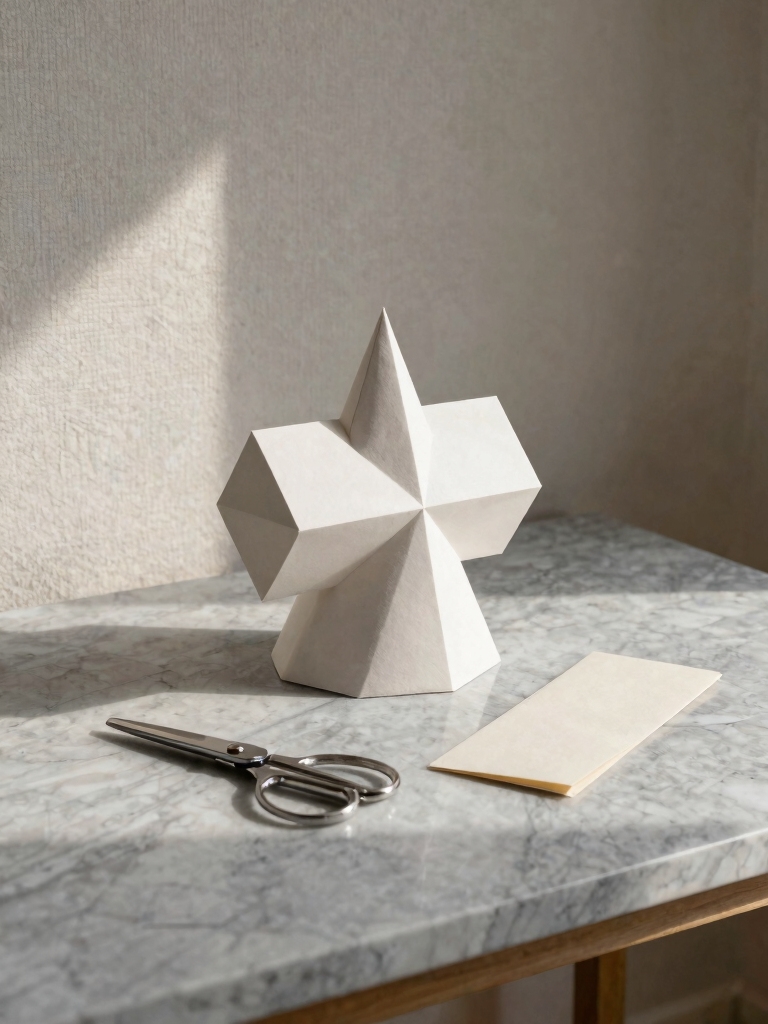
Create 3D Art From Paper
Three-dimensional paper art can transform a simple sheet into intricate sculptures that seem to leap off the page.
I start by sketching a simple shape and making multiple copies. Then I cut them out and score fold lines. By gluing these layers together at staggered depths, I build up the form.
You’ll quickly see your flat drawing gain beautiful, surprising depth with just a few strategic overlaps.
Create a Custom Paper Accent Wall
Since you’ve already built 3D pieces, let’s cover a wall with them to make a bold statement.
First, I lay all my sculptures on the floor to finalize the arrangement. I then attach them using removable adhesive strips for flexibility.
It’s essential to mix sizes and shapes for visual interest.
Finally, I step back and adjust any pieces that feel unbalanced.
Incorporating this technique can transform your space much like stylish bookcase ideas elevate a living room’s decor.
Personalize Your Space With a Paper Photo Ledge
I’m crafting a display for my favorite photos that doesn’t require a hammer and nails.
I’ll just cut a paper-towel tube lengthwise and fold it to create a sturdy, half-cylinder ledge.
Then I decorate it with scrapbook paper for a custom look.
I attach it to my wall with strong double-sided tape, and it’s ready to lean my cherished pictures against.
It’s a simple, damage-free shelf in minutes.
Adding creative elements like this can truly transform any space and make your living room feel uniquely yours.
Build Geometric Vases From Paper
I’ve found building geometric vases from paper adds a striking, modern accent to any room.
I’ll show you how to start by choosing the right paper and then constructing clean shapes.
Finally, we’ll explore simple decorating techniques to finish your unique vase.
Incorporating these crafts can also serve as small living room decor ideas that elevate the whole space.
Choosing Your Paper
The first step in building your own geometric vase is selecting the right paper.
I consider these four key traits to guarantee my vase is both beautiful and sturdy:
- Weight: I use cardstock, as it holds crisp folds.
- Color: I pick solid colors or subtle patterns for a modern look.
- Finish: A matte or light gloss works best.
- Size: Standard letter or A4 sheets are perfectly manageable to start.
Building Geometric Shapes
Once you’ve selected your paper, let’s transform those flat sheets into the three-dimensional forms that will become your vase by mastering a few essential folds.
I’ll start with crisp valley and mountain folds to create precise edges.
We’ll then lock these panels together with simple tabs or slits, building up the sides.
Accuracy in these folds is your key to a stable, geometric structure that stands proudly.
Decorating Vases Simply
Four simple techniques let you turn plain geometric vases into decorative centerpieces.
I’ll show you how to personalize them with items you already own.
- Wrap with Twine: Coil jute or yarn around the vase for rustic texture.
- Paint Geometric Patterns: Use painter’s tape as a guide for crisp lines.
- Apply Decoupage: Adhere patterned paper or fabric scraps for a collage effect.
- Add 3D Embellishments: Glue on beads, buttons, or dried flowers.
Make a Sculpture From an Old Book
Uncover a unique sculpture within an old book’s pages by sculpting paper into three-dimensional art.
I choose a thick, unwanted book and plan a simple shape, like a heart or bird.
Then, I carefully fold, curl, and glue selected pages to build my form.
This transforms a forgotten object into a striking decorative piece.
You’ll find the process intuitive, requiring only patience and a basic glue.
Frame Windows With Paper Cutout Curtains
I’ll frame my window with delicate paper cutout curtains to add soft, artistic light.
It’s a simple way to personalize any room. Here’s how I do it:
- Choose a sturdy paper, like cardstock or vellum.
- Sketch and cut out a repeating pattern (e.g., leaves, geometric shapes).
- Tape the top edge of my cut sheet to the window frame.
- Adjust the length so it hangs gracefully against the glass.
This technique is one of the aesthetic room inspirations many lovers are copying right now to create their dream space.
Brighten a Corner With Paper Leaf Strands
A simple strand of paper leaves can instantly brighten a dim corner. I cut leaf shapes from colorful scrapbooking paper.
Next, I fold each leaf along a central vein for dimension. Then, I sew them onto a long piece of yarn with my sewing machine, spacing them out.
Finally, I tape the strand’s ends high in the corner and let it cascade down for a lively, natural touch. This easy project adds an elegant feel that can help make small spaces feel luxe.
Hang a Unique Paper Bead Curtain for Your Doorway
Moving from leaves to beads, another way to personalize a space is by crafting a paper bead curtain.
You’ll transform old magazines or patterned paper into a colorful, textured divider for your doorway.
My process is simple:
- Cut long, triangular paper strips.
- Roll each tightly around a skewer to form a bead.
- Seal them with glue or mod podge.
- String your beads onto sturdy cords and hang.
Conclusion
I hope these ideas prove that with a little paper and creativity, you can transform your space in a million different ways. Grab your scissors and glue, pick your favorite project, and just start. You’ll be amazed at how a few simple folds and cuts can create decorations that will absolutely blow your guests away. Now, go make something wonderful.