I start my high-end laundry makeover with a deep clean and fresh paint. Swapping hardware and adding a peel-and-stick backsplash gives instant luxury. I hang a strategic mirror to bounce light and use stylish baskets for smart storage. Even my art and a hardy plant add personal polish. Keeping it clutter-free maintains that custom feel. I’ve got plenty more clever swaps that prove a tight budget never holds great style back.
Clear the Decks With a Deep Clean and Declutter
Begin by emptying your laundry room completely. I haul everything into the hallway, facing the intimidating blank canvas.
I deep clean every surface, scrubbing away grime until things shine.
Now, I ruthlessly declutter, asking if each item truly earns its spot. I donate duplicates and toss broken supplies.
This cost-free reset reveals my room’s true potential and existing storage, giving me a clear vision before I spend a dime.
Incorporating small laundry room ideas can help you create a clutter-free setup even on a budget.
Transform the Space With a Fresh Coat of Paint
Since I now have a clean slate, I grab my roller and tackle the walls with a fresh coat of paint—the single most transformative DIY project for my budget.
I choose a light, reflective color that makes the tight space feel airy and bright.
It’s amazing how this simple, affordable step instantly elevates the whole room, covering old stains and creating a crisp, high-end backdrop for everything else.
Adding smart design elements can further maximize your small laundry room, making the most of every inch with space-saving solutions.
Install Stylish and Affordable Peel-and-Stick Flooring
Next, I give the floor a much-needed makeover with affordable peel-and-stick vinyl tiles. I choose a chic pattern, like marble or geometric tile.
Prep’s key—I clean the old floor thoroughly for a strong bond. Then I just measure, cut, and press each tile into place.
The transformation is instant. It’s a durable, water-resistant surface that looks luxe for a fraction of the cost. Adding smart storage solutions can further enhance the functionality of your laundry room without adding clutter.
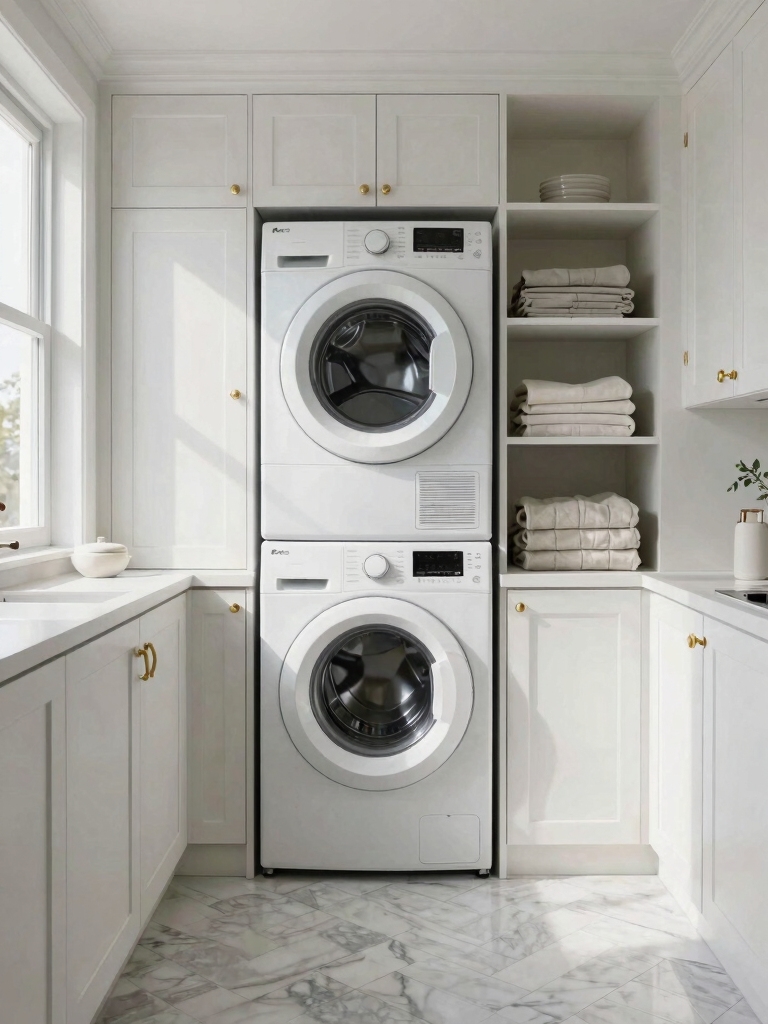
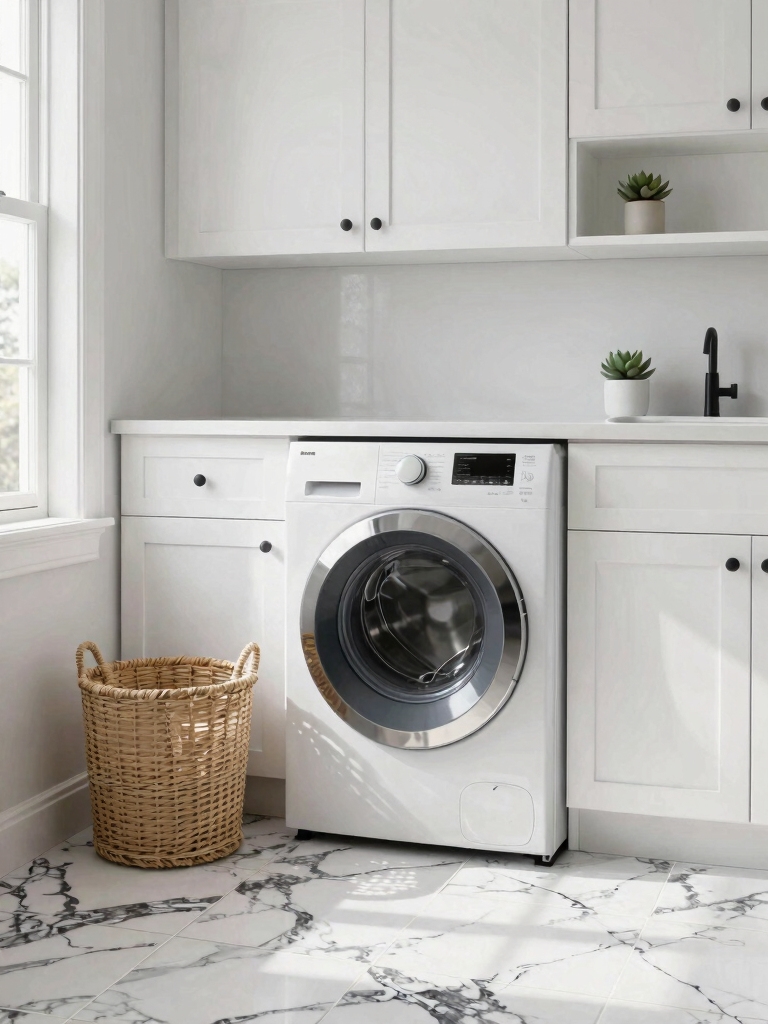
Create a Focal Point With an Inexpensive Backsplash
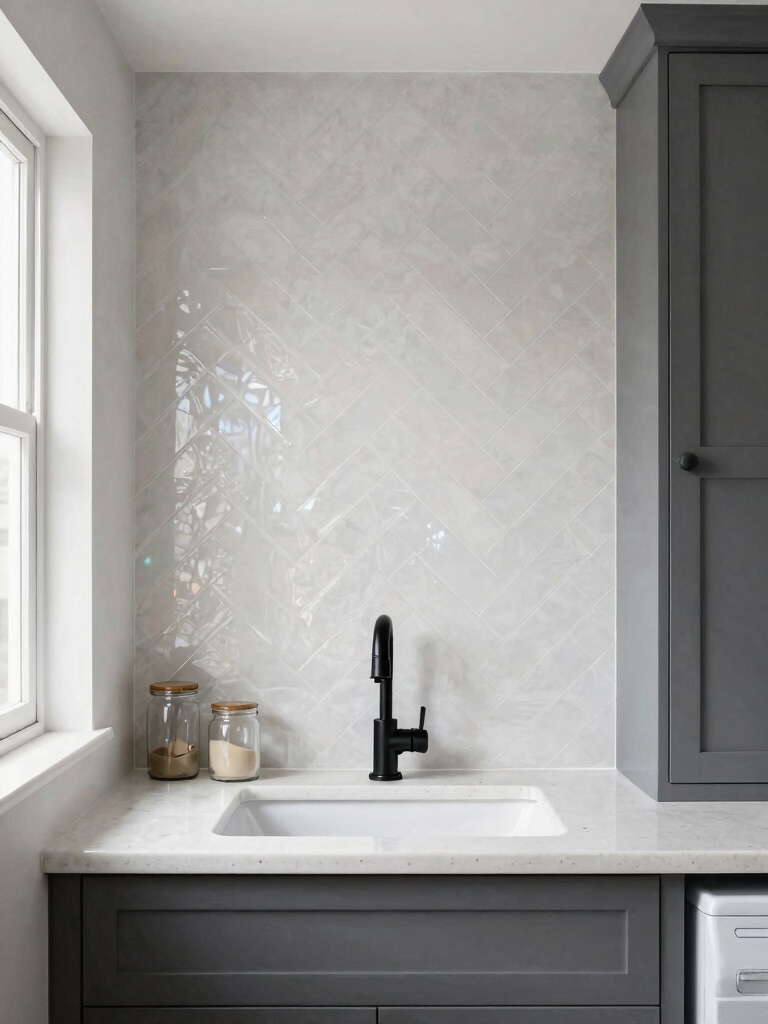
With the floor looking fresh, I direct my attention upward to the walls, where an inexpensive peel-and-stick tile backsplash can create a stunning focal point.
I choose a bold pattern or classic subway tile for visual richness. It’s a simple DIY project; I just measure, peel, and stick.
This transformative layer adds instant character and a high-end look without the cost or mess of traditional tile.
In small spaces, such creative solutions maximize functionality while enhancing style, making the most of every inch with creative laundry room solutions.
Swap Builder-Grade Lighting for a Statement Fixture
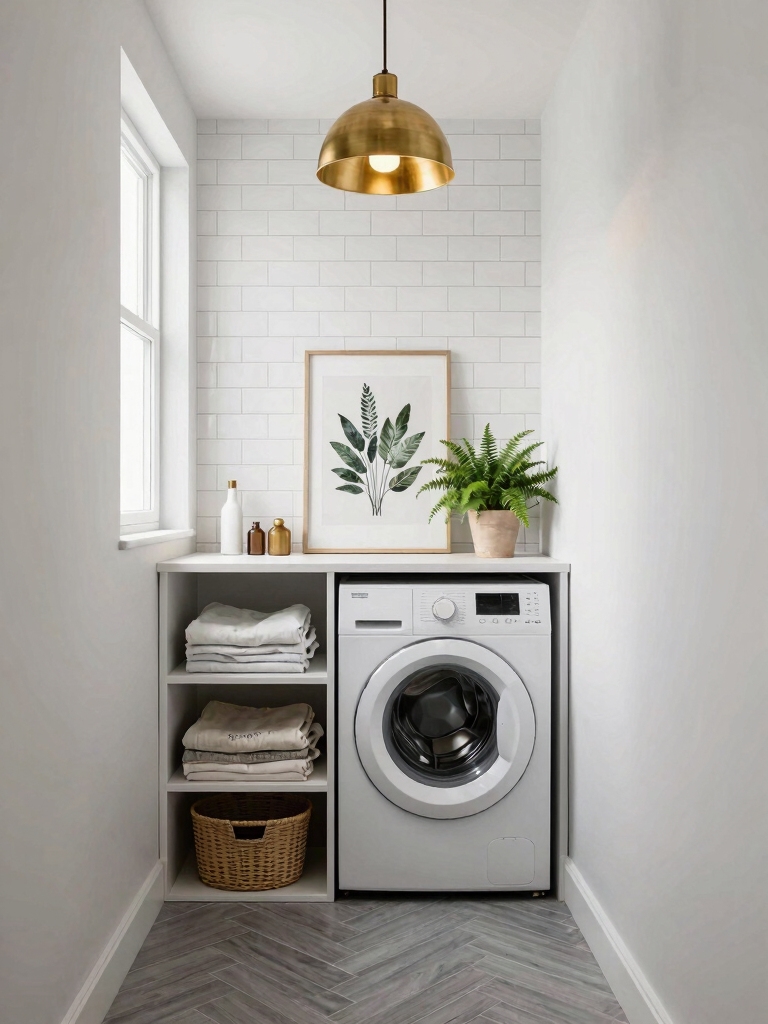
I’m starting by choosing a fixture that fits my space and matches my vibe, whether that’s industrial or farmhouse.
I guarantee it’s sized right so it doesn’t overwhelm my small room but still gives me the bright light I need to spot stains.
Finding a stylish option that provides good illumination is a DIY upgrade that makes a huge visual impact without breaking my budget.
Incorporating smart lighting solutions not only enhances functionality but also elevates the overall style of your laundry room with smart and stylish laundry room solutions.
Define Your Design Style
Since lighting can dramatically shift a room’s entire feel, swapping out a generic builder-grade fixture is one of the most impactful and budget-friendly ways to define your laundry room’s style.
I scour vintage shops for a chic, industrial pendant or opt for a modern geometric flush mount. A simple swap, often a DIY project, injects immediate personality and completely reorients the space around my chosen aesthetic.
Choose An Appropriate Scale
The single most eye-catching upgrade in my budget laundry makeover was exchanging a bland, builder-grade ceiling light for a properly scaled statement fixture.
I measured my room, then chose a visually-rich pendant with a diameter suited to the space.
This one DIY swap instantly elevated the room’s style without a high-end price.
It proves scale is essential; a fixture too small looks lost, while one too large overwhelms.
Focus On Functional Lighting
Properly scaled lighting isn’t just decorative—it’s my most important functional upgrade.
I swapped my dull builder-grade dome for a statement pendant. I found a gorgeous, sculptural one at a thrift store and installed it myself.
Now, it casts beautiful shadows and floods my sorting station with perfect light. That single, budget-friendly fixture makes the whole room feel custom and helps me spot every stain.
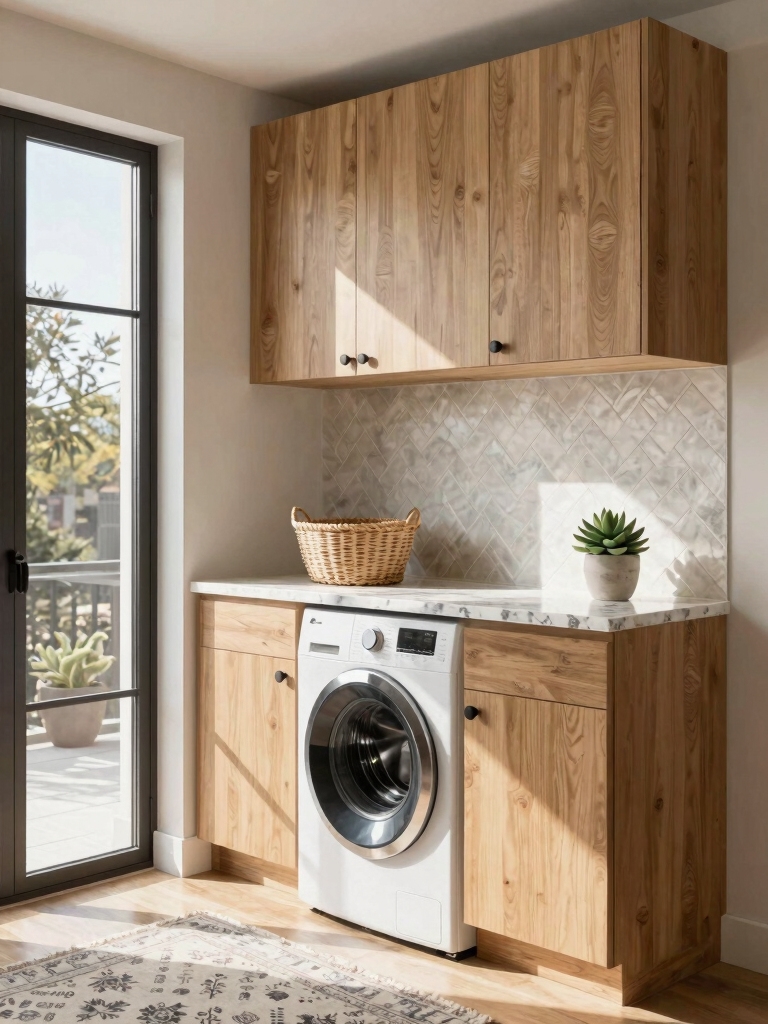
Build a Custom-Looking Countertop on a Tight Budget
Achieving a custom-looking countertop doesn’t require expensive materials; you can transform basic plywood or an old door into a stylish surface with just paint and creativity.
I’ll sand it, apply a few coats of durable enamel paint, and maybe use painter’s tape for a chic two-tone or geometric design.
A simple polyurethane topcoat adds protection and a subtle sheen, giving me a high-end look for practically nothing.
In small spaces, these thoughtful design choices help create the illusion of a spacious oasis while maximizing functionality.
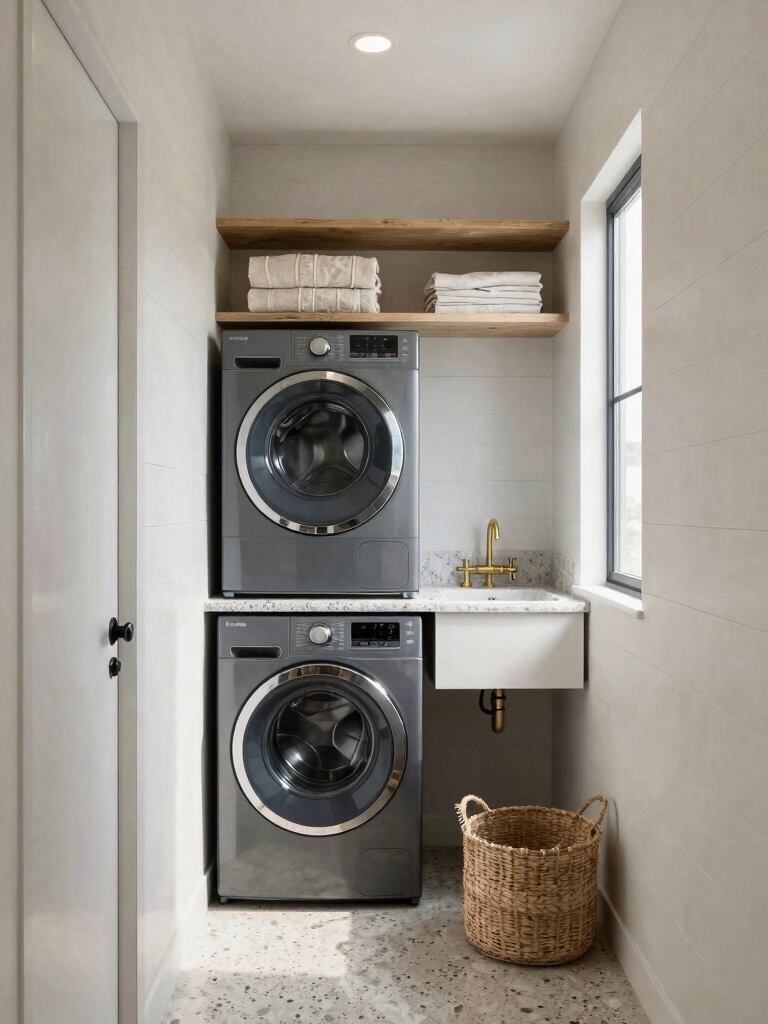
Elevate Your Sink With a New Faucet and Accessories
I can make my utility sink feel like a real feature by swapping the old faucet for a sleek, modern one.
I’ll add some DIY-friendly accessories like a wall-mounted dish soap dispenser to keep things tidy.
This small update creates a neat focal point and solves my sink-side clutter in one affordable weekend project.
Incorporating stylish storage solutions helps maximize both functionality and aesthetic appeal in small laundry spaces.
Faucet As A Focal Point
Don’t underestimate the visual impact a new faucet and a few accessories can have in your laundry room.
I swapped my standard model for an affordable, high-arc brushed nickel one. Its clean lines instantly modernized the space.
I then added a matching soap dispenser. This tiny, DIY-friendly change created a focal point that makes the whole utility sink area feel intentional and surprisingly upscale.
Thoughtful Sinkside Organization
Even if your utility sink area feels a bit neglected, you can transform it with affordable storage and some stylish coordination.
I focus on a cohesive look by matching my sink accessories to a new faucet. This zone becomes a sleek, functional hub that looks custom.
Here’s my approach:
- Anchor with a faucet: A brushed nickel or matte black pull-down elevates everything instantly.
- Corral essentials: A caddy for soaps and a hanging rack for brushes contain clutter.
- Add a personal touch: I use a small wooden shelf or a framed print for character.
Add a Fold-Down Ironing Board to Save Space
If you’re short on square footage, you can tuck a fold-down ironing board inside a cabinet or mounted to the wall.
I love this space-saving trick. A simple hardware-store version looks clean and custom when you paint it to match your cabinetry.
It disappears when I’m not using it, keeping the area clutter-free. This is one of my favorite budget-friendly upgrades that instantly polishes the whole room.
For even more efficiency, consider incorporating clever storage solutions to maximize every inch of your laundry space.
Maximize Vertical Space With a Tension Rod Drying Rack
Just as a fold-down ironing board clears the floor, a simple tension rod can open up your laundry room by moving the drying process upward.
I install one between two walls or inside a cabinet, instantly creating a hidden drying rack. It’s a visually clean, budget-savvy DIY win that keeps delicates and hand-washables off precious counter space.
- Leverage Dead Air: Transform unused vertical real estate into a functional zone.
- Prioritize Adaptability: Easily remove the rod when you need full cabinet access.
- Celebrate Simplicity: Achieve a streamlined look without built-in cabinet costs.
This budget-friendly solution is perfect for transforming your laundry room without spending much.
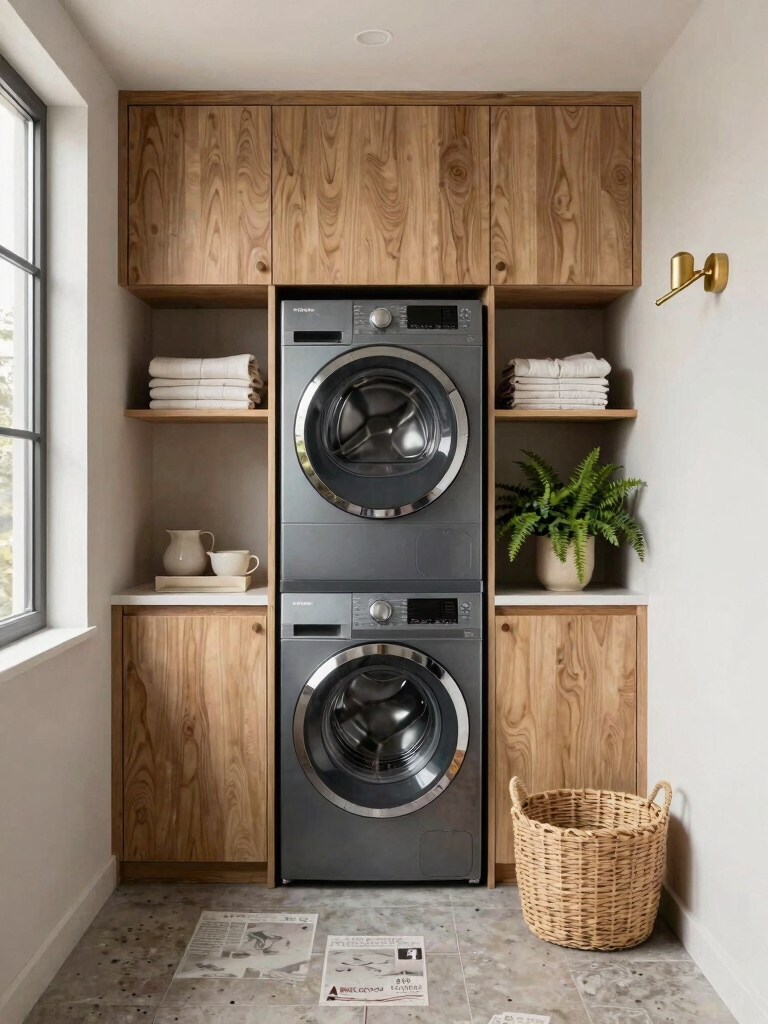
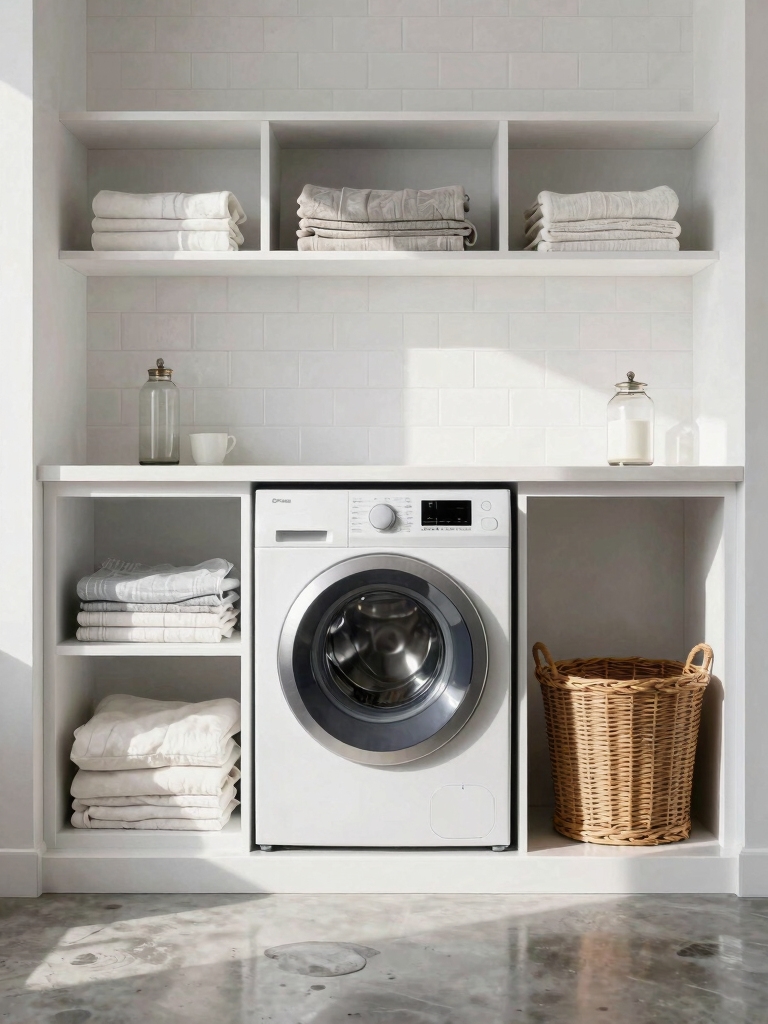
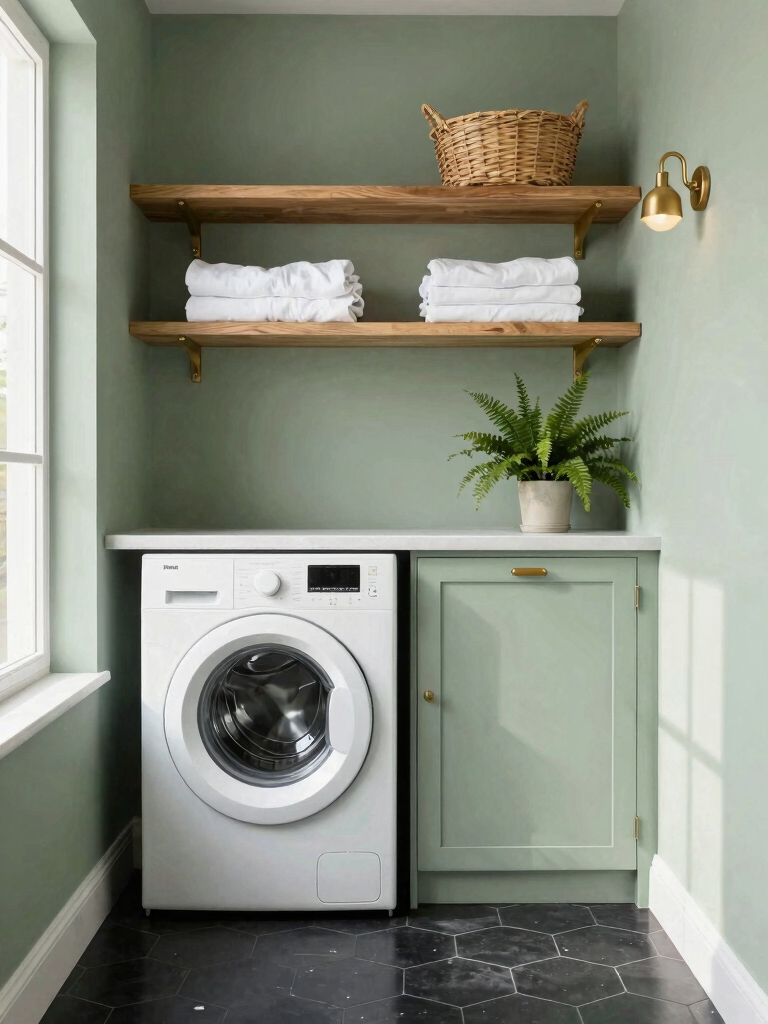
Use Open Shelving for an Airy, Custom Feel
While we’re looking up, let’s tackle another vertical space solution that feels custom without the custom price tag: open shelving.
I use affordable pine boards and basic brackets, then stain or paint them for a built-in look. This instantly opens up my tiny room and makes essentials accessible.
I style shelves with jars for laundry pods and a small plant for a high-end, airy feel I adore.
For even more organization, consider clever cabinet solutions that hide everything and keep your laundry room tidy with smart storage ideas.
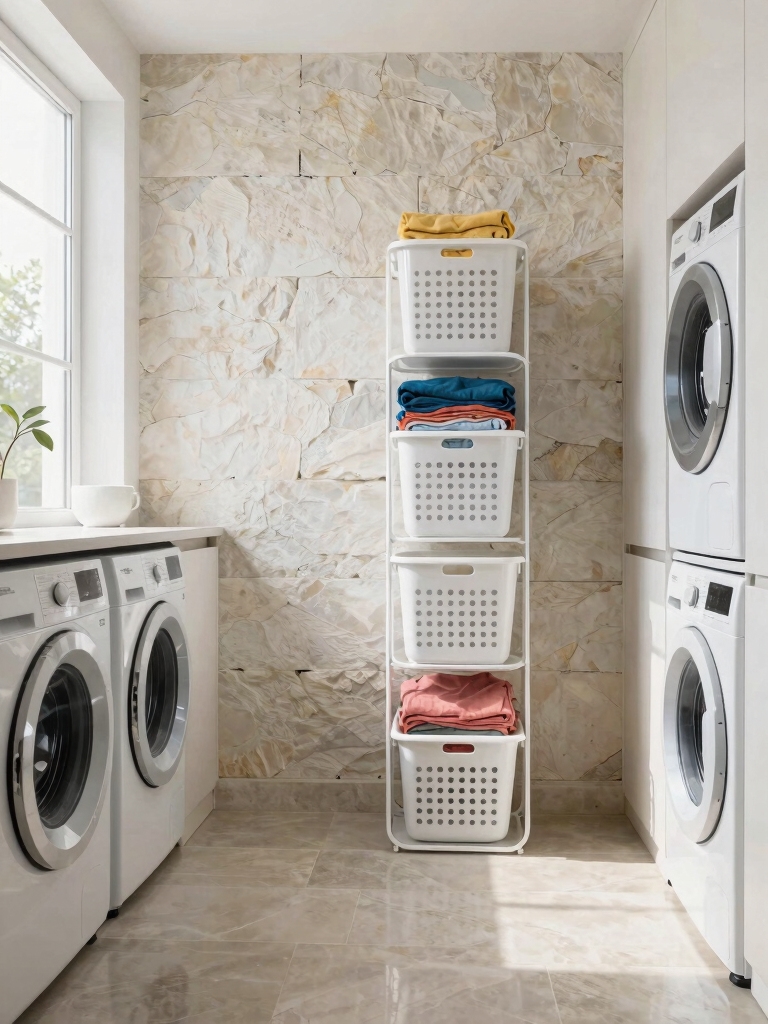
Hide Clutter in Chic Baskets and Coordinated Containers
Because even the tidiest spaces need smart storage, I corral my laundry day clutter in budget-friendly baskets and matching containers. I shop discount stores or use plain bins I’ve personalized. A unified look instantly elevates the room while keeping essentials within reach.
- Visual Harmony: Matching materials like all natural seagrass create a calm, curated feel.
- Functional Design: Label each container to streamline your sorting routine.
- DIY Upgrade: Stencil a simple pattern onto basic boxes for custom flair.
Conceal Supplies in a Lidded Hamper or Cabinet
To keep my laundry supplies neatly out of sight, I stash them in a lidded hamper or a simple cabinet.
A woven basket with a lid adds warmth, while a plain storage unit gets a quick DIY makeover.
I use chalk paint for a custom look, hiding detergent and stain sticks inside.
This instantly declutters my space, creating a streamlined, high-end feel without a major renovation.
Upgrade Cabinet Hardware for an Instant Lift
My laundry room’s cabinet hardware gave me a quick, affordable refresh. I swapped basic knobs for stylish pulls, which felt like adding jewelry to the space.
The visual impact is huge for a small price. It’s an easy, DIY project that anyone can tackle in an afternoon.
- Focus on Finish: Black, brass, or chrome can instantly modernize dated cabinets.
- Mind the Scale: Oversized pulls make basic cabinets feel custom.
- Mix Textures: Combine sleek metals with matte finishes for depth.
Add High-Impact With Peel-And-Stick Wallpaper
I’m a huge fan of peel-and-stick wallpaper for a quick, cost-effective upgrade that delivers a big visual punch.
It transforms small spaces dramatically without needing professional help.
You’ll find the application is a simple, satisfying do-it-yourself project that you can finish in an afternoon.
Quick Cost-Effective Upgrade
Because you want big style on a small budget, let’s tackle those plain walls with peel-and-stick wallpaper.
I found it’s a renter-friendly, mess-free transformation you can complete in an afternoon. Choose a bold, large-scale print—it’ll distract from the room’s size and give it a designer touch.
- Maximizes Impact: A dramatic pattern instantly elevates the entire space.
- Protects Surfaces: It acts as a wipeable, durable backsplash.
- Empowers You: This DIY proves high-end looks are totally accessible.
Transform Small Spaces Dramatically
Peel-and-stick wallpaper does more than just cover a wall; it actively transforms the entire feel of your compact laundry area.
I find a bold pattern or metallic texture instantly creates a high-end, designer look for a fraction of the cost.
It’s a powerful tool that makes my small space feel intentional and dramatic, proving you don’t need a major renovation to achieve a stunning visual impact.
Simple Do-It-Yourself Application
To add high-impact with peel-and-stick wallpaper, it’s easier than you might think—you can install a stunning feature wall yourself in just an afternoon.
I transform my entire laundry nook for under $50. The key is planning your pattern placement before you stick.
- Measure twice, cut once to minimize costly waste.
- Smooth out air bubbles as you go for a flawless finish.
- Start from a plumb line to keep your pattern perfectly aligned.
Bounce Light Around With a Strategic Mirror
A single, strategically placed mirror can dramatically amplify the light in your laundry room without adding any new fixtures.
I’ll position mine opposite the window to double the natural glow. A thrifted, ornate frame instantly elevates the space.
This clever trick creates an airy, open feel, making my compact room appear larger and more luxurious, all for the price of a simple DIY hang.
Incorporate Personal Touches Like Art and Greenery
Beyond brightening the room with mirrors, making the space feel uniquely mine comes from adding art and plants.
I frame my kids’ drawings and hang thrifted botanical prints. A simple shelf holds DIY propagation jars and a rugged succulent. These touches inject soul without spending much.
- Art tells your story: Use personal photos or inexpensive prints.
- Greenery brings life: Even a single hardy plant softens the mood.
- DIY adds character: Propagate cuttings or craft your own frames.
Maintain Your High-End Look With Simple Habits
I’ll keep my chic laundry space feeling luxe by giving it a quick daily reset.
I’m putting together my own cleaning caddy with basic supplies I already own.
Finally, I’ll make decluttering a habit so my clever DIY projects stay the star of the show.
Implement A Daily Reset
While the high-end finishes in your laundry room cost little, maintaining that polished look hinges on a few simple daily habits I swear by. My secret’s a five-minute “reset” after each load. This stops clutter from ever accumulating.
- Wipe surfaces with a microfiber cloth to keep your chic laminate counters gleaming.
- Return supplies to their labeled jars for that curated, organized aesthetic.
- Sweep lint immediately so the floor always looks freshly cleaned.
Designate A Cleaning Caddy
Nothing maintains a polished aesthetic quite like having every tool within arm’s reach.
I corral my stain remover, microfiber cloths, and dryer balls into a single, chic caddy. I found a pretty basket at a thrift store and lined it with leftover fabric.
This simple DIY instantly organizes my supplies and elevates the space. It’s a visual trick that makes routine cleaning feel luxurious and effortless.
Establish A Decluttering Routine
Just as my cleaning caddy keeps tools handy, a quick daily habit keeps the clutter from ever piling up.
I do a two-minute sweep each evening to reset the space, which protects my budget-friendly upgrades and maintains that luxe look. For me, the routine is a form of visual self-care.
- Rehome one stray item like a rogue sock.
- Wipe the washer’s seal to prevent grime.
- Toss the dryer lint immediately.
Conclusion
I’ve seen firsthand that a little elbow grease and these clever updates make all the difference. Sticking to my budget, I chose high-impact DIYs like peel-and-stick and a statement light. Keeping it clutter-free with good habits seals the deal. Trust me, you can have a laundry room that looks like a million bucks without spending a fortune.