I think you can instantly upgrade your cramped laundry room. I’d start by stacking your washer and dryer above a deep utility sink to free up floor space. For versatility, a fold-down counter over the sink creates a folding station that disappears. Tuck a narrow sink between side-by-side machines or use a retractable base cabinet for a mobile unit. These visual transformations make every inch work harder and reveal more clever space-savers just ahead.
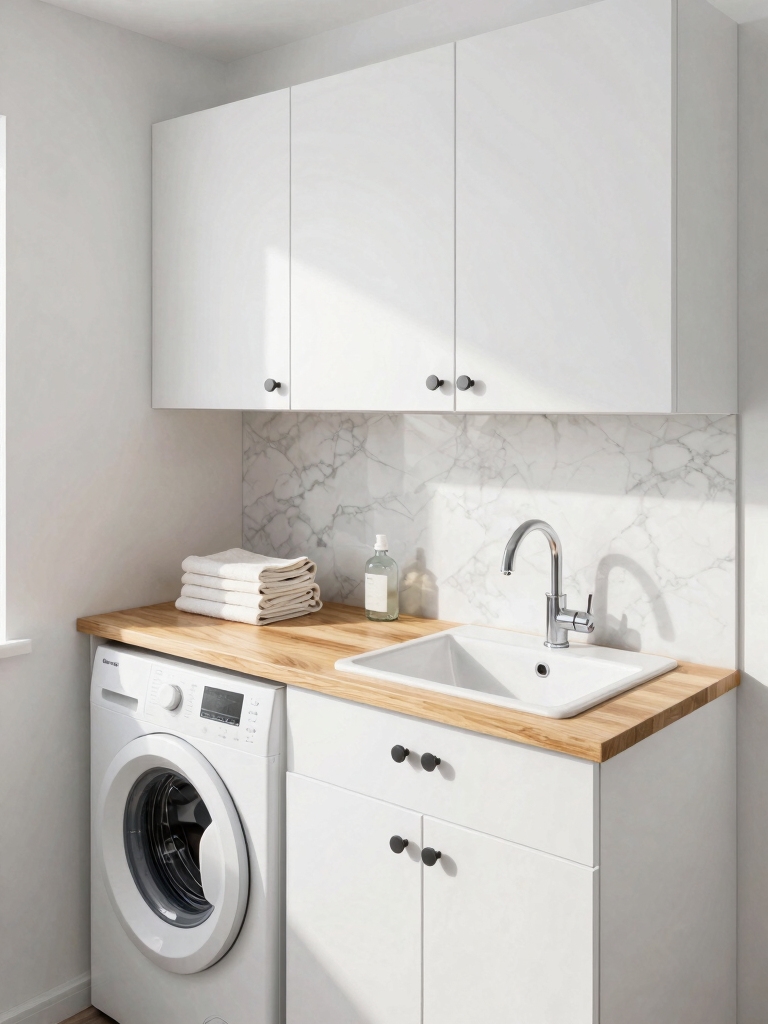
Choose an All-in-One Laundry Sink Cabinet
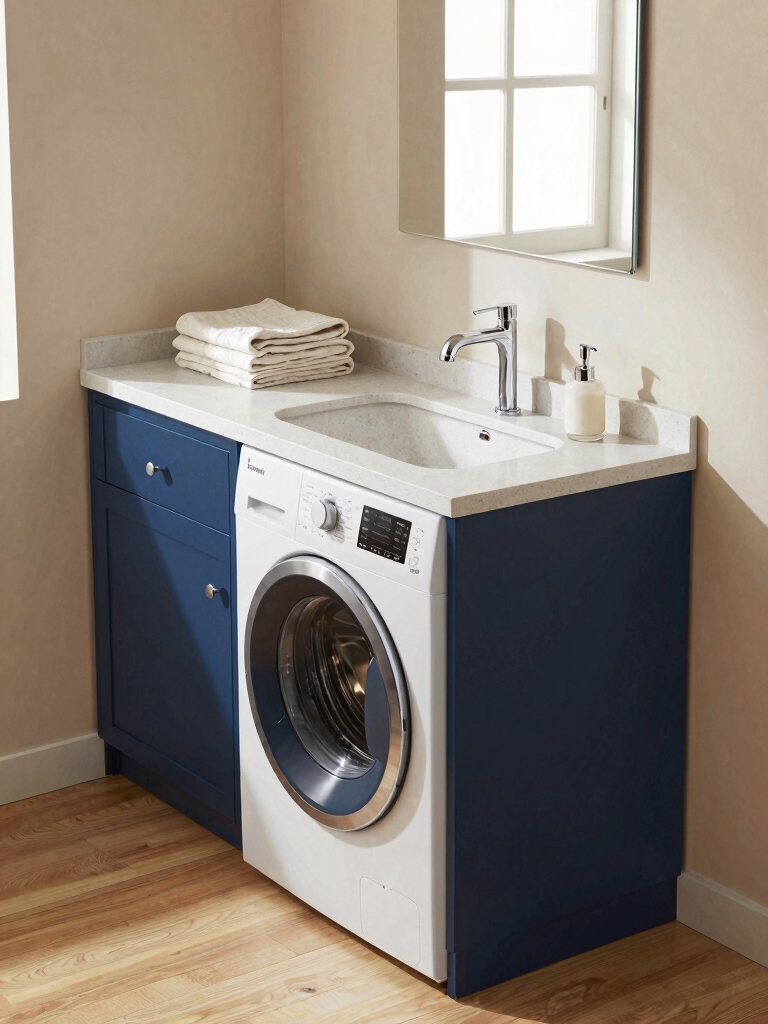
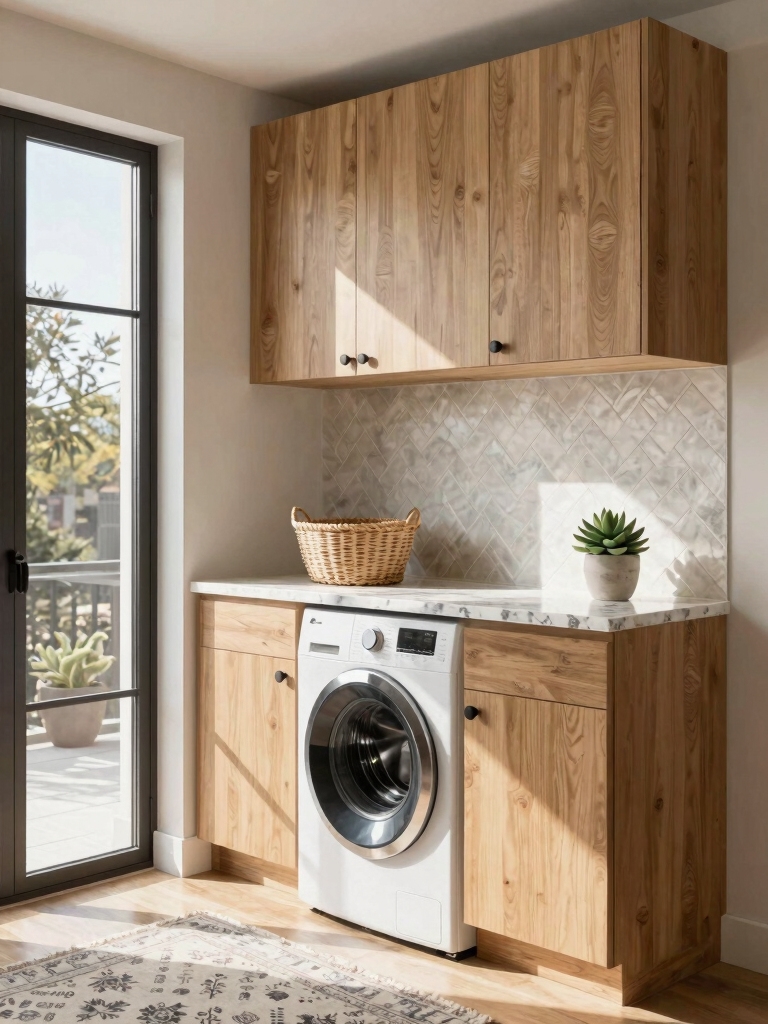
One option I always consider for maximizing a laundry room’s functionality is an all-in-one sink cabinet.
I love how it consolidates everything: a deep basin for handwashing, a sturdy countertop for folding, and cabinets below to hide detergents.
It transforms a cramped corner into a dedicated station.
I choose a model with a seamless, waterproof top to easily wipe down after tackling messy pre-treatment chores.
Adding clever storage solutions and thoughtful design elements can make even the smallest laundry room feel like a spacious oasis.
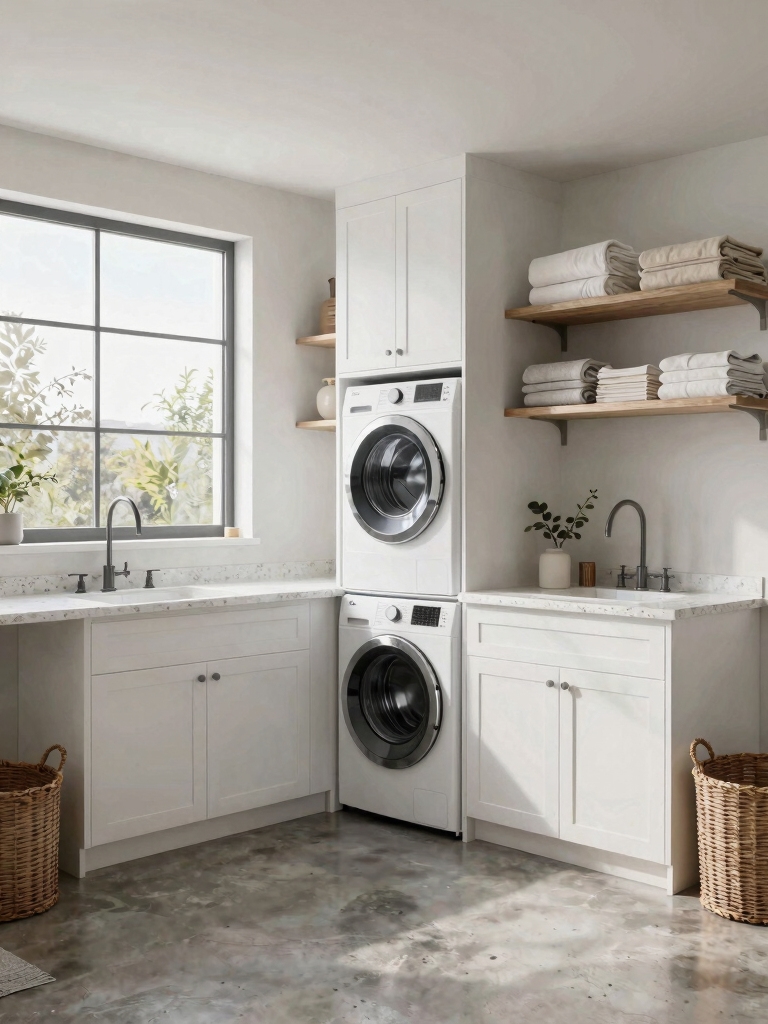
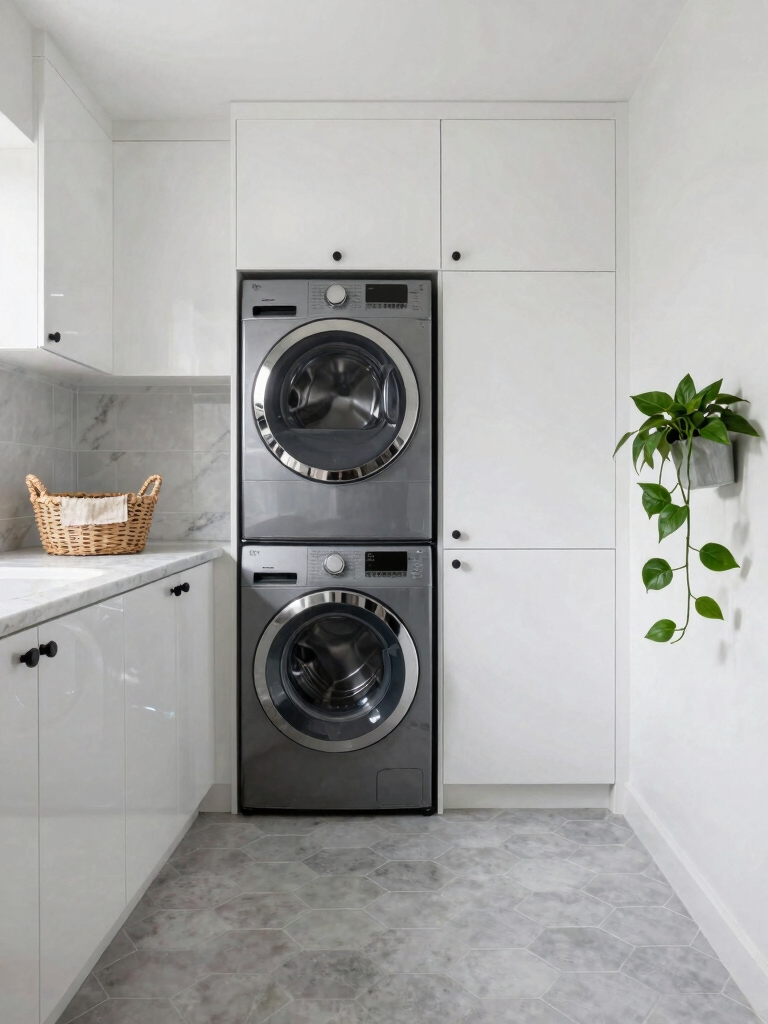
Stack Machines Above a Utility Sink
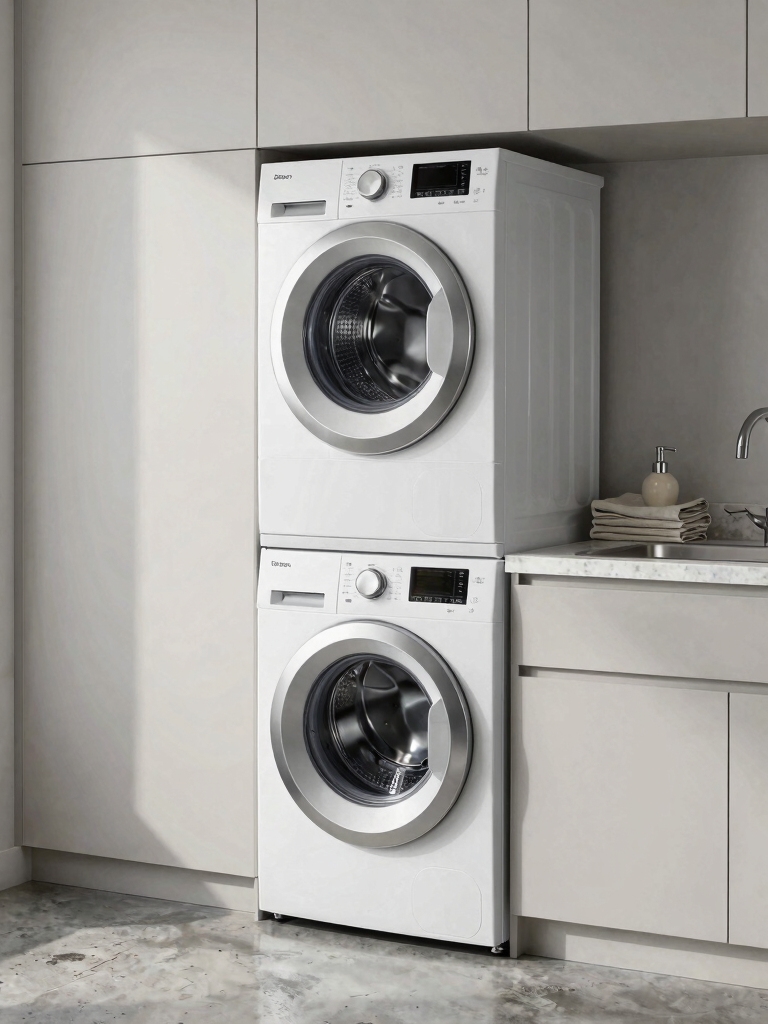
Beyond the sink cabinet, another space-saving tactic I use is stacking the washer and dryer over a utility sink.
I gain an entire counter for folding while keeping the deep basin accessible. It creates a clean, vertical line. Just confirm your units are stackable and properly secured.
- Maximize vertical space to free up the floor.
- Verify your machines are designed for secure stacking.
- Keep plumbing and drains accessible behind the units.
Additionally, incorporating small stackable laundry room ideas can significantly enhance the spacious feel of your laundry area without sacrificing functionality.
Build a Fold-Down Counter Over Your Sink
When you’re short on square footage, a fold-down counter over your utility sink is a brilliant trick I employ to instantly create a folding station that disappears when you need the sink.
I mount a sturdy wood panel to the wall with strong hinges. It’s perfectly sized to span the sink basin, providing a flat, solid surface for folding laundry before I simply fold it back up against the wall.
This clever solution is one of the best small space ideas that saves the day in a cozy laundry room.
Slide a Sink Into a Retractable Base Cabinet
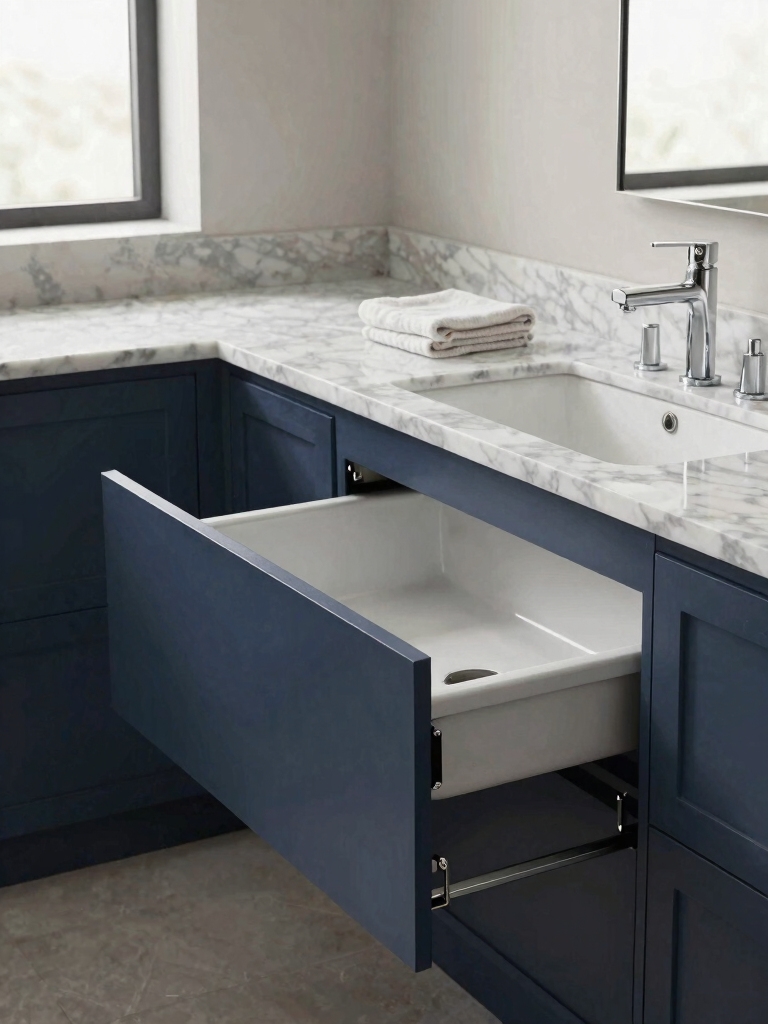
To maximize my limited floor space, I installed a utility sink inside a retractable base cabinet, fundamentally creating a mobile sink that slides out from beneath my washer.
I mounted it on robust drawer slides for smooth operation and sealed the plumbing with flexible PEX lines.
The setup gives me:
- Instant access when I need a deep basin for messy tasks.
- A hidden, clean look when I slide it back.
- Zero wasted permanent floor footprint.
This design is one of the very small laundry room ideas that fit more into less by making every inch count with smart design tips.
Tuck a Corner Sink Behind Angled Machines
Since my retractable sink makes the most of space beneath the washer, I also squeezed a laundry sink into a corner by angling my machines.
I turned my washer and dryer diagonally against the walls, creating a hidden triangular nook behind them.
That’s where I installed a small, deep-basin utility sink. It tucks completely out of the main walkway but remains perfectly accessible for filling buckets or handwashing.
This layout is one of many smart solutions for a functional laundry room that maximize utility in tiny spaces.
Squeeze a Sink Between Your Washer and Dryer
If your machines are side-by-side, you might exploit the gap between them by fitting a narrow sink right in that slot. I’d measure precisely and install a shallow bar or utility sink. This gives me a perfect spot for handwashing delicates.
- Find a sink less than 15 inches deep to guarantee a comfortable reach.
- Run plumbing lines neatly through the shared wall.
- Use the basin for soaking stained items before they go into the washer.
To further maximize space, consider adding vertical storage above the sink to keep cleaning supplies organized and within easy reach.
Select a Space-Saving Pedestal Laundry Sink
While choosing a sink, I look for a pedestal model because its narrow footprint tucks neatly into corners or alongside appliances without consuming too much floor space.
The single column frees up my legs, making tasks more comfortable.
I prefer a deep basin for soaking items and a durable, seamless material like stainless steel that’s easy to wipe down and resists stains from laundry detergents.
This clever solution helps maximize every inch in a small laundry room, making it both functional and space-savvy with a pedestal laundry sink.
Opt for a Compact Sink With a Drying Rack
A compact sink crowned with a drying rack brings my laundry room’s efficiency to the next level. I hand-wash delicates right over the basin, then lift the rack for drip-drying. This combo saves precious counter space and keeps wet items contained.
- I choose a stainless steel sink for its shallow profile and durability.
- The rack’s angled bars channel water directly back into the basin.
- A wall-mounted faucet frees up the entire sink ledge for sorting.
To make the most of limited space, incorporating clever solutions designed for compact laundry rooms can significantly enhance functionality and organization.
Hide a Sink in a Pull-Out Ironing Board Cabinet
By maximizing vertical space, I conceal a small utility sink behind a pull-out ironing board cabinet.
I install the cabinet above a countertop, so the ironing board slides right over the sink basin when stowed. A shallow, rectangular sink fits perfectly.
When I need to hand-wash a delicates, I simply pull down the board to access the faucet and basin below.
It’s my ultimate two-in-one space saver.
To further optimize your laundry room, consider stackable washer-dryer units to free up additional floor space.
Install a Sink in a Convertible Rolling Cart
I’ll show you how a rolling cart can become a mobile utility cart with a sink that’s a real space-saver.
You’ll need to pick materials that can handle water and weight, like sealed wood or waterproof laminate.
With this setup, I can roll my prep station right over to the washer when I’m done.
This approach is perfect for those looking to transform your mudroom into a functional laundry space without sacrificing style or convenience.
Mobile Utility Cart Solutions
Because you’re likely working with limited floor space, installing a sink into a convertible rolling cart creates a practical, multi-purpose hub that moves wherever you need it.
I look for a sturdy metal cart with locking casters and a laminate top I can cut to fit a small bar sink. Then, I plumb it directly to the wall with a flexible supply line and a retractable drain hose.
- Pick a cart with a solid, water-resistant top for secure sink mounting.
- Use a flexible PEX line and a coiled drain hose for easy movement and connection.
- Add lower shelves for storing detergents and a hanging bar for drip-drying delicates.
Space-Saving Sink Placement
One smart solution for limited floor space is installing a sink directly into a mobile utility cart, creating a portable washing station I can roll exactly where needed.
I fit a small stainless steel basin into the cart’s top, connecting it to flexible hoses. This setup lets me wash delicates by the machine, then tuck the entire station into a corner or closet, freeing up the main floor area.
Choosing Cart Materials Wisely
While picking materials for a convertible rolling cart, focus on durability and moisture resistance as top priorities. Your sink will be used here, so every component must handle splashes.
I look for heavy-duty casters that lock and sealed finishes that wipe clean. Consider these key materials:
- Frame: Powder-coated steel resists rust better than basic chrome.
- Shelving: Marine-grade plywood or plastic laminate won’t warp.
- Hardware: Stainless steel screws prevent ugly corrosion stains.
Add a Two-Level Counter With a Built-In Basin
I love this idea because it creates two distinct workspaces: the built-in basin gives me a spot for handwashing delicate items, while the lower counter lets me sort or fold a large load.
Dual Workspace Creation
You can immediately transform a cramped laundry area by adding a two-level counter with a built-in basin. I use the deep top for folding and the lower, sink-level section for treating stains. This creates two distinct work zones in one footprint.
- Separate Wet & Dry Tasks: Keep pre-wash mess contained at the sink level.
- Maximize Vertical Space: The elevated counter provides storage below.
- Define Clear Zones: Physically separates clean folding from dirty prepping.
Sink And Folding Integration
One might think a laundry sink and folding counter must occupy separate spaces, but integrating them into a two-level design reveals efficient multitasking in a single footprint.
I install a lower basin for soaking, then a higher, spacious countertop above it for folding dry clothes. This tiered layout keeps wet and dry tasks organized, and I can easily swivel from washing delicates to sorting a fresh load without moving an inch.
Hide a Sink Behind a Flip-Up Countertop
Since a laundry room sink can clutter a limited counter, a brilliant solution is concealing it behind a flip-up countertop. I install a sturdy, hinged section that lifts smoothly. I keep a waterproof laminate on the surface and add a small latch to secure it.
When I need the basin, I simply flip it up. When I’m done, it vanishes, giving me a full, clean workspace.
- Choose a solid-core panel that matches your cabinetry for a seamless look.
- Install heavy-duty, concealed hinges to support the weight and guarantee smooth operation.
- Seal all edges with waterproof silicone to protect the cabinet interior from moisture.
Combine a Sink With a Foldable Drying Rod
A flip-up countertop keeps the sink out of sight, but when it’s in use, pairing it with a foldable drying rod makes the space work even harder.
I mount the rod to the wall right above the sink. After I hand-wash delicates, I simply unfold it to hang items directly over the basin.
This catches every drip, keeping my floor dry and consolidating wet tasks into one tidy, efficient spot.
Mount a Sink on a Sliding Panel Above the Washer
I find mounting a sink on a sliding panel above your washer creates a brilliant concealed space-saving solution.
You can install a shallow bar sink on a track, so I slide it over the washer when I need to pre-treat stains and push it back against the wall when I don’t.
Just remember to select compatible sink materials, like a lightweight composite, to guarantee the panel slides smoothly without straining the hardware.
Concealed Space-Saving Solution
Mounting a utility sink on a sliding panel above your washer is one of the most ingenious ways to reclaim floor space you’ll find.
I simply slide it out when I need to rinse a stain or fill a bucket, then tuck it neatly away. It keeps my floor completely clear for laundry baskets.
Consider these essentials for installation:
- A sturdy, wall-mounted track system.
- A shallow, rectangular basin.
- A flexible, coiled water supply hose.
Dual-Purpose Sliding Mechanism
Imagine a sink that simply slides out over your washer when you need it and disappears when you don’t. I install it on a sturdy panel mounted to a heavy-duty track above my machine.
When I pull it forward, I’ve got a full basin for pre-treating stains. Releasing a lock lets it glide smoothly back, clearing the entire washer lid for loading.
It’s my perfect dual-purpose space saver.
Selecting Compatible Sink Materials
That sliding mechanism is now ready to support a sink, but its function determines what that sink can be made of. I need a material that’s both lightweight and durable to handle the motion and daily use.
- Stainless Steel: My top pick for its perfect blend of strength, moderate weight, and easy cleaning.
- Solid Surface (e.g., Corian): A great, seamless option that’s lightweight and stain-resistant.
- Composite Granite: Extremely tough, but verify its weight won’t strain the sliding hardware.
Tuck a Sink Into a Shallow Overhead Cabinet
One clever way to reclaim your precious floor space is by tucking a small laundry sink directly beneath a shallow overhead cabinet.
I imagine a wall-mounted faucet and a narrow basin, perhaps just ten inches deep. You’ll slide its front edge right under that cabinet’s base, creating a neat, unified line.
This frees up the floor below for my laundry basket or a slim rolling cart, adding function without clutter.
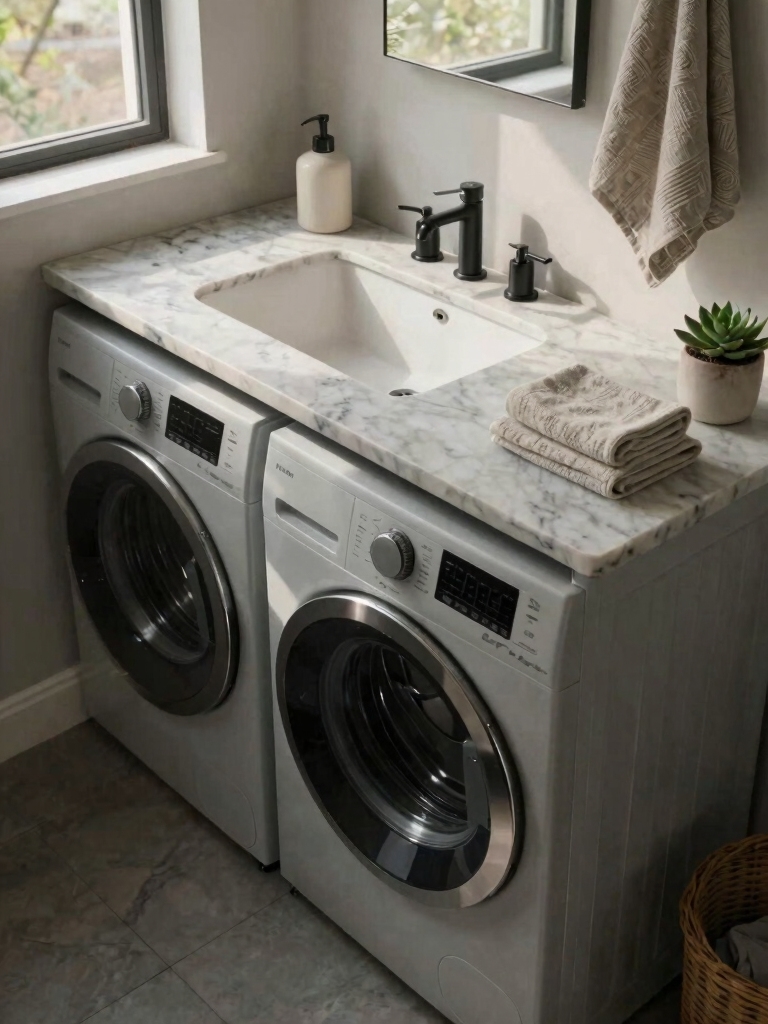
Use a Sink Basin as a Countertop Extension
I love a built-in extension design because the basin’s edge aligns perfectly with my countertop’s depth, creating one continuous workspace.
A classic counter-style apron sink actually provides a bit of extra front surface that I can use for stacking folded items.
Choosing the same material for both the sink and the surrounding countertop, like a solid slab of quartz, gives me that seamless, clean look I’m after.
Built-In Extension Design
Maximize every inch by letting your laundry sink double as a practical counter extension. I choose a drop-in or undermount basin and have my countertop material flow seamlessly over its edges.
This creates one unified, waterproof worksurface perfect for sorting, folding, or treating stains right at the source.
- Seamless Surface: Use quartz or solid surfacing for a continuous, spill-resistant plane.
- Undermount Magic: Tuck the basin underneath for easy debris wiping.
- Support Structure: Build sturdy cabinetry beneath to handle the sink’s weight and provide storage.
Counter-Style Apron Sinks
Imagine transforming your laundry sink into a sprawling, work-ready countertop with a counter-style apron sink.
I install a wide, shallow basin so its front lip extends forward under my counter’s edge. This apron acts as a seamless countertop extension, giving me a vast, flat surface for sorting and treating stains.
It’s a single, integrated piece, so I eliminate that grimy seam where my old drop-in sink met the counter.
Seamless Countertop Material
Choosing the right material for this extended countertop surface matters because it needs to match the sink’s durability and cleanability.
I treat the basin as a continuous work zone, so I opt for a nonporous solid surface like quartz. It creates a flawless, water-resistant plane where I can scrub stains directly without worrying about seams trapping grime.
- Quartz: Engineered for uniform strength and stain resistance.
- Solid Surface: Can be sanded to repair minor scratches.
- Integrated Sink: A molded, seamless bowl eliminates the dirty rim gap.
Group Machines to Frame a Central Sink Station
Grouping the washer and dryer on either side of a deep utility sink frames your space around this essential hub.
I place my machines flanking it to create a dedicated, efficient work triangle. This centralizes all tasks—soaking, rinsing, washing, drying—within a single, tight footprint.
The sink’s basin becomes a natural focal point, and I gain a clear countertop surface above it for sorting and folding.
Conclusion
So, there you have it. My quest for laundry room salvation, complete with a sink. I’ve considered cabinets that fold, slide, and magically disappear. I’ve pondered stacking, tucking, and framing my appliances into a symphony of utility. Now, if only I could train the socks to march themselves into the hamper, my domestic opera would be complete. Until then, a sink is a very good start.