Let’s start by turning your walls into a story with a personal photo gallery. I use thrifted frames and arrange my favorite prints with simple tape. For travel memories, I cluster ticket stubs on a large map. I even frame pressed leaves or stretch leftover fabric over wood for textured art. You can create stunning displays with vintage plates or a grid of mirrors. I’ll show you how these ideas transform a space effortlessly.
Start With a Personal Photo Gallery Wall
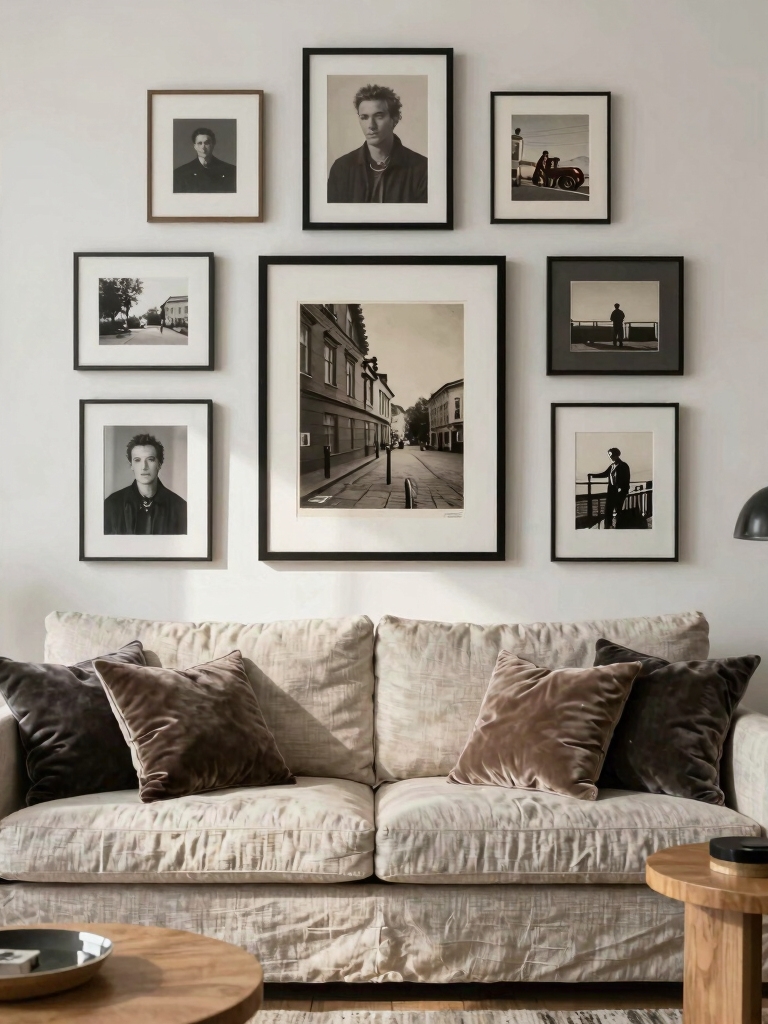
If you’re looking for an affordable wall decoration that adds personality, I’d start with a personal photo gallery.
You don’t need fancy frames; I use thrifted ones or simple clipboards. I arrange prints in a grid with painter’s tape first.
It’s cheaper than art, and every picture tells your story. The cost is just printing photos—my phone’s gallery is already full of them.
For added impact, consider mixing different sizes and styles to create wall art living room decor that suits every wall.
Curate a Wall of Travel Maps and Ticket Stubs
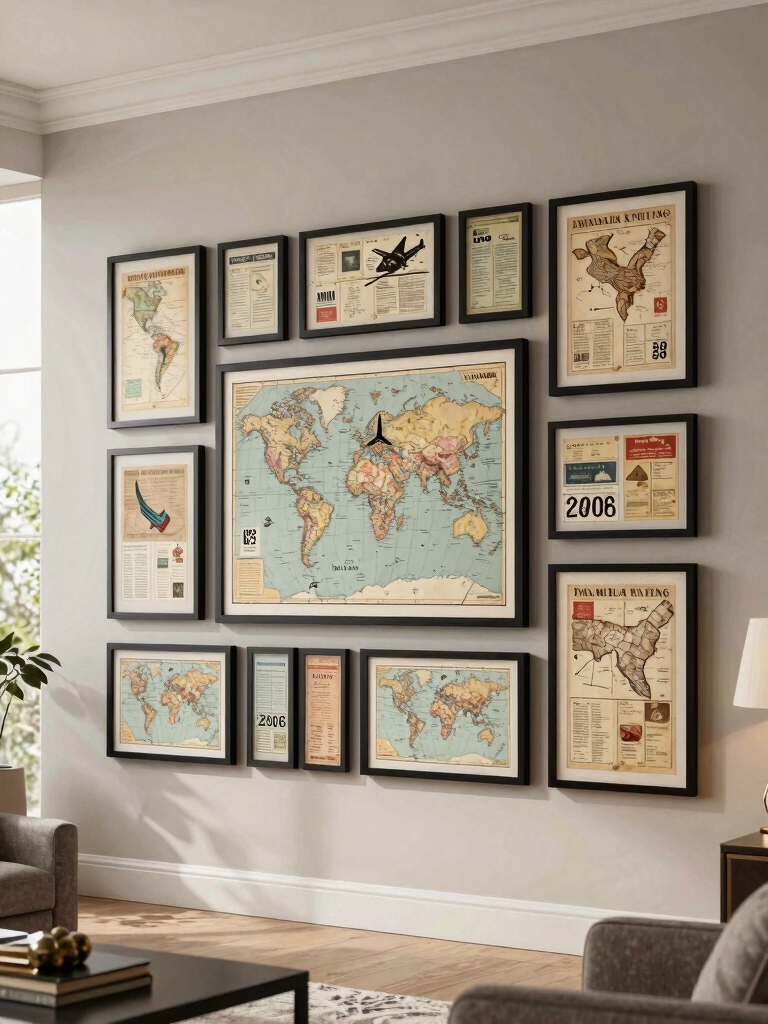
I start by selecting a large, inexpensive map as my focal point and arranging it off-center on the main wall.
I then use simple washi tape to intentionally cluster my favorite ticket stubs and postcards around it, creating a balanced layout.
This practical method turns my keepsakes into a personalized, conversation-starting display without needing a single frame.
This approach is one of many aesthetic room inspirations that can transform your space creatively and affordably.
Create A Focal Point
Transform a blank wall into a travelogue of your adventures by curating a personal collection of maps and ticket stubs. I use a large, central vintage map as my anchor, then build around it. This creates a focal point without spending much.
- Anchor with a Map: Thrift a large framed map for visual weight.
- Layer Memorabilia: Use washi tape to add tickets and postcards.
- Define the Space: Outline the entire collection with LED string lights.
Arrange With Intention
Once you’ve gathered your pieces, arranging them with thoughtful spacing prevents a cluttered look and tells your travel story clearly.
I’ll lightly trace the layout on my wall first. I mix ticket stubs and maps in a balanced grid, leaving two to three inches between each frame.
This approach costs nothing and makes each precious memory stand out, creating a gallery that looks intentional, not thrown together.
Select Your Keepsakes
To build your collection, start by digging through boxes or drawers to find old maps and used tickets—anything that sparks a memory of a place you’ve visited works perfectly.
I then curate and prep my finds. Focus on durable, flat items that are easy to mount.
- Clean items with a soft cloth.
- Press them flat in a heavy book.
- Choose a simple frame or adhesive strips for a budget-friendly display.
Showcase Your Favorite Fabric as Textile Art
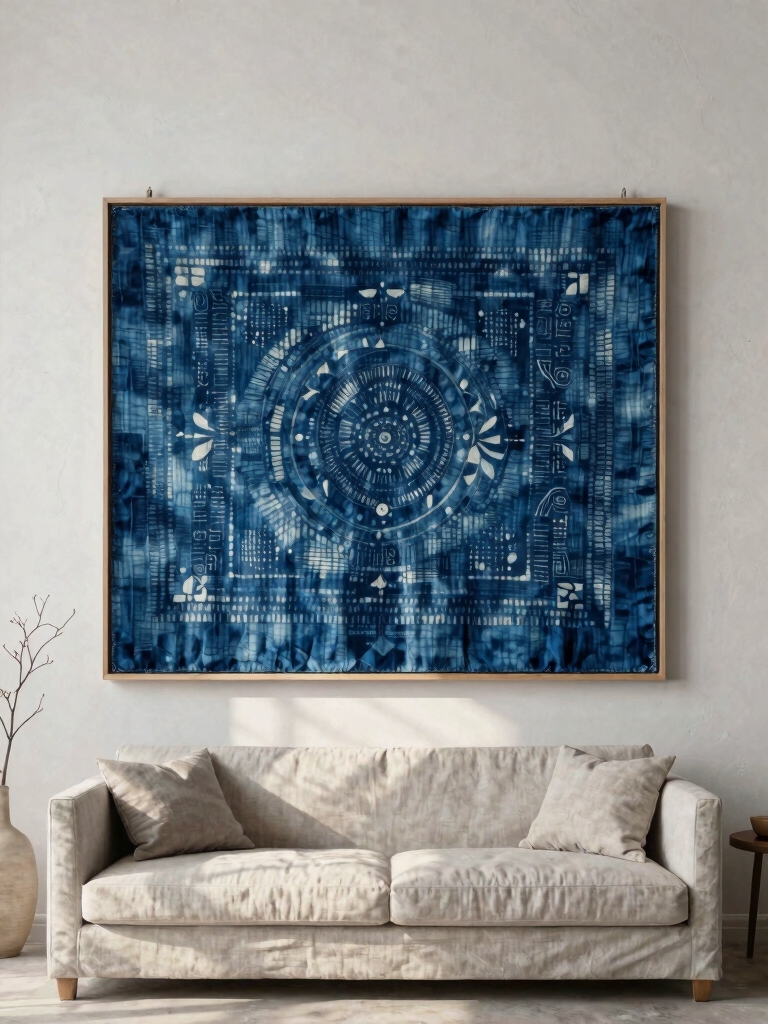
I often turn leftover fabric into art by stretching it over a simple wooden frame I build myself.
For texture, I source inexpensive burlap, linen, or quilt squares from remnant bins at craft stores.
Mounting a favorite patterned cloth this way creates a rich, personalized focal point without a high cost.
This is one of many affordable DIY room decor ideas that can transform your space stylishly with minimal expense.
Selecting Fabric Frameworks
While your favorite fabric might currently be folded in a closet, you can showcase it as stunning textile art by selecting the right framework. I find affordable, ready-made floater frames work best, allowing the fabric’s edges to be visible.
My practical selection tips are:
- Match depth to fabric thickness—choose deeper frames for quilts.
- Prioritize neutral finishes like black or raw wood.
- Repurpose old frames by removing the glass and backing.
Creating Textile Wall Art
Now that you’ve chosen a frame, let’s get your fabric mounted inside it. First, iron your fabric to remove any wrinkles.
Then, lay it flat over the frame’s backing board. I fold the excess fabric edges over the board’s sides and staple them tightly, working from the center outwards to keep it smooth.
Finally, I just secure the assembled backing into the frame’s front casing.
Sourcing Materials For Texture
After mounting fabric in a frame, you might wonder what materials to choose for your own piece. I focus on texture and thrift, sourcing from my own home first.
- Scour your closet for old linens, scarves, or shirts with interesting patterns.
- Check remnant bins at fabric stores for discounted, high-quality offcuts.
- Re-purpose household textiles like napkins, curtains, or quilt samples.
Display a Cohesive Collection of Thrifted Art
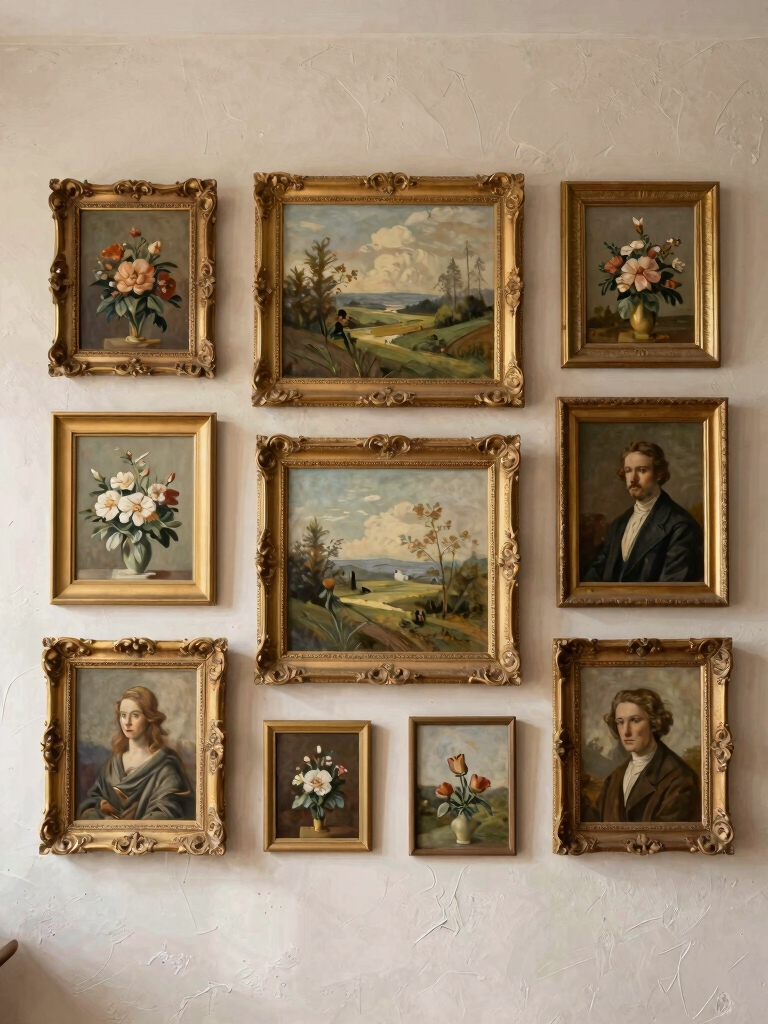
If you’ve gathered an assortment of thrifted art, creating a cohesive display is easier than you might think.
I unify mine by spray painting mismatched frames the same color. Laying them on the floor first helps me arrange the gallery. Keeping a consistent space between pieces, about two inches, makes it look intentional.
A cohesive background, like a white wall, really lets the collection shine. Many top designers emphasize that stylish wall decor can transform a living room without the need for expensive art.
Hang a Statement Collection of Vintage Plates
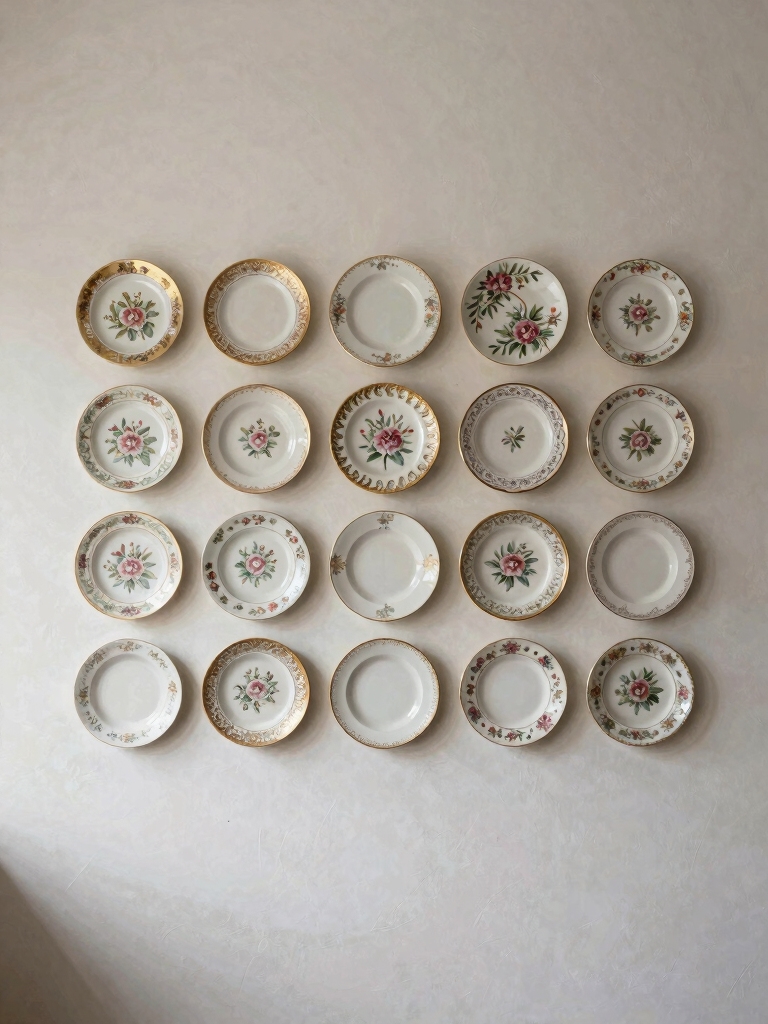
I find I can create a stunning wall display with vintage plates by carefully selecting a specific color palette first.
I then design a cohesive arrangement on the floor before committing to any nails. This practice saves both money and my wall from unnecessary holes.
Incorporating vintage pieces like plates adds a timeless vintage vibe that brings character and warmth to any room.
Curate Your Plate Palette
While you might think collecting vintage plates requires a big budget, I’ve found that curating a statement wall is surprisingly affordable when you focus on thrift stores and flea markets.
My thrifty strategy hinges on three simple rules:
- Mix materials: I combine ceramic, stoneware, and even metal trays for visual texture.
- Prioritize shape: I look for interesting outlines—octagons, scallops, squares—over perfect patterns.
- Embrace chips: Slight wear adds character and slashes the price.
Design A Cohesive Arrangement
Once you’ve gathered your curated collection, arranging and hanging the plates cohesively is where the real magic happens.
I lay them out on a table first, playing with spacing and height to create a pleasing shape.
Then I use affordable adhesive plate hangers to mount them.
I mark their exact positions on the wall with painter’s tape, ensuring my DIY display feels intentional and balanced.
Arrange Woven Baskets for Texture and Warmth
You can easily add texture and warmth to your room’s walls by arranging a collection of woven baskets.
I find thrift stores are perfect for sourcing affordable, unique pieces. Hang them securely with picture hanging strips or small nails.
Focus on creating visual interest by mixing sizes and shapes in your layout.
- Source baskets from thrift stores or garage sales.
- Secure them with adhesive strips or nails.
- Arrange by mixing various sizes and weaving patterns.
This simple approach can transform bare walls instantly and elevate the overall room decor.
Bring Nature in With Pressed Leaves and Botanicals
I can create a pressed botanical gallery wall for next to nothing by gathering leaves from my backyard.
I’ll press them flat in a heavy book and then frame them in clean, inexpensive frames I’ve found at a thrift store.
Arranging those framed leaves in a grid gives my wall a naturally beautiful, personalized look.
Transforming unused corners into these displays is a great way to turn dead zones into statement spots.
Pressed Botanical Gallery Wall
For a deeply personal and affordable touch, I’m drawn to creating a pressed botanical gallery wall to bring nature’s quiet beauty indoors.
I’ll gather leaves and flowers, press them in a heavy book, and mount them in thrifted frames. The key is intentional arrangement for visual harmony.
- Collect diverse botanicals for texture contrast.
- Use inexpensive, uniform frames for cohesion.
- Arrange layouts on the floor before hanging.
Naturally Beautiful Framed Leaves
While the previous gallery wall offers a grand display, framing individual leaves creates a simpler, equally stunning focal point.
I press finds in a heavy book for weeks. I then use an affordable pre-cut mat and a secondhand frame.
Centering a single, large maple or fern leaf against a neutral mat makes a powerful statement. It’s a nearly free piece of art that brings serene nature indoors.
Craft an Ever-Growing Wall of Indoor Greenery
Building an ever-growing wall of greenery is a surprisingly affordable way to transform your space, and you can start by repurposing materials like old wooden pallets, wire grids, or hanging shoe organizers to create your vertical base.
I focus on low-maintenance, fast-propagating plants to keep costs down.
- Propagate Pothos Cuttings: Root them in water for weeks, then plant.
- Use Lightweight Soil Mix: A standard potting mix with perlite is perfect.
- Water with a Squeeze Bottle: This targets roots and prevents wall drips.
Adding soft lighting and cozy textures nearby can enhance the inviting vibe of your greenery wall, making it a cozy aesthetic focal point you’ll love to stay around.
Build a Feature Wall From Repurposed Wood
Another budget-friendly approach uses repurposed wood to create a feature wall with rich texture and character.
I source materials like salvaged pallet boards or old fencing from construction sites or online marketplaces. After cleaning and cutting them, I arrange the pieces directly onto my wall using construction adhesive and a nail gun.
The varied finishes, like weathered paint or natural grain, give me an architectural focal point without a hefty cost.
Refreshing your home with room decor ideas like this can transform your space quickly and affordably.
Paint a Bold, Simple Geometric Pattern
For a striking visual impact with minimal expense, I use painter’s tape and a single bold color to transform a plain wall.
- Plan Your Pattern: I sketch simple shapes like triangles or stripes directly on the wall.
- Apply Tape Carefully: I press the tape edges firmly to prevent paint bleed.
- Paint & Reveal: I apply my accent color, let it dry fully, then peel the tape away.
Adding wallpaper with stylish patterns can also serve as an excellent alternative to costly artwork for accent walls.
Create Minimalist Art With String and Nails
Moving from paint to string, minimalist nail and string art provides texture and depth without the mess.
I start with a wooden board and small nails. I lightly pencil a simple shape—a triangle or mountain skyline works great.
Then I carefully hammer the nails along my lines. Finally, I weave cotton string between them, creating geometric designs.
The cost is just for the board, nails, and a single string spool.
Turn Functional Tools Into Industrial Decor
If you want to switch from minimalist textures to rugged statement pieces, consider turning old wrenches and pipe fittings into wall art. I scour flea markets for inexpensive, worn tools.
You can mount them in a shadow box for a clean look or arrange them directly on the wall in a geometric pattern. My process is simple:
- Clean and lightly sand items for a uniform finish.
- Arrange your layout on the floor first.
- Secure pieces with strong adhesive or brackets.
Install a Grid of Mirrors to Amplify Light
Instead of industrial tools, reflective surfaces can transform a room. I hung small, affordable mirrors in a grid. This tactic bounces natural light everywhere, making my space feel instantly larger and brighter.
For a cohesive look, I matched frame styles or used identical frames. It’s a simple DIY project that delivers major visual impact for minimal cost, functioning like a custom art installation.
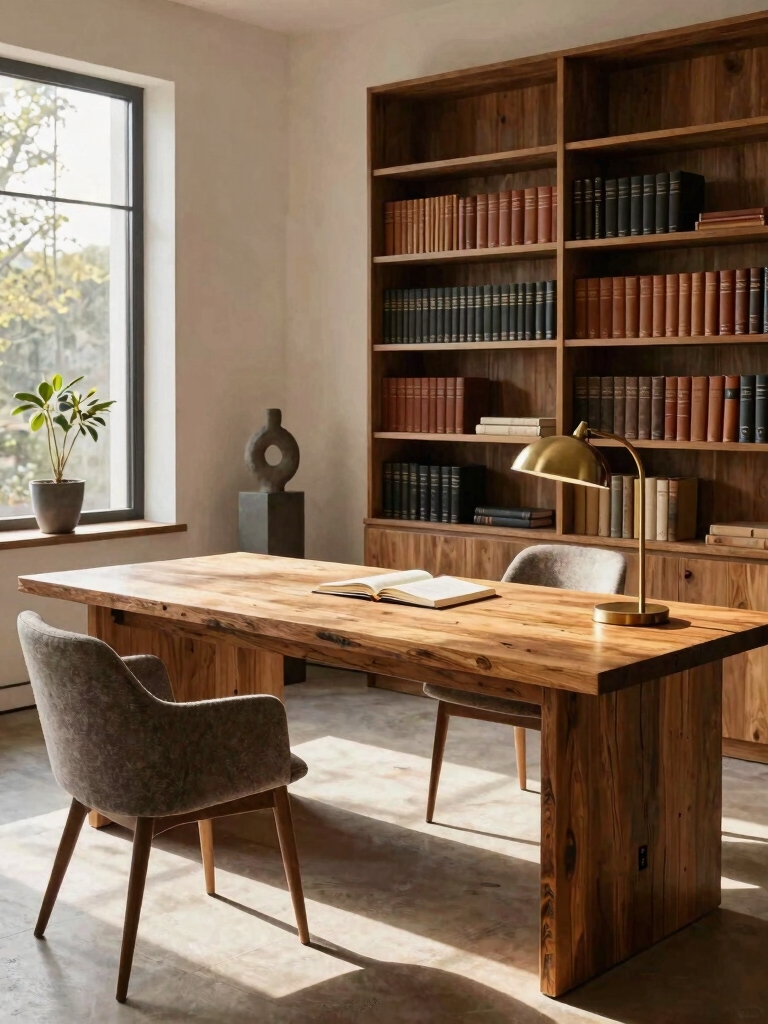
Showcase Your Favorite Books as Shelf Art
Books have always been a part of my home’s decor, but I’ve found arranging them on shelves as intentional art elevates any room.
It’s an affordable project that just requires styling what you own.
I focus on three simple techniques:
- Group books by color for a bold, graphic impact.
- Mix vertical and horizontal stacks to create visual rhythm.
- Add bookends or a single decorative object to finish the look.
Make a Playful Display With Kids’ Art and Toys
Letting my kids’ creativity and favorite toys become part of our room’s wall decor creates a wonderfully personal and ever-changing gallery I can do on a budget.
I use clear clip frames for easy artwork swaps and hang small shelves or ledges for displaying toy cars or dolls.
It’s a fun, free project that adds personality without costing a dime.
Frame and Hang Unusual Everyday Objects
To add an artistic touch without buying art, I frame and hang unusual everyday objects, transforming simple items into striking decor.
You’ll find amazing pieces all around your home. My method focuses on shadow boxes for depth.
- Bold Fabric Swatches: I mount vibrant textile samples as abstract art.
- Vintage Kitchen Tools: I arrange old utensils neatly for industrial charm.
- Pressed Natural Finds: I dry and frame leaves or feathers simply.
Conclusion
I’ve learned my walls can hold memories, not just pricey prints. I now collect my travels, frame my fabrics, and play with my plates. I curate my kids’ art, elevate my everyday objects, and amplify my own light. I see that my most meaningful gallery is built by my own hands, filled with my own stories, and defined by my own perspective.