I’ve ditched fussy centerpieces for ideas I actually use. My go-tos? A sculptural branch in a slender vase for minimalist impact or seasonal fruit in a low bowl for vibrant, edible art. I love grouping unscented candles at different heights for a warm glow and potting a fragrant herb garden for charm and convenience. Mixing these photogenic, DIY concepts keeps my table fresh. Let’s explore more simple styles to spark your own.
The Minimalist Single-Branch Centerpiece
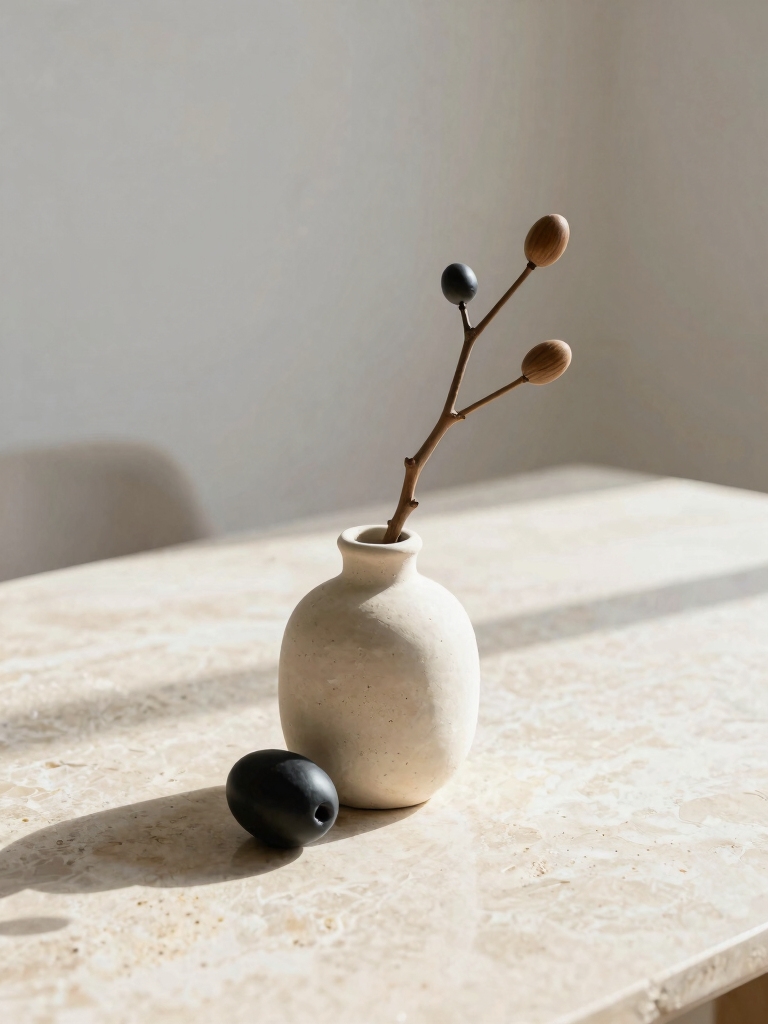
While a lush arrangement can be lovely, you might prefer something simpler, which is why I favor a single, sculptural branch for its stark elegance.
Forage one with an interesting twist. Place it in a slender vase. That’s it. It’s a zero-cost, high-impact statement.
I love how its shadow plays on the table, creating a living sculpture that’s effortlessly photogenic and completely yours.
Refreshing your space with room decor ideas can make a big difference in how your home feels this weekend.
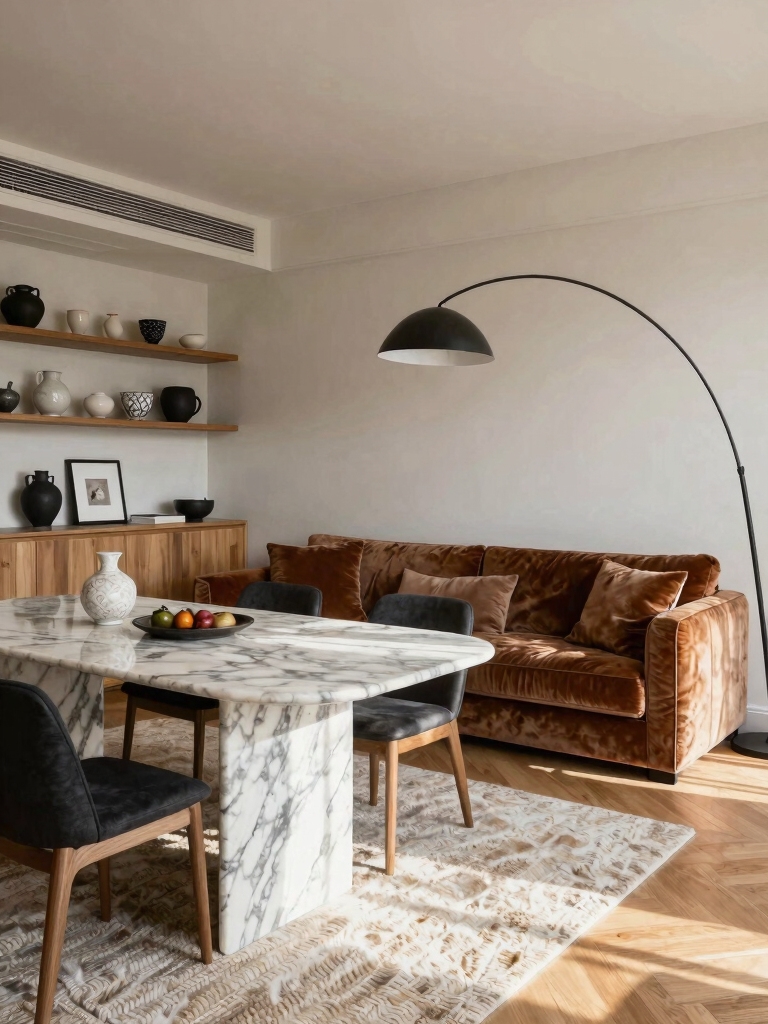
A Seasonal Fruit Or Vegetable Arrangement
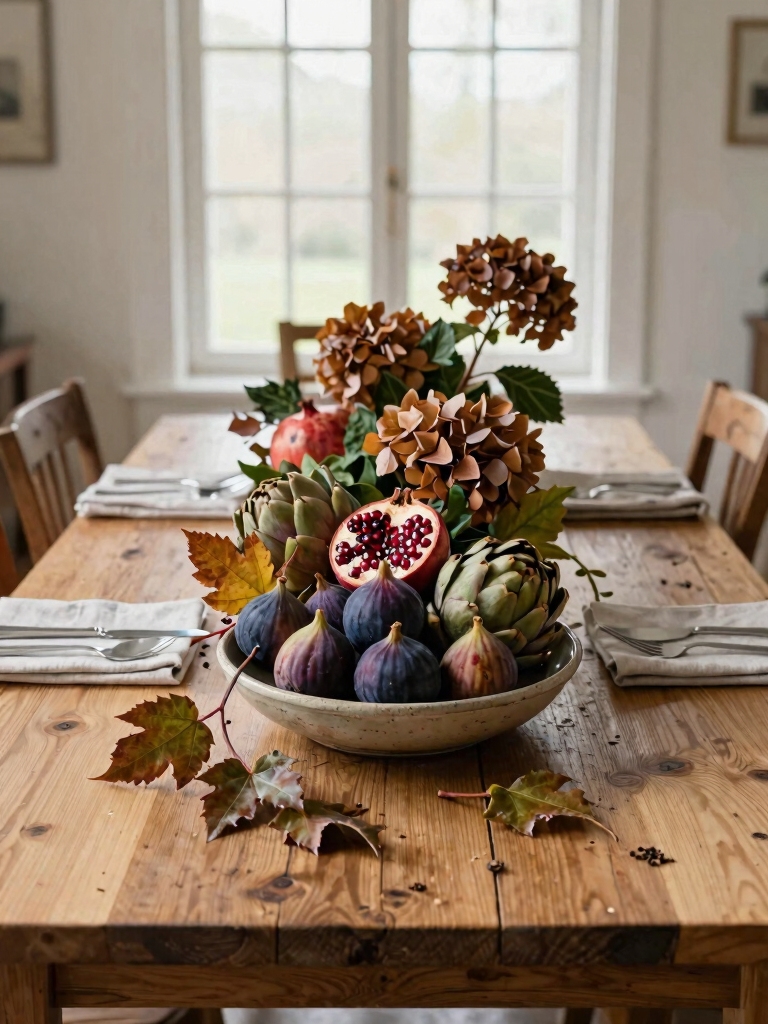
I start my seasonal arrangement by choosing just a few perfect ingredients from the market.
I then play with heights and colors in a simple bowl for a design that looks effortless.
Remember to swap out any pieces that spoil to keep your display fresh and vibrant.
Using space-efficient ideas from small dining room ideas can help your centerpiece stand out without crowding the table.
Select Seasonal Ingredients
Choosing a seasonal fruit or vegetable arrangement offers a vibrant, zero-waste option for a dining table centerpiece.
I focus on photogenic ingredients with strong colors and textures. My selection process follows three simple rules:
- Shop local farmers’ markets for peak ripeness.
- Embrace imperfect, uniquely shaped produce.
- Prioritize items that can be eaten later.
This guarantees a fresh, minimalist look.
Design Your Arrangement
Now, let’s build the arrangement with those seasonal ingredients.
I start with a low bowl and anchor it with large, sturdy pieces.
I layer in smaller fruits for height variation, tucking greenery between them.
I keep the shape organic and asymmetrical.
The goal is a casual, textured mound that looks abundant from every angle, perfect for a photo before guests arrive.
Maintain Your Display
An arrangement like this, built on sturdy produce, is surprisingly resilient. I maintain it with simple, mindful checks.
I find this routine keeps it photogenic and extends its life beautifully.
- Rotate pieces daily to prevent flat spots and guarantee even color.
- Remove any soft items immediately to protect its neighbors.
- Refresh the base by swapping out a few pieces as needed for a quick revive.
Style A Tray With A Miniature Still-Life
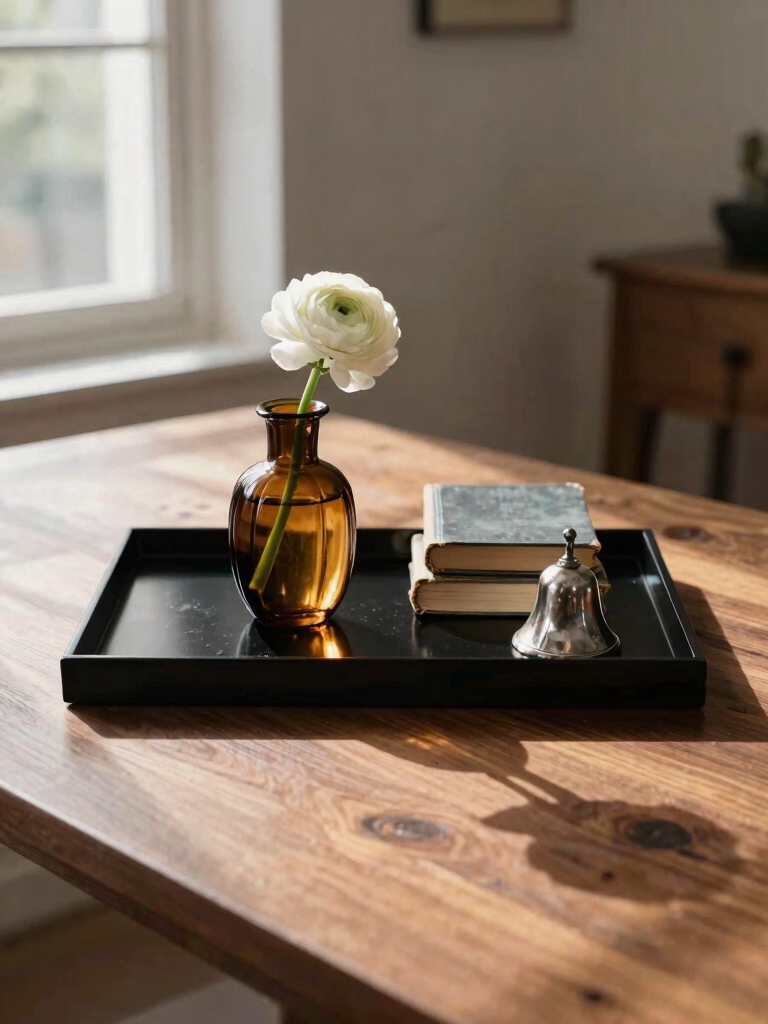
I love creating a miniature still-life on a tray for a refined centerpiece.
First, I select a simple tray and pick a couple of key focal pieces, like a small vase and a book.
Then I build balanced layers by adding lower objects, such as a seashell or a candlestick, to complete the look.
Using a tray allows for easy styling and makes it simple to update your table decor as the seasons change.
Select Your Tray
Find a tray with a flat surface and clean edges—I prefer simple wood or marble, but feel free to choose something that complements your dining room style.
- Size matters; pick one that anchors your table without dominating it.
- I love trays with subtle texture for added visual interest.
- Consider its height; a low profile keeps the arrangement feeling grounded and intimate.
Pick Key Focal Pieces
Three key focal pieces will anchor your miniature still-life and give it a cohesive, photogenic look.
I choose a sculptural vase, a simple candle, and one unique object like a vintage book. I limit myself to these three items to maintain a minimalist aesthetic.
They create visual weight and become my story’s main characters before I add anything else. This keeps my tray looking intentional and uncluttered.
Add Balanced Layers
Once my key pieces are placed, I build depth by adding balanced layers around them.
I style a tray as a miniature still-life. It’s a simple DIY that’s inherently photogenic.
- Tuck a folded linen napkin for soft texture.
- Stack two vintage books for height.
- Sprinkle a few loose pods for organic scatter.
A Low, Lush Herb Garden Centerpiece
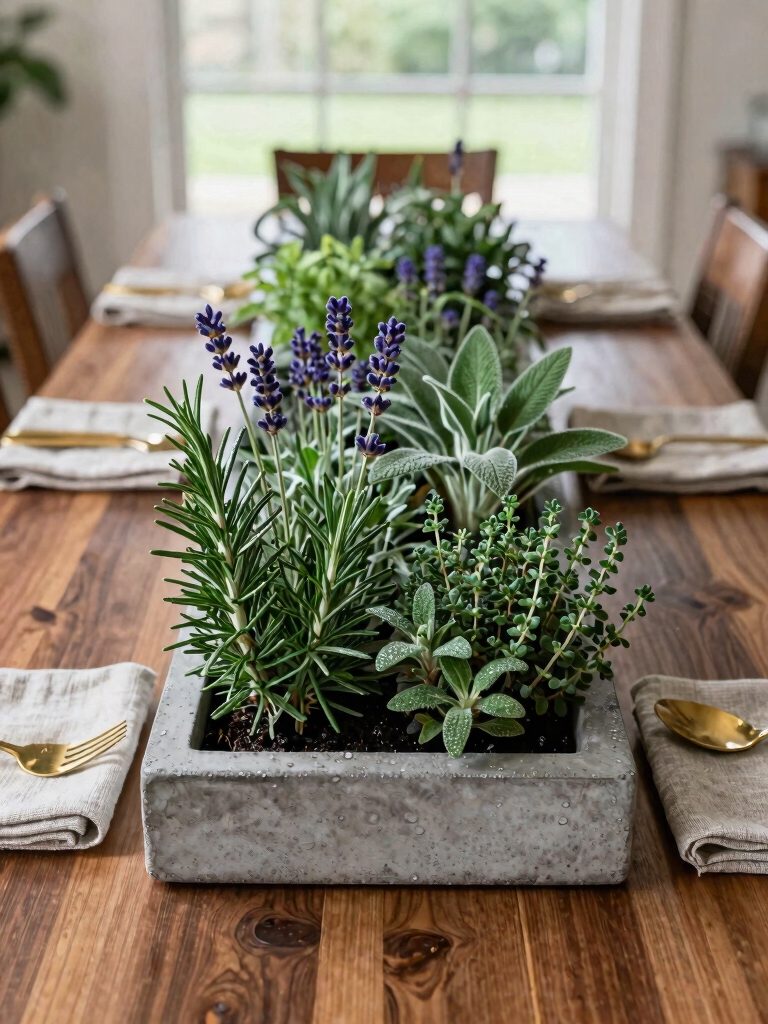
Even if your space is limited, you can craft a living, fragrant focal point with a low, lush herb garden right on your dining table.
I select a long, shallow planter and plant varieties like rosemary, thyme, and mint. The key is keeping them low and full through regular trimming.
The fresh scent is immediate, and I love having cooking herbs so beautifully at hand. Plus, this budget-friendly idea adds charm without breaking the bank, making it a perfect choice for affordable decorating.
Group Candles At Different Heights
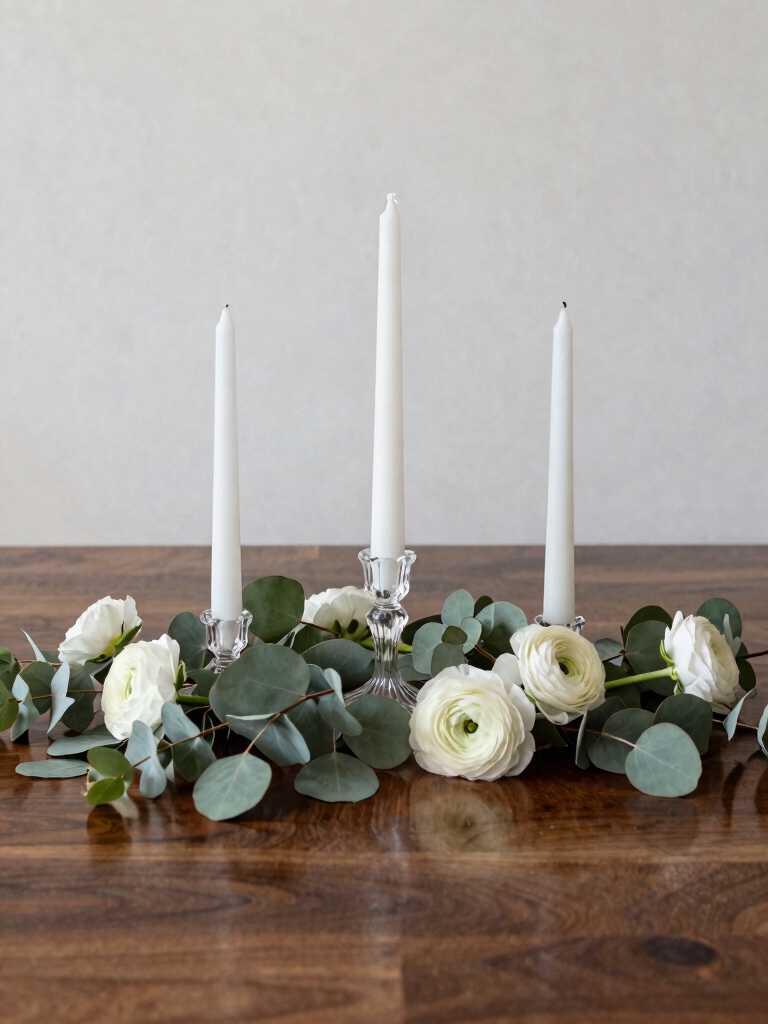
Because candlelight instantly transforms any space, I start by grouping candles at different heights to create dynamic, layered pools of light.
It’s a minimalist, photogenic trick that only requires three simple steps:
- Use sturdy books or upturned bowls as risers.
- Mix pillar candles and tapers on your platforms.
- Cluster them loosely together for a warm, inviting glow.
Adding a stylish rug underneath can further enhance the ambiance and define the dining area with texture and warmth, making your centerpiece stand out on a dining room rug.
A Book Stack With A Decorative Topper
I stack a few of my favorite books, creating a platform that looks curated and effortlessly chic.
I top it with a single, beautiful object—maybe a small vase, a sculptural shell, or a vintage ceramic piece. This instantly elevates my table.
It’s a five-minute DIY that adds height and personality. The layered textures look fantastic in photos and tell a little story about my style.
Incorporating stunning decor ideas like this can make every meal feel truly elevated.
A Dough Bowl Filled With Natural Textures
Building on that love of layered texture, filling a dough bowl offers an easy, artful alternative. I love its rustic, neutral base. Just forage your own materials for a look that’s uniquely yours.
- Start with a layer of moss or dried pods.
- Add height with bleached branches.
- Nestle in smooth stones or a single feather.
I keep it simple, letting each element’s shape and texture shine. This approach exemplifies how to create an elegant dining room decor on a budget without sacrificing style.
A Simple Hurricane Lantern For Ambient Glow
I love a simple hurricane lantern for its minimalist shape and photogenic glow.
You can find them in styles from clear glass to tarnished metal.
Let’s talk placement and how to fill them for perfect ambient light.
Incorporating these lanterns thoughtfully can help you create a charming atmosphere even in a small living room.
Lantern Styles And Materials
One simple hurricane lantern can become your go-to piece for ambient glow.
I love that its style is entirely defined by its frame and globe. My own DIY approach focuses on choosing the right materials to photograph beautifully.
Consider these three core elements:
- Frame: Choose from black iron for drama, brass for warmth, or painted metal for color.
- Globe: Opt for clear glass for bright light, seeded glass for texture, or frosted for soft diffusion.
- Base: Use a wooden slice for rustic charm, a ceramic tile for modern flair, or a metal tray for industrial edge.
Ambient Lighting Placement Tips
Once you’ve chosen your hurricane lantern for its photogenic materials, placing it effectively becomes key to casting that perfect ambient glow.
I always position it slightly off-center on the table to create dimension. Don’t just use a plain candle—opt for an unscented pillar for a cleaner, longer-lasting flame.
Cluster two lanterns of differing heights for a dynamic, camera-ready setup. Their reflection in surrounding glassware adds beautiful layered light.
Repurpose A Large, Statement Bowl
Because you might’ve a large, statement bowl waiting for a new role, consider transforming it into your dining table’s sculptural centerpiece.
- Stack curated seasonal objects like polished river stones or lemons for a simple, textural vignette.
- Float a single oversized bloom, like a protea or dahlia, in a bit of water for a stunning, minimalist focal point.
- Fill it with a cluster of matte black or white candles to create dramatic, ambient lighting.
Incorporating this centerpiece idea can add a unique touch that complements wall art living room decor ideas sized for every wall, creating harmony between your dining and living spaces.
A Year-Round Fern In A Neutral Pot
Try anchoring your table’s center with a single lush fern in a neutral-toned pot—it’s a living sculpture that lasts through every season.
I love its effortless, minimalist vibe. Just pop a hardy variety like a Boston fern into a simple ceramic or concrete planter.
Its timeless greenery works with any tablescape. Water it regularly, and you’ve got a photogenic, zero-fuss centerpiece that thrives all year.
Plus, incorporating budget-friendly decor tips ensures your dining room looks chic without overspending.
A Wooden Board With Ceramic Vessels
How about grounding your arrangement with rustic texture?
I layer a wooden board with minimalist ceramic pots. It’s a DIY vignette that’s endlessly photogenic. You can swap contents seasonally.
Try these combinations:
- Three small vessels holding singular, statement stems.
- A trailing vine in one pot juxtaposed with geometric shapes in others.
- Textured seed pods or dried grasses for a sculptural, neutral moment.
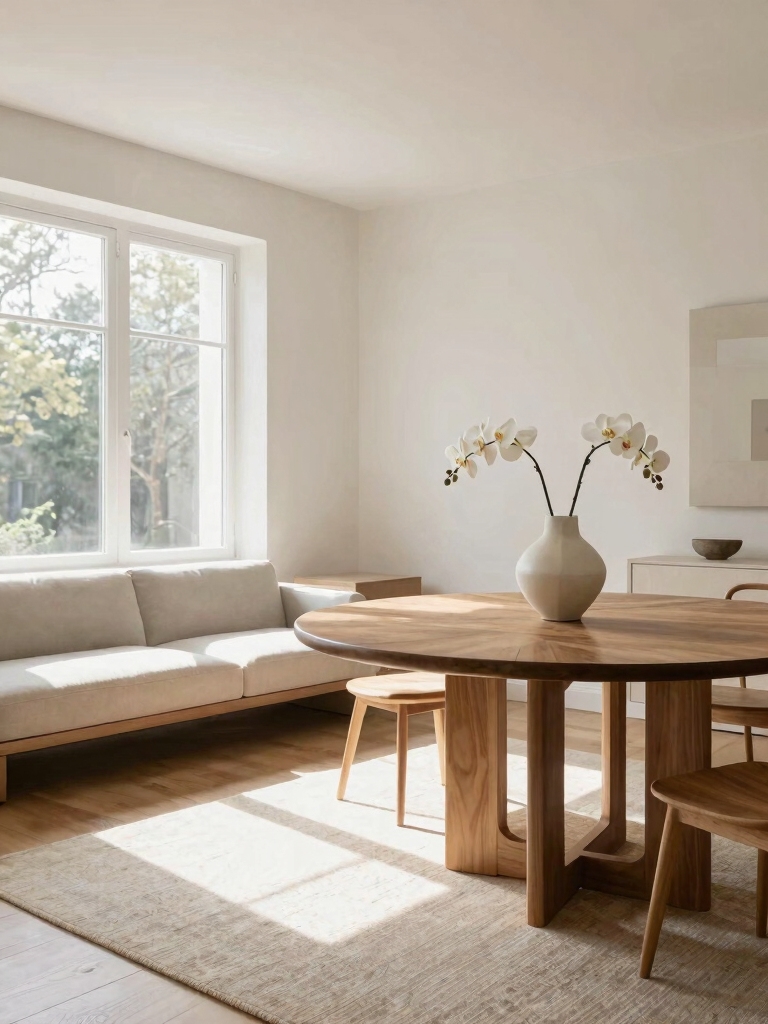
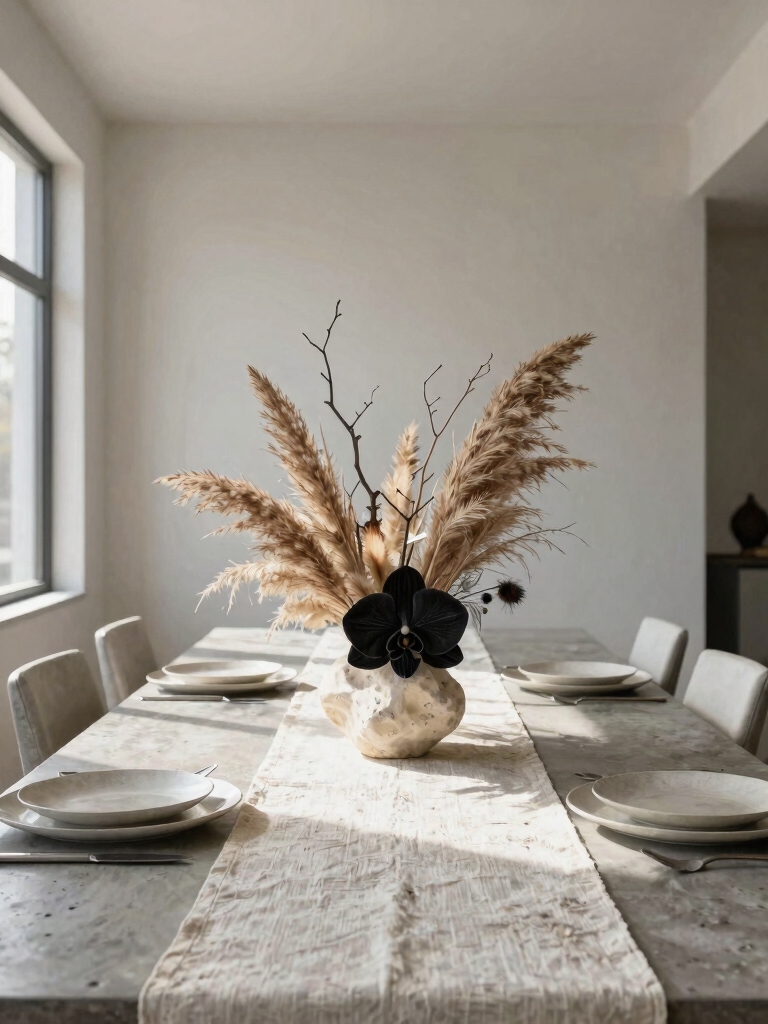
An Elegant Single-Orchid Centerpiece
While a lush arrangement can be stunning, I often find the most elegance in a single, perfect bloom.
I select one striking orchid and place it in a clean, simple vase. This requires minimal effort but creates a powerful focal point. Its sculptural form looks beautiful photographed from every angle.
I let this one statement piece define the entire table’s mood with quiet sophistication.
Display A Collection Of Found Objects
Moving from a single orchid’s simplicity, I also love the character of a collected arrangement.
I gather meaningful objects—shells, smooth stones, or vintage glass—for a minimalist, photogenic display. Group them in a shallow bowl for a stunning DIY centerpiece.
- Hunt for monochromatic or similarly textured pieces.
- Arrange with varied heights for visual interest.
- Leave space between objects to let each piece shine.
An Easy Cluster Of Small Bud Vases
First, I gather mismatched bud vases because perfection isn’t the goal.
Next, I’ll snip single stems and leafy sprigs to let each vase hold its own simple moment.
Finally, I cluster them loosely on the table for an impact that feels both effortless and intentional.
Selecting The Right Vases
Because I want this centerpiece to look effortless, I’m clustering small bud vases.
I mix shapes and materials for visual texture, focusing on a minimalist, diy style that photographs beautifully.
- Group Odd Numbers: Three or five vases of varying heights create a dynamic, intentional look.
- Mix Materials: Combine clear glass, ceramic, and even metal for subtle contrast.
- Vary Heights: Stagger them to build a relaxed, organic silhouette on the table.
Choosing Flowers And Foliage
While I’m clustering bud vases, I keep my flower choices simple and deliberate, opting for a single stem in each vase to maintain that effortless, photographic look.
I mix varying flower heights and textures, pairing a bold ranunculus with delicate baby’s breath or airy foliage.
I stick to one color palette, maybe all whites or soft blush tones, for that cohesive, minimalist style I can easily recreate.
Arranging For Effortless Impact
The secret to effortless impact is letting each small vase hold its own singular, perfect stem, and then grouping them together as a relaxed cluster.
I gather mismatched bud vases for character. The process is simple and photogenic.
- Select varied vessels—tiny bottles, mini pitchers, or simple glasses.
- Place one standout bloom or a few sprigs of foliage in each.
- Group them organically on a tray for a cohesive, artful display.
A Tiered Stand With Kitchen Staples
For a simple, sculptural look, I often turn my tiered stand into a display of beautiful kitchen staples.
I’ll style lemons on one tier, artichokes on another, and fill the top with garlic bulbs or walnuts.
It’s an effortless, edible sculpture that feels intentional.
The monochromatic or tonal grouping is key—all greens or neutrals—making it minimalist, photogenic, and completely usable later in my cooking.
A Basket Woven From Natural Fibers
Natural fiber baskets always catch my eye for their organic texture and handcrafted feel.
I use one as a centerpiece, filling it with everyday items for a relaxed look. It’s an easy, photogenic project.
- Pick a shallow, neutral-toned basket.
- Arrange a mix like wooden utensils, linen napkins, and fresh lemons.
- Let some items spill out slightly for an effortless, gathered vibe.
Showcase A Treasure Under A Glass Cloche
Placing a special object under a glass cloche instantly creates a museum-worthy focal point on your dining table.
I love using mine to display a singular treasure—a delicate bird’s nest, a striking seashell, or even antique keys.
It’s a supremely simple DIY that forces you to edit, celebrating one beautiful thing.
The glass magnifies details and protects your find, making it endlessly photogenic from every angle.
A Low-Water Succulent Dish Garden
While the previous cloche elevates a single object, let’s shift to a living arrangement that’s just as sculptural: a low-water succulent dish garden.
I love its sculptural, minimalist lines. To make your own:
- Select a shallow, unglazed dish for drainage.
- Arrange a mix of echeveria and haworthia for varied texture.
- Fill gaps with gritty cactus mix and top-dress with pebbles.
It’s remarkably low-maintenance and endlessly photogenic.
The Textured Vignette: Bowl, Book, And Candle
If you’re drawn to simple arrangements with depth, a textured vignette of a bowl, book, and candle might be your next favorite project.
I gather a rough ceramic bowl, a cloth-bound book, and a single pillar candle. I layer them casually for contrast, creating shadows and intrigue.
It’s a one-minute project that feels personal and looks perfectly styled.
Simple Rules For Everyday Centerpieces
Since we often need a centerpiece but don’t have hours to craft one, I keep a few straightforward principles in mind for everyday arrangements.
My minimalist rules are:
- Work in odd numbers for visual interest.
- Vary heights using books or trays.
- Stick to one primary color palette.
This creates a balanced, photogenic vignette from things I already own.
Conclusion
Now you have the proof. Don’t just create a centerpiece; curate a feeling. That’s your table’s new mantra. Let these ideas become your own. Mix, simplify, and start with that single branch—your own story begins there. I promise, it’s a story your gathered guests will feel long before the first bite.